Summary
This document provides a quick start guide as well as detailed instructions on how to set up and use a VILT Minium Manager 2.7.18 system. Usage instructions for Minium Recorder, which is exclusive to Minium Manager customers, are also included.
Quick start
1. Install and Run Minium Manager
To install and run Minium Manager:
-
Contact VILT and request the Minium Manager installation bundle.
-
Extract
minium-manager.zipto a directory on a local machine. -
Execute the script
./bin/start-minium-manager-all.(sh|bat) -
Minium Manager is now available at port
8080. You can access it by requesting the following URL: .
http://localhost:8080/
2. Give it a try
To try it, access Minium Manager:
http://localhost:8080/
-
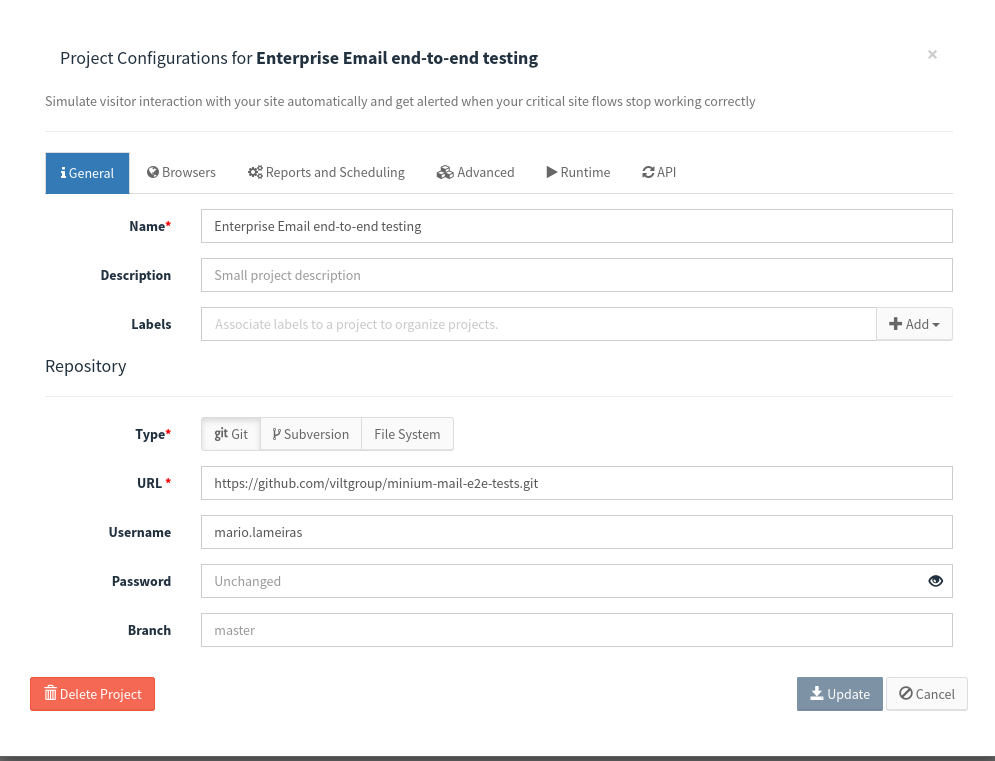
Log in at Minium Manager, and click
Create New Project.
-
Fill the form:
Name |
Project name |
Description |
Description of the project |
Type SCM |
Type of SCM repository |
Repository Url |
URL of the repository where the project with the features is stored. The following are examples of valid git URLs (or a local file path): https://github.com/github/git.git //dolos/repos/gmail-e2e-tests |
-
Click
Saveto create the New Project. -
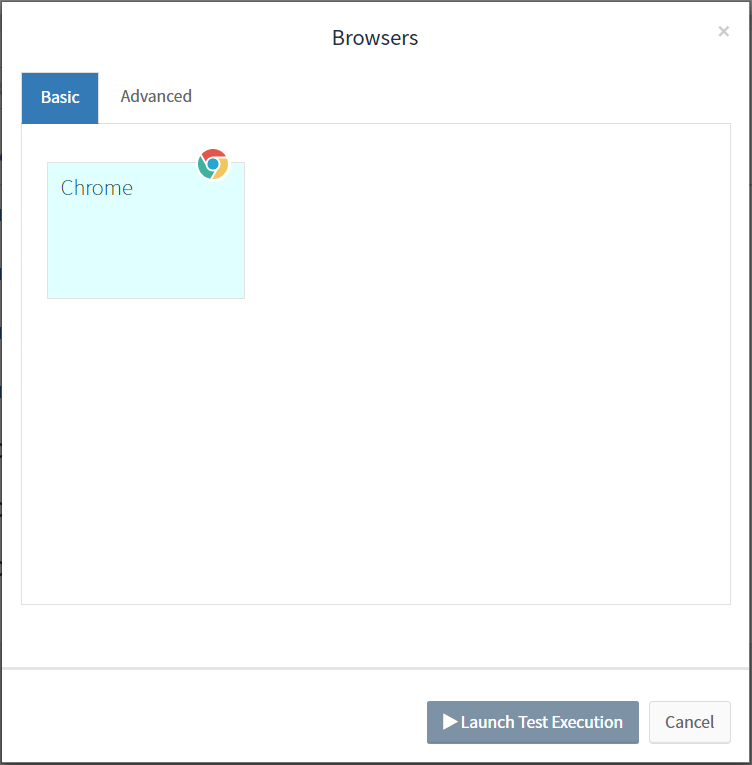
In the projects list, click on
Launch testto launch test executions of the features and choose the browsers where you want to run the features:
-
Choose an installed browser on the machine and click
Launch Test Executionto Start the test. -
Schedule the test execution (it the project configuration):

-
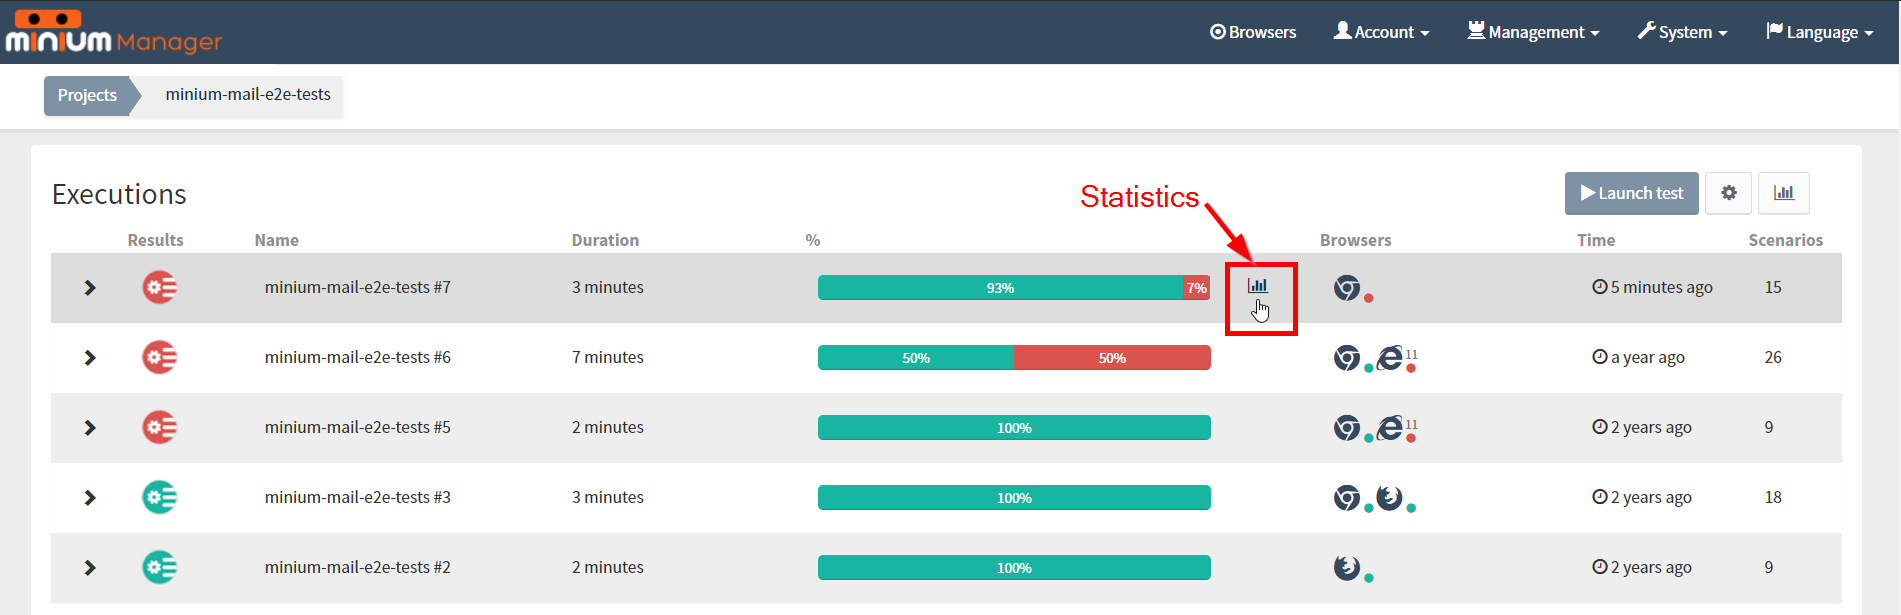
Click on the project name (from the projects list) to see the status of the all launched executions:
-
Click on the test execution to see the list of features executed and their results
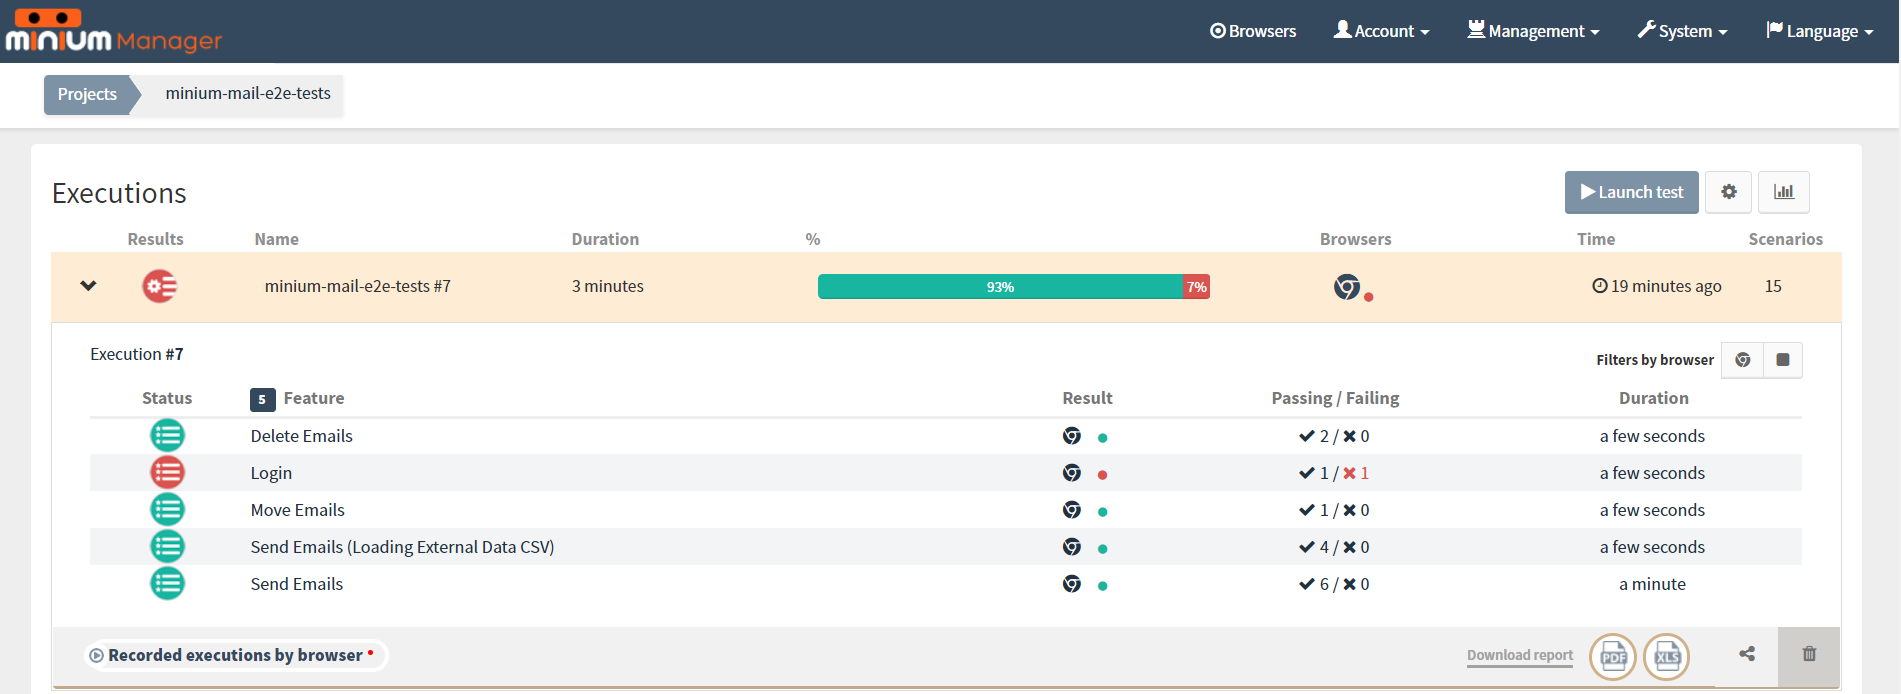
-
At the feature’s page, see the scenario of this particular feature. Collapse the scenario to see all the steps and their results.
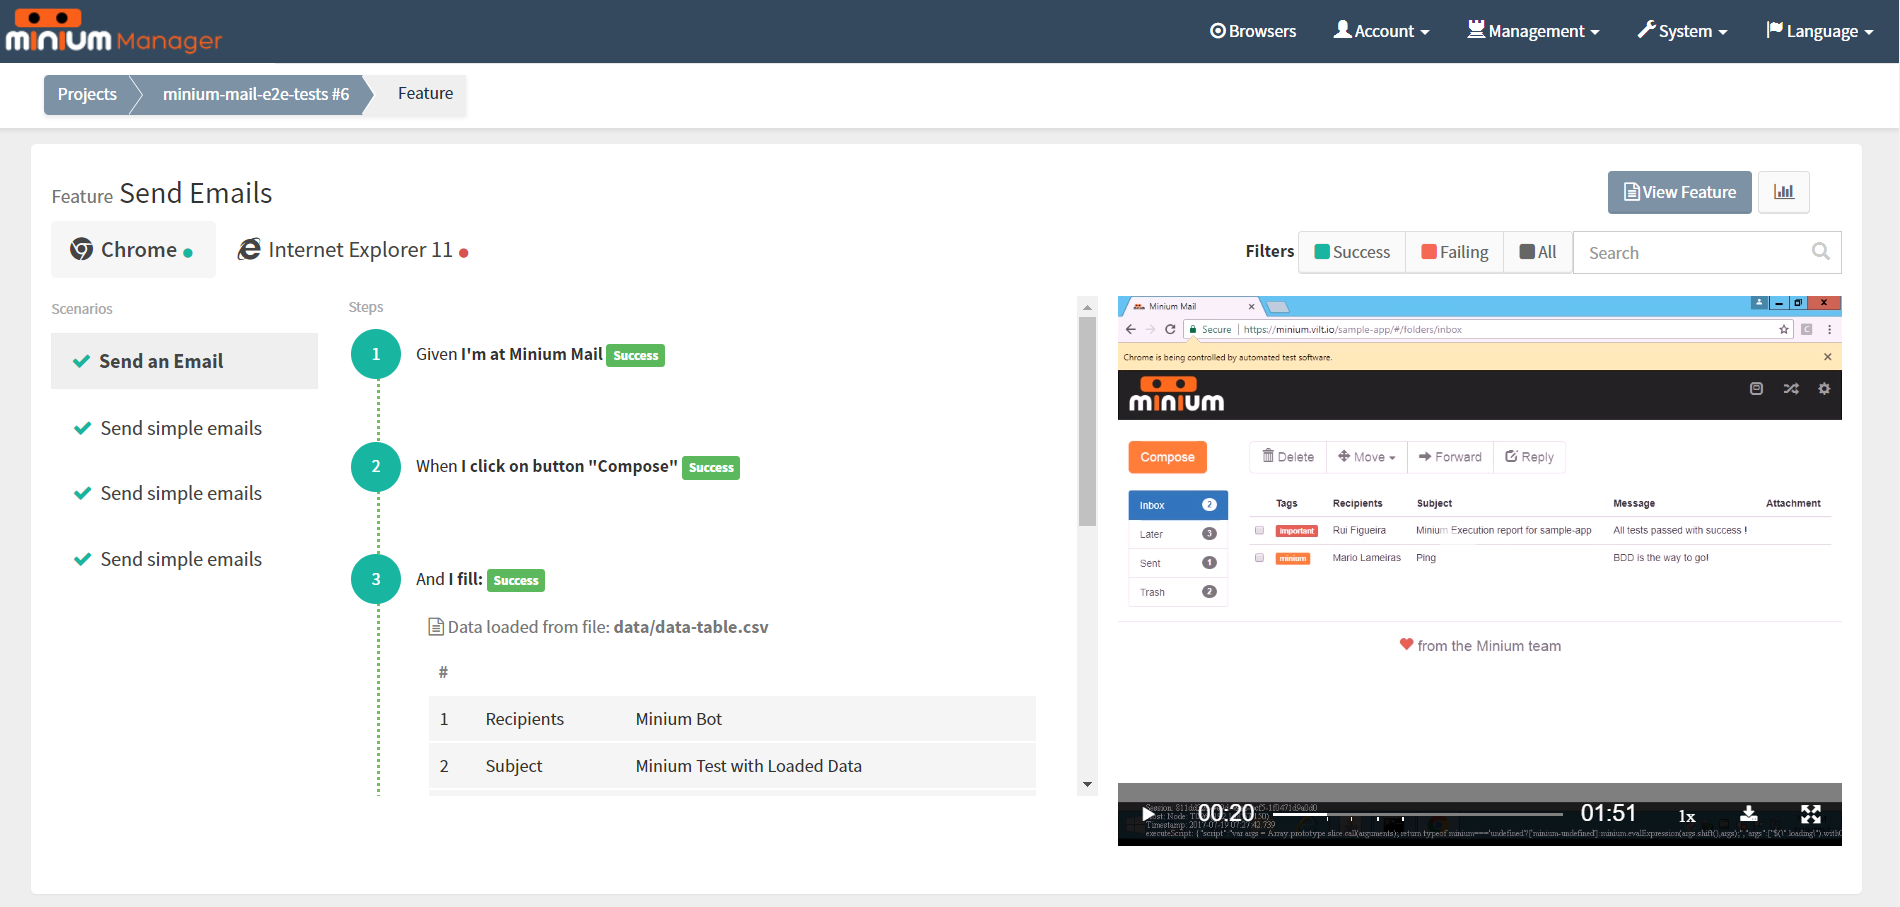
Installation Guide
3. Supported Environments and Compatibility
This section provides information on Minium Manager supported environments and compatibility.
3.1. Operating Systems
| Operating System | Versions |
|---|---|
Linux |
|
Microsoft Windows |
|
3.2. Databases
| Database | Versions |
|---|---|
MySQL |
|
3.3. Java
Minium Manager supports Java 1.8.
3.4. Selenium Grid
Minium Manager uses Selenium Video Node to run tests in parallel on multiple machines and manage different browser versions and browser configurations centrally.
The compatibility of Selenium Grid with Operating Systems are:
| Operating System | Versions |
|---|---|
Linux |
|
Microsoft Windows |
|
About the web browsers (based on the latest versions of the webdrivers), Selenium Grid supports:
| Browser | Versions |
|---|---|
Firefox |
|
Internet Explorer |
|
Chrome |
|
You can check more details about the supported platforms at https://selenium.dev/downloads/.
Other providers are also supported:
3.4.1. Selenium Grid - WebDrivers
If you are running the Node in a 32-bit Linux distro machine, you cannot update your Google Chrome web browser to the latest versions (Google dropped support for all 32-bit Linux distros in March 2016). The last version of the Google Chrome for the 32-bit Linux distros is version 48. So, to continue to perform tests with Google Chrome (version 48) in 32-bit Linux distros, you should use the version 2.21 of the Chrome webdriver. For the 64-bit Linux distros, you can update the Google Chrome (64-bit) to the latest version and use the latest chrome webdriver.
About Firefox, with the release of Firefox 47, the extension based version FirefoxDriver no longer works. If you are using Firefox 46 (or prior versions), you can continue to use the FirefoxDriver. For Firefox 47, you need to update the Firefox to the latest version and start using use the MarionetteDriver. The other option is to downgrade your version of Firefox (preferably to the Firefox 45 ERS) and continue using the FirefoxDriver. Keep in mind that the FirefoxDriver will be discontinued.
For Internet Explorer, it is required a Microsoft Windows machine.
3.5. Application Servers
| Application Server | Versions |
|---|---|
Apache Tomcat |
|
3.6. Supported Browsers
Minium Manager web console is supported by the following browsers:
-
Chrome
-
Firefox
-
IE 9+
3.7. Language Support
Minium Manager is currently localized in the following languages:
-
English
-
Catalan
-
Spanish
-
Portuguese
4. Minium Manager
Minium Manager is a powerful console that provides useful reports of the ongoing projects and has a strong component in continuous integration.
4.1. Minium Manager Architecture
The following diagram shows the generic architecture of Minium Manager:
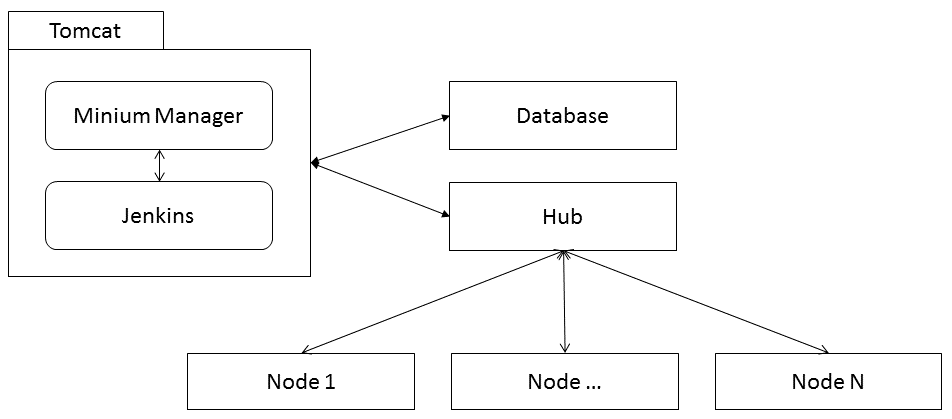
The main components of Minium Manager are Minium Manager, Jenkins for Continuous Integration in testing, Selenium Grid: one Hub (to monitor and manage the tests) and several Nodes (runs a browser to execute the tests). The number of nodes directly depends on the volume of executions and different browsers requirements for testing.
One of the standard installation for Minium Manager is:
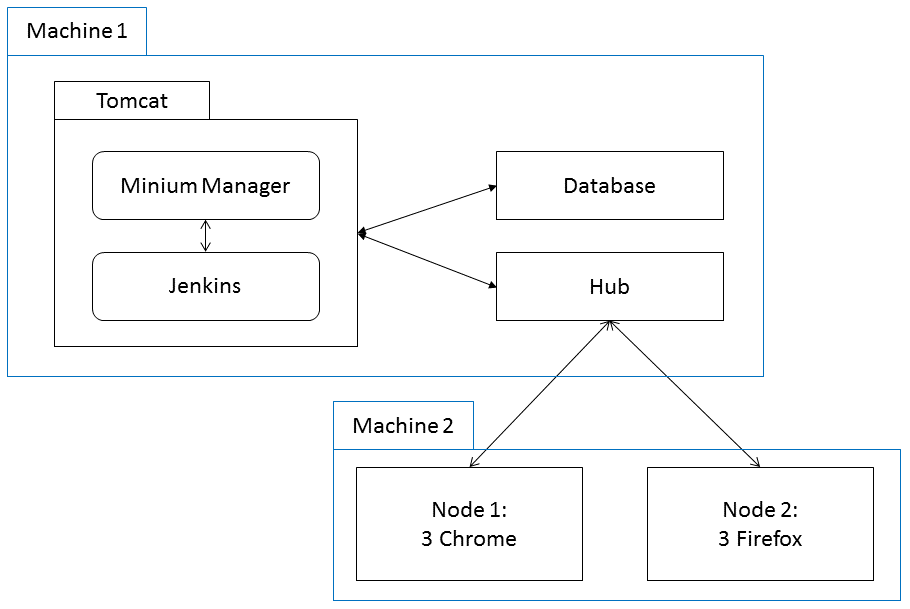
This base configuration has two machines:
-
Machine Type 1 with Minium Manager, Jenkins, MySQL and Selenium Hub installed. This is the machine that will manage the tests.
-
Machine Type 2 with two Nodes (Running Google Chrome and Firefox). This is the machine that will perform the tests. If more browsers are required, more machines of type 2 will be needed, as only 1 browser of each type can run per Operating System (The exception is running with Docker).
4.1.1. Machine Type 1
This machine runs Minium Manager with Jenkins providing the Manager interface, scheduling of jobs and reports. It will also run the Selenium Hub that manages the connection to all the available selenium nodes.
For easier setup and management we recommend Docker and Docker Compose to be installed on the machine.
Otherwise, the following software needs to be installed.
-
Java 8withJAVA_HOMEenvironment variable set -
Gitand/orSVN -
MySQL 5.6
4.1.2. Machine Type 2
In this machine type is where the tests are executed in the Browser
The node machines are independent of the hub or the other nodes (concerning to OS or browser selection). A single machine can have multiple nodes running, but is recommended a node (running only single type of browser) per machine. A node on MS Windows OS might have the capability of offering Internet Explorer as a browser option, whereas this wouldn’t be possible on Linux or Mac.
For easier setup and management we recommend Docker and Docker Compose to be installed on the machine.
It is also necessary to have video recording of simultaneous browser executions, and to have multiple instances of the same browser without the need for extra hardware.
Otherwise, if Docker is not installed, a node machine requires the installation of the following software:
-
Java 8 -
The browser(s) and its web drivers that the node will use to execute the tests (provided by the installation package)
In this configuration, it is only necessary to run the tests in Chrome and Firefox browsers.
An alternative standard installation for Minium Manager is:
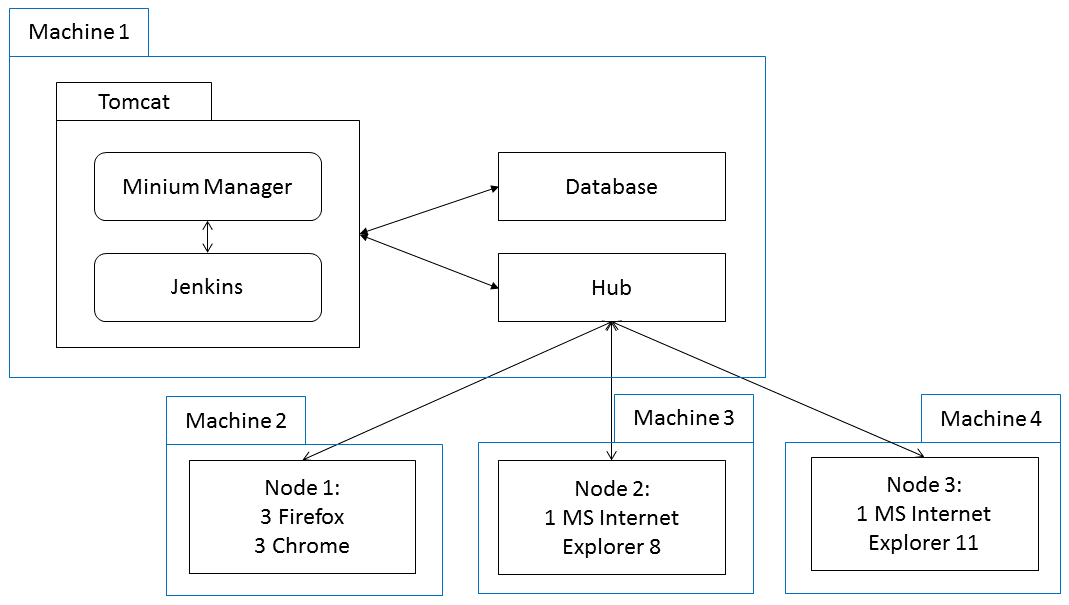
The main difference of this configuration to the first is how the Nodes are arranged. This configuration runs a Node per machine (Machine 2, Machine 3 and Machine 4). The Machine 3 and Machine 4 was MS Windows OS. This installation will run the tests in parallel.
Alternatively, run the Hub in a different machine.
|
NOTE:
A different machine is required for each Internet Explorer version. |
4.1.3. Node Configuration - Internet Explorer
To configure a node with MS Internet Explorer the following configuration is required:
-
On IE 7 or higher on Windows Vista or Windows 7, set the Protected Mode settings for each zone to be the same value. The value can be on or off, as long as it is the same for every zone. To set the Protected Mode settings, choose "Internet Options…" from the Tools menu, and click on the Security tab. For each zone, there will be a checkbox at the bottom of the tab labeled "Enable Protected Mode".
-
Additionally, "Enhanced Protected Mode" must be disabled for IE 10 and higher. This option is found in the Advanced tab of the Internet Options dialog.
-
The browser zoom level must be set to 100% so that the native mouse events can be set to the correct coordinates.
-
For IE 11 only, it will need to set a registry entry on the target computer so that the driver can maintain a connection to the instance of Internet Explorer it creates. For 32-bit Windows installations, the key to examine in the registry editor is
HKEY_LOCAL_MACHINE\SOFTWARE\Microsoft\Internet Explorer\Main\FeatureControl\FEATURE_BFCACHE. For 64-bit Windows installations, the key isHKEY_LOCAL_MACHINE\SOFTWARE\Wow6432Node\Microsoft\Internet Explorer\Main\FeatureControl\FEATURE_BFCACHE. Please note that theFEATURE_BFCACHEsub-key may or may not be present, and should be created if it is not present.
|
Important:
Inside this key, create a DWORD value named iexplore.exe with the value of 0.
|
Check the rest of the configurations at the following website: https://github.com/SeleniumHQ/selenium/wiki/InternetExplorerDriver#required-configuration
4.1.4. Jenkins Agent
This machine runs a Jenkins Agent that executes Minium Projects.
To be able to connect to the SCM repositories, build the projects and launch the Minium Projects, it is required that this machine has installed the following software:
-
Java 8 -
Gitand/orSVN -
Maven -
Google Chrome, and it’swebdriver -
NodeJs(Required for the Cookie projects)
Also, it is required to download the agent.jar to be able to connect to the Jenkins.
To download the archive jar, access the link <jenkins_ulr>/jnlpJars/agent.jar.
4.2. System Requirements
Minium Manager minimum requirements are:
Hard-Drive:
-
Machine Type 1: 100Gb
-
Machine Type 2: 100Gb
| Setting up daily backups is recommended for the entire Hard Drive. |
| Disk space will be related to the type of usage and how tests are created in Minium: Screenshots taken per test, frequency of execution, Videos stored and history saved for each project. |
Memory:
-
Machine Type 1: 12Gb
-
Machine Type 2: 8Gb (Minium for 2 browsers)
CPU:
-
Machine Type 1: 4 CPUs @ 2Ghz
-
Machine Type 2: 4 CPUs @ 2Ghz
Other Requirements:
-
JAVA 8
-
Internet Connection
If the server machine is a LINUX system with no graphical interface. You will need to install the following packages:
-
xvfb
-
xfonts-75dpi
-
fontconfig
-
libjpeg62-turbo
-
libxrender1
Offline Server workaround:
| Nodes without internet connection will be very limited in testing websites as CDN and external resources are often used and thus it is not recommended. |
-
RPM packages for LINUX systems:
If the server machine does not have Internet access, the RPM packages can be provided for RedHat family systems, then follow the steps below:
-
Extract the packages into the server machine
-
Go to the folder where the packages were extracted
-
rpm -Uvh *.rpm
-
Maven Repository:
-
Local repository maven to execute the project will also be provided, then follow the steps below:
-
Extract the folder into the default location of repository maven (${user.home}/.m2/repository)
5. Installing Minium Manager
This chapter describes how to install Minium Manager in a standalone application or run the docker images with Minium Manager.
To install (as standalone):
-
Contact VILT and request the Minium Manager installation bundle.
-
Extract
minium-manager.zipto a directory of your choice.
5.1. Database Configuration
By default, Minium Manager uses an H2 database, but a MySQL database is recommended.
Before proceeding, it is necessary to create the database named minium.
|
Note:
Be free to give another name to the database. After, it is necessary to set the database name in the endpoint of the database connection at the application server. |
5.1.1. MySQL
The Minium Manager supported MySQL 5.6 Community Edition.
To define the new configuration of the MySQL edit the file $MINIUM_MANAGER_HOME/config/application-prod.yml, in order to replace the <dbhost>, <username> and <password>:
spring:
  datasource:
    driver-class-name: com.mysql.jdbc.jdbc2.optional.MysqlDataSource
    url: jdbc:mysql://<dbhost>/minium
    username: <username>
    password: <password>
  jpa:
    database-platform: org.hibernate.dialect.MySQLInnoDBDialect
    database: MYSQL
It is also recommend increasing the buffer pool size and max allowed packet of MySQL to avoid future problems when the amount of data stored on the database increases (see Minium Manager is slow on the section Troubleshooting Minium Manager). Example:
max_allowed_packet=1000000000
innodb_log_file_size=1024M
innodb_buffer_pool_size=1G
5.2. Selenium Grid Configuration
Minium Manager uses Selenium Grid to provide an easy way to run tests in parallel on multiple machines and manage different browser versions and browser configurations centrally.
The default configuration run the Hub, and the Node in the same machine as Minium Manager, but it can choose to run the Hub and the Node on another machine or use the browserstack as provider to run the tests.
5.2.1. Move the Hub, and the Node to another machine
If choose to run the Hub on another machine, copy the ./selenium folder to the new machine and configure the new endpoint.
Inside this folder (./selenium), will find two folders: hub and node.
The hub folder contains a configuration to run the Hub (see below).
The node folder contains two folders with configurations to run the Node in a MS Windows and in a Linux OS machine:
-
The
winfolder contains a configuration to run the Node in a MS Windows OS machine. In this configuration (./selenium/node/win/node_5555.jsonfile), it is configured 1 instances of firefox, 1 instances of chrome and 1 instance of internet explorer (version 11). -
The
linuxfolder contains a configuration to run the Node in a Linux OS machine (default configuration). In this configuration (./selenium/node/linux/node_5555.jsonfile), it is configured 1 instances of firefox and 1 instances of chrome.
It is necessary to add/update the Minium Manager configuration (replace <selenium_host> at the ./config/application-prod.yml file) in order to set the new provider:
minium:
  manager:
    providers:
      - type: selenium-video-node
        selenium-grid-url: <selenium_host>
After this launch the Hub from another machine with ./bin/start-selenium-hub.(sh|bat) script (from the ./selenium/hub copied folder):
|
Note:
The new machine must have the java installed and configured (i.e. the JAVA_HOME environment variable).
|
It is possible to choose a different port (default: 4444), to do this edit the hub_4444.json
(at the ./selenium/hub copied folder) before launching the Hub, to replace the port property.
At the ./selenium/hub folder find the hub_4444.json file with the following properties:
| Property | Type (Default Value) | Description |
|---|---|---|
|
Integer (4444) |
|
|
Integer (-1) |
|
|
Boolean (true) |
|
|
Integer |
|
|
Integer |
|
|
Integer |
|
|
Integer |
|
|
Integer (5) |
|
Node Configuration
The default configuration run one Node in the same machine as Minium Manager.
In order to run instances of the Node on another machine, copy
the ./selenium folder to the new machine and configure the endpoint to Hub.
It is required that the new machine have java installed.
To define the endpoint of the Hub, edit the Node configuration (on the new machine)
at ./selenium/node/(linux|win)/node_5555.json file, to replace <machine_ip>
(the host/"ip address" of the new machine), <hub_host> (the host/"ip address" of the Hub) and <hub_port> (the port used by the Hub):
{
  ... ,
  "configuration": {
    ... ,
    "host": "<machine_ip>",
    ...
    "hubHost": <hub_host>,
    "hubPort": "<hub_port>",
    ...
  }
}
Launch the Node from another machine with ./bin/start-selenium-node.(sh|bat) script (from the ./selenium/node/(linux|win) copied folder):
|
Note:
Before start any Node instance, make sure the Hub instance is started. |
|
Note:
Be free to change this configuration, but before apply the changes, stop the Node, update the node_5555.json file, and launch the Node again.
|
At the capabilities section (in the node_5555.json file) we can set the browser(s) for the tests:
| Property | Type | Description |
|---|---|---|
browserName |
String |
The name of the browser being used; this value should be one of |
version |
String |
The browser version, or the empty string if unknown. |
platform |
String |
A key specifying which platform the browser should be running on. This value should be one of |
maxInstances |
Integer |
Maximum number of instances to allow to connect to grid. |
Check the rest of the properties at the following website: https://raw.githubusercontent.com/wiki/SeleniumHQ/selenium/DesiredCapabilities.md
WebDrivers Configuration
If you want to update the webdrivers at the Node, due the incompatibility with the web browser version
(check Selenium Grid - WebDrivers to see more about the compatibility), you need to download the newer versions of the webdrivers at http://docs.seleniumhq.org/download/ and copy the webdrivers file to the folder ./selenium/node/(linux|win)/drivers. Check if the name of the webdriver file match the name defined at the script ./selenium/node/(linux|win)/start-selenium-node.(sh|bat).
Additional browser capabilities
By default, the selection of the browsers on which the tests will run is as simple as possible, by only taking into account their names. In case more specificity is needed, additional browser capabilities can be configured. If any of those capabilities is not browserName, version, platform or applicationName, start by making sure that:
-
The
minium-grid.extensions.jarfile is on theseleniumfolder. -
The property
hub_additional_classpathon theselenium/hub/selenium-grid-extras_config.jsonfile includes the valueminium-grid-extensions.jar. -
The property
capabilityMatcheron theselenium/hub/hub_4444.jsonfile is set tominium.manager.grid.MiniumCapabilityMatcher.
After setting up the hub, add the capabilities to the JSON configuration files of the nodes (e.g., node_5555.json). Example containing the version, platform and environment of each browser:
{
  "capabilities": [
    {
      "browserName": "chrome",
      "maxInstances": 1,
      "version": "62",
      "platform": "Windows",
      "environment": "Development"
    },
    {
      "browserName": "firefox",
      "maxInstances": 1,
      "version": "56",
      "platform": "Windows",
      "environment": "Development"
    }
  ]
}
Note that the names of the capabilities are in camel case (browserName, applicationName, etc.).
Lastly, add the capability names to the config/application-prod.yml file, so that they will be considered and displayed on the user interface:
minium:
  manager:
    webdrivers:
      capabilities-to-consider:
        - version
        - platform
        - environment
5.2.2. BrowserStack
To run the tests through browserstack as provider is necessary to update the default configuration.
First disable the default configuration in order to set the new provider. So, edit the ./config/application-prod.yml file
to uncomment the minium.manager.providers.browserstack-username, and the minium.manager.providers.browserstack-access-key (remove the '# '), set the minium.manager.providers.type with the browserstack value and replace <browserstack_username> and <browserstack_access_key>:
 minium:
   manager:
     providers:
       - type: browserstack
         browserstack-username: <browserstack_username>
browserstack-access-key: <browserstack_access_key>|
The
|
5.2.3. Multiple providers
Minium Manager also supports the configuration of multiple providers.
To add multiple providers, edit the Minium Manager configuration (replace the placeholders, explained above, and the <provider_label> at the ./config/application-prod.yml file) in order to set the list of providers:
 minium:
   manager:
    providers:
      - label: <provider_label> (e.g: Selenium Video Node)
        type: selenium-video-node
        selenium-grid-url: <selenium_host>
      - label: <provider_label> (e.g: BrowserStack)
        type: browserstack
        browserstack-username: <browserstack_username>
        browserstack-access-key: <browserstack_access_key>
      - label: ...
        ...
The provider_label configuration must be a unique value and will define the name of the provider that will be displayed at the Minium Manager interface.
After the configuration of multiple providers, restart Minium Manager, to be able to launch the tests in different providers.
5.3. Standalone Installation
The quickest way to start using Minium Manager is to launch it as a standalone application.
5.3.1. Start Minium Manager
Minium Manager is launched by running the script ./bin/start-minium-manager-all.(sh|bat).
|
Note:
Minium Manager is launched with 1024M of heap size. To increase the heap size, you must edit the JAVA_OPTS environment variable at ./tomcat/bin/setenv.(sh|bat).
|
Change the default configuration (e.g. run Selenium Grid and/or Selenium Node in another host), then launch the Selenium Grid and/or Selenium Node from the different hosts (see Selenium Grid Configuration).
After this run the script ./bin/start-minium-manager.(sh|bat) to start Minium Manager.
To start the Selenium Grid and Selenium Node from another host, check Selenium Grid Configuration.
After Minium Manager is started, and if the default configuration is used, it is ready to use and available at http://<hostname>:8080/
5.4. Docker Installation
An Alternative way to start using Minium Manager is through a docker container.
To run Minium Manager with docker, it is required have docker installed, docker compose too and a machine with Linux.
To install:
-
Contact VILT and request the Minium Manager installation bundle.
-
Extract
minium-manager.zipto a directory on the local machine.
5.4.1. Start Minium Manager
Minium Manager can be started by executing the following commands:
-
Navigate to the directory created by the extraction of the installation bundle
minium-manager.zip. -
Create the docker-compose.yml file (e.g):
version: '3.7'
services:
    minium-manager:
        container_name: minium-manager
        restart: unless-stopped
        image: bia.vilt-group.com/engineering/minium/minium-manager:{product-version}
        hostname: minium
        volumes:
            - jenkins-data:/opt/minium/data/jenkins
            - videos:/opt/minium/data/videos
            - mysql-conf:/opt/minium/config/mysql/
            - selenium-video-lib:/opt/minium/selenium-libs/
            - m2-repo:/opt/minium/tools/maven-repository/
            - ./config/application-docker.yml:/opt/minium/config/application-docker.yml
            - ./config/license/key.license:/opt/minium/config/license/key.license
        environment:
            - JAVA_OPTS=-Xms4G -Xmx4G -Dspring.profiles.active=prod,docker
            - MINIUM_MYSQL_URL=jdbc:mysql://mysql:3306/minium
    jenkins-agent:
        restart: unless-stopped
        image: bia.vilt-group.com/engineering/minium/minium-manager-bundle-base/minium-jenkins-agent:1.2.13
        volumes:
            - ./tools/lib/minium-core-extensions.jar:/opt/minium/lib/minium-core-extensions.jar
            - ./tools/crawler/cookie-exporter.js:/opt/minium/crawler_dependencies/lib/node_modules/headless-chrome-crawler/exporter/cookie-exporter.js
            - /dev/shm:/dev/shm
            - type: volume
                source: m2-repo
                target: /root/.m2/repository
                read_only: true
                volume:
                    nocopy: true
        environment:
            - MINIUM_COOKIES_CLASSPATH=/opt/minium/lib/minium-core-extensions.jar:target/test-project.jar
            - JENKINS_URL=http://minium-manager:8080/jenkins/
            - JENKINS_SECRET=<secret>
            - JENKINS_AGENT_NAME=monitoring
    mysql:
        container_name: minium-mysql
        restart: unless-stopped
        image: mysql:5.6
        ports:
            - "3306:3306"
        volumes:
            - mysql-conf:/etc/mysql/conf.d/minium.cnf
            - mysql-data:/var/lib/mysql
        environment:
            - MYSQL_DATABASE=<database>
            - MYSQL_ROOT_PASSWORD=<password>
    firefox:
        image: selenium/node-firefox:3.141
        restart: unless-stopped
        volumes:
            - /dev/shm:/dev/shm
            - type: volume
                source: selenium-video-lib
                target: /opt/minium/lib
                read_only: true
                volume:
                    nocopy: true
        depends_on:
            - hub
        environment:
            HUB_HOST: hub
            SE_OPTS: '-servlets com.aimmac23.node.servlet.VideoRecordingControlServlet -proxy com.aimmac23.hub.proxy.VideoProxy'
            JAVA_CLASSPATH: '/opt/minium/lib/*:/opt/selenium/*:.'
            JAVA_OPTS: '-Dvideo.source=X11 -Dvideo.framerate=8 -Djavax.accessibility.assistive_technologies='
    chrome:
        image: selenium/node-chrome:3.141
        restart: unless-stopped
        volumes:
            - /dev/shm:/dev/shm
            - type: volume
                source: selenium-video-lib
                target: /opt/minium/lib
                read_only: true
                volume:
                    nocopy: true
        depends_on:
            - hub
        environment:
            HUB_HOST: hub
            SE_OPTS: '-servlets com.aimmac23.node.servlet.VideoRecordingControlServlet -proxy com.aimmac23.hub.proxy.VideoProxy'
            JAVA_CLASSPATH: '/opt/minium/lib/*:/opt/selenium/*:.'
            JAVA_OPTS: '-Dvideo.source=X11 -Dvideo.framerate=8 -Djavax.accessibility.assistive_technologies='
    hub:
        image: selenium/hub:3.141
        ports:
            - "4444:4444"
        volumes:
            - videos:/opt/selenium/videos
            - type: volume
                source: selenium-video-lib
                target: /opt/minium/lib
                read_only: true
                volume:
                    nocopy: true
        environment:
            JAVA_CLASSPATH: '/opt/minium/lib/*:/opt/selenium/*:.'
            SE_OPTS: '-servlets minium.manager.grid.servlets.ListNodesServlet,com.aimmac23.hub.servlet.HubVideoDownloadServlet,com.aimmac23.hub.servlet.HubVideoInfoServlet'
            JAVA_OPTS: '-Dvideo.storage=com.aimmac23.hub.videostorage.LocalFileVideoStore -Dvideo.path=/opt/selenium/videos -Djavax.accessibility.assistive_technologies='
volumes:
    videos:
    selenium-video-lib:
    mysql-data:
    mysql-conf:
    jenkins-data:
m2-repo:-
Run the Minium Manager image, with the following command:
docker-compose up -d &|
Note:
To configure Minium Manager (i.e. Database connection, Selenium, …), check the Installing Minium Manager section. |
5.5. TestLink
Minium Manager can be configured to export test results to TestLink.
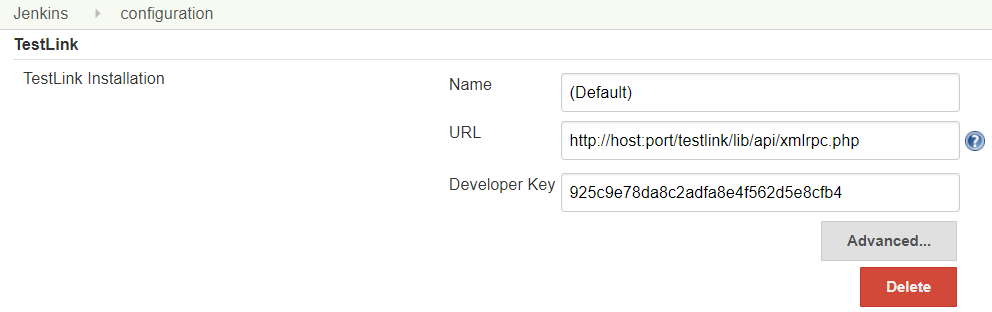
To configure the integration with TestLink, start by making sure the TestLink Plugin is installed on Jenkins.
After that, go to Manage Jenkins > Configure System and configure the URL of TestLink, and a developer key with permissions to create builds on all the desired projects:
Then, open the config/application.yml and add the TestLink value to the minium.manager.modules property:
minium:
  manager:
    modules:
      - TestLink
To log the batch update requests, configure the following logging levels:
logging:
  level:
    # logs the user who performed the request
    minium.manager.web.rest.TestLinkResource: INFO
    # logs the number of projects being updated
    minium.manager.service.TestLinkService: INFO
5.6. Add Jenkins Node
Minium Manager supports new types of project: the monitoring project that are executed with high frequency (every 5, 10, 20 minutes), and can give us a report about the availability of a certain page and performance metrics, with the objective to check that the page are working as expected and Cookie Project that is two custom Minium Projects that generates a report with all browser cookies found during the navigation or crawl of a website.
Before configuring this new project type, first configure jenkins to add a new agent:
To add a new agent:
-
Go to
Manage Jenkins>Manage Nodes>New Node. -
Set the Node name field (store the node name), select
Permanent Agentand clickOk. -
Configure the
# of executors(e.g.5), theRemote root directory(at the Jenkins Agent machine, e.g./tmp) and clickSave. -
Open the new node menu (
<jenkins_ulr>/computer/<node_name>/) and copy command to start the new Agent. -
Launch the Jenkins Agent (by executing the command previously retrieved) and check if the Agent is connected.
|
Important:
Check the Jenkins Agent to see the requirements of a new node. |
6. After Installing Minium Manager
Minium Manager allows tweaking configurations such as follows:
6.1. License
This chapter describes the procedure to gather all the information required to produce a valid license and how to set up the installation with a license. Minium Manager allows configuring Projects without a license but do not allow running tests without a valid license in place.
The license has a limit of executions per month. Each month, the execution number will reset. An alert will be shown in Minium Manager when the number of executions gets close to the limit.
As an example, if exists a project with 10 features and each feature have 5 scenarios, when an execution is launched in one browser it will consider 50 scenarios executed at the end of the execution. If launch the execution in 2 browsers, it will count 100 scenarios (2 x 50 scenarios) executed.
6.1.1. Obtaining a Valid License
Request a license form VILT and attach the company name.
6.1.2. Configuring Minium Manager License
With a valid license it only needs to add its contents to the file ./config/license/key.license and restart Minium Manager.
After this should be able to run tests normally.
To configure the Minium Manager license, edit the ./config/application-prod.yml file in order to set the minium.manager.license.client-name and minium.manager.license.scenarios-alert-notification in order to replace the <client_name> (the name of the client), and the <number_of_scenarios> (the number of scenarios executed before launch a notification) values.
minium:
  manager:
    license:
      client-name: <client_name>
      scenarios-alert-notification: <number_of_scenarions>
6.2. Logs
This chapter describes how to manage the logging of the several components of Minium Manager.
6.2.1. Minium Manager
By default, Minium Manager writes logs to ./logs/minium.log.
Change easily the following properties in application-prod.yml to tweak the logs:
| Property | Description | Default Value |
|---|---|---|
|
Default logging level for all classes |
|
|
Specify log level for specific packages by replacing fullyqualifiedname with the full class name. For example: org.springframework |
|
Next an example of a possible logging configuration:
logging:
  file: ${minium.manager.home}/logs/minium.log (1)
  level:
    org.springframework: WARN (2)
minium.manager: DEBUG (2)| 1 | Path where minium manager will write the log file |
| 2 | Add or remove keys to suit the needs |
|
Note:
The properties logging.level.root and logging.level.fullyqualifiedname can be set with one of the following values: ERROR, WARN, INFO, DEBUG or TRACE.
|
To stop the minium manager logging for the ./logs/minium.log file, please comment the line file: ${minium.manager.home}/logs/minium.log the logging configuration (Add the hash sign "#" at the beginning of the line) at the application-prod.yml file and the restart the tomcat.
The minium manager logging will start to be written at the ./logs/catalina.<date>.log.
Jenkins
If you intend to separate the jenkins file in a new file, you can create the file ./tomcat/webapps/jenkins/WEB-INF/classes/logging.properties with the content:
handlers = org.apache.juli.AsyncFileHandler

org.apache.juli.AsyncFileHandler.level = FINE
org.apache.juli.AsyncFileHandler.directory = ${minium.manager.home}/logs
org.apache.juli.AsyncFileHandler.prefix = ${classloader.webappName}.
org.apache.juli.AsyncFileHandler.maxDays = 3
|
Note:
The path ./tomcat/webapps/jenkins/WEB-INF/classes/ will be generated after the tomcat starts for the first time, and the file ./tomcat/webapps/jenkins.war be deployed.
|
After the tomcat is restarted, the jenkins logging will start to be written at the ./logs/jenkins.<date>.log.
Find more information at https://tomcat.apache.org/tomcat-8.5-doc/logging.html#Using_java.util.logging_(default)
6.2.2. Selenium Grid
To enable the logging of the selenium grid, you must edit several files before launching the selenium grid:
-
Hub: open the file
./selenium/hub/start-selenium-hub.(sh|bat)and add the-log selenium.logas java option. -
Node: open the file
./selenium/node/(linux|win)/start-selenium-node.(sh|bat)and add the-log selenium.logas java option.
When launching Selenium server with the -log option, the server can record valuable debugging information reported by the Selenium Server to a text file (named selenium.log) stored at the ./selenium/hub/ for the Hub and ./selenium/node/(linux|win)/ for the Node.
The <level> can be replaced with:
-
OFF: Turns off logging.
-
SEVERE: Messages about things that went wrong. For instance, an unknown command.
-
WARNING: Messages about things that may be wrong but was handled. For instance, a handled exception.
-
INFO: Messages of an informative nature. For instance, information about received commands.
-
DEBUG: Messages for debugging. For instance, information about the state of the driver.
-
ALL: All log messages. A way to collect all information regardless of which log levels that are supported.
Find more information at https://github.com/SeleniumHQ/selenium/wiki/Logging.
6.3. E-mail
Configure e-mail reports for Minium Manager executions. This way, the execution’s status can be sent by e-mail, which is specially handy for large tests.
Before defining the e-mail recipients on the project configuration, configure the e-mail server.
To configure the e-mail gather the following properties:
-
Protocol: The protocol used by the email server
-
Hostname: The email server hostname
-
Port: The email server port number
-
Username: The login user of the server
-
Password: The login password of the server
-
From: The e-mail field
from
This configuration is done on ./config/application-prod.yml as follows:
spring:
  mail:
    protocol: smtp
    host: mail.example.com
    port: 25
    user: SomeUser
    password: SomePassword
    tls: false
    auth: false
    from: minium@example.com
6.4. LDAP
To use LDAP authentication, set the following properties in the config/application-prod.yml file:
-
URLs: The URLs of the LDAP servers.
-
Username: DN of a binding user.
-
Password: Password of the binding user.
-
Base: Base suffixes from which all operations should originate.
-
User search base: The search base for user searches.
-
User search filter: The filter used to search for users, where
{0}will get replaced by the user’s login name. -
Group search base: The search base for group membership searches.
-
Group search filter: The filter used to search for group membership, where
{0}will get replaced by the DN of the user. -
Group name attribute: The attribute that contains the name of the group.
-
Admin: The login name of the initial administrator.
Here is an example:
spring:
  ldap:
    urls:
      - ldap://myserver1:389
      - ldap://myserver2:389
    username: uid=admin,dc=example,dc=com
    password: secret
    base: dc=example,dc=com
    base-environment:
      user-search-base: ou=users
      user-search-filter: uid={0}
      group-search-base: ou=groups
      group-search-filter: uniqueMember={0}
      group-name-attribute: cn
      admin: an.admin.user
6.5. Videos
To record the tests and present the videos at executions and features pages, set the following properties in the config/application-prod.yml file:
-
location-path: The path where the videos are stored.
-
max-disk-space: Maximum disk space available for the video files before the system warn the user at the health check page (in megabytes).
Here is an example:
minium:
  manager:
    video:
      location-path: /opt/minium/videos
      # size in MB
max-disk-space: 10240|
Important:
The Selenium Video Node retrieves the video from the node and store it in the folder (passed by a parameter). The parameter must math the path configured at minium.manager.video.location-path
|
6.6. Minium version auto-update
For the version of minium-cucumber-parent to be automatically updated for the projects have that auto-update enabled:
-
Set the
minium.manager.jenkins.miniumCucumberParentVersionproperty to the target version. To use the latest version instead of a specific version, set the value of the property to the minimum version and add a,after it (for example1.9.5,). If this property is not defined, the tests will run with the version defined on the POM even if auto-update is enabled. -
The Maven installation used by Jenkins (
Manage Jenkins > Global Tool Configuration) must have namemaven_jenkins, and the user who runs Jenkins must have permission to execute the binary.
6.7. Error Message (Jenkins)
To print the errors at the console output, you need to add the error pattern (regular expression based in the java.util.regex package) that occurs in the console output of the child job (e.g. /ERROR: Subversion checkout has been canceled/).
You can configure the patterns at the minium.manager.jenkins.error-patterns property list.
When the pattern matches with a line at the console output of the child job, the console output will be added to the pipeline job until we find an empty line, or the line "Build was aborted".
The error will be propagated to the pipeline job and will be printed at the front-end of Minium Manager.
Example:
error-patterns:
    - type: Module
      patterns:
          - '/org\.mozilla\.javascript\.JavaScriptException: Error: Module \".+\" not found\..*/'
    - type: SCMInvalidCredentials
      patterns:
          - '/org\.tmatesoft\.svn\.core\.SVNAuthenticationCancelledException: svn: E200015: Authentication cancelled/'
          - '/ERROR: Subversion checkout has been canceled/'
          - '/fatal: Authentication failed for.+/'
At front-end, Minium Manager displays a user-friendly message for the common cases: /org\.mozilla\.javascript\.JavaScriptException: Error: Module \".+\" not found\..*/ (Module missing at the project) and /org\.tmatesoft\.svn\.core\.SVNAuthenticationCancelledException: svn: E200015: Authentication cancelled/, /ERROR: Subversion checkout has been canceled/ (Wrong credentials for the scm repository).
When we detect errors of the type SCMInvalidCredentials, an email will be sent to warn the users (configured at the report section of the project’s configuration, if any).
6.8. Monitoring And Cookie
To configure the Minium Manager to execute monitoring and cookie projects, set the following properties in the config/application-prod.yml file:
-
agents-monitoring-label: The given name of Jenkins Node that will execute the monitoring projects.
-
max-projects-monitoring-per-agent: Maximum number of monitoring projects that executes per node.
-
agents-cookie-label: The given name of Jenkins Node that will execute the cookie projects.
-
max-projects-cookie-per-agent: Maximum number of cookie projects that executes per node.
Here is an example:
minium:
  manager:
    jenkins:
      agents-monitoring-label:
        - monitoring-agent
      max-projects-monitoring-per-agent: 10
      agents-cookie-label:
        - cookie-agent
      max-projects-cookie-per-agent: 10
Cookies
The Jenkins Node that will be executing the cookie projects needs the following environment vars:
-
MINIUM_COOKIES_CLASSPATH: This environment variable will store the classpath required to execute the cookie projects. This var needs to point to the jar
minium-core-extensions.jarof the bundle (located at./tools/lib/minium-core-extensions.jar). At the end of the var, its required to append the jar with the static valuetarget/test-project.jar. To separate this two jars, use the classpath separator correctly: on all Unix-like operating systems use a colon (":"); on Windows use a semicolon (";"). E.g./opt/minium/lib/minium-core-extensions.jar:target/test-project.jar. -
NODE_PATH: The node path need to have installed the package
headless-chrome-crawlerandpuppeteer@1.20.0.
To configure the NODE_PATH globally, you can define a path to your NODE_PATH environment variable
(e.g. /opt/minium/crawler_dependencies/lib/node_modules/) and use the following commands to install the dependencies:
npm i -g headless-chrome-crawler && npm i -g puppeteer@1.20.0After, copy the file cookie-exporter.js at the bundle (located at ./tools/crawler/cookie-exporter.js) to the folder exporter of the
node module headless-chrome-crawler (e.g. /opt/minium/crawler_dependencies/lib/node_modules/headless-chrome-crawler/exporter/cookie-exporter.js)
|
Note:
If the Monitoring and Cookie projects needs proxy to run the tests, you can use the property -Dminium.monitoring.performance.httpProxy.
Example: -Dminium.monitoring.performance.httpProxy=localhost:8080.
|
6.9. Executors
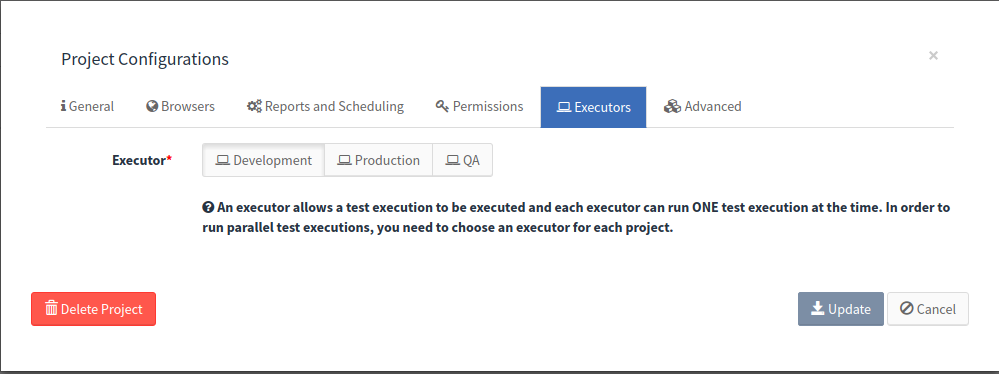
An executor allows a test execution to be executed and each executor can run ONE test execution at the time. In order to run parallel test executions, you need to choose an executor for each project.
-
home-dir: Jenkins home directory
-
executors: List of executors. Each executor has a name and label (this label will be shown in the UI).
Here is an example:
minium:
     manager:
        jenkins:
          home-dir: /home/minium-manager/data/jenkins
        executors:
          - name: dev
            label: Development
          - name: prod
            label: Production
          - name: qa
            label: QA
6.10. Additional WebDriver configurations
Additional WebDriver configurations can be set by adding profiles to the config/application-webdrivers.yml corresponding to the browser names and/or versions. Examples:
# adds the marionette capability when running tests on Firefox 47
spring:
  profiles: firefox47

minium:
  webdriver:
    desiredCapabilities:
      marionette: false
---
# starts Chrome, regardless of the version, with the no-sandbox argument
spring:
  profiles: chrome

minium:
  webdriver:
    chromeOptions:
      args:
        - no-sandbox
6.11. Lacaixa Configurations
Since lacaixa have custom features in Minium Manager, they are separated in the property minium.manager.lacaixa.
At this property, we have the following configurations:
-
allow-scm-error: This configuration allows to continue the execution despite the error at the scm credentials. -
data-extraction-report-types: Configure the types of projects available at the Data Extraction Report.
allow-scm-error
We have several configurations at this configuration:
-
enabled: Enables of disables the configuration. The default isfalse. -
send-mail-notification: Notify the users by e-mail the backup checkout was used to run the execution. The default istrue. -
paths-to-checkout: Paths at the Jenkins master and Nodes where the backup checkouts will be stored.
Example configuration:
minium:
  manager:
    lacaixa:
      enabled: true
      send-mail-notification: false
      paths-to-checkout:
        master: /opt/minium/data/jenkins-backup/
        monitoring: /opt/minium/data/jenkins-backup/
        cookie: /opt/minium/data/jenkins-backup/
data-extraction-report-types
By default, the values configured are: DEFAULT and MONITORING.
The values allowed at this property are: DEFAULT, MONITORING, COOKIE_MINIUM and COOKIE_CRAWLER.
6.12. Integration with HP ALM
Minium Manager allow integration with HP Application Lifecycle Management (HP ALM). After Minium Manager execute the tests, the results are imported into HP ALM. Afterwards, see the results published in ALM.
Before configuring a project that imports the tests results to HP ALM, first configure the HP ALM Server at jenkins.
To configure e-the HP ALM Server at jenkins, edit the ./tools/jenkins/com.hp.application.automation.tools.settings.AlmServerSettingsBuilder.xml file
to replace ${ALM_NAME} and ${ALM_URL} properties with the name of the ALM Server and the endpoint to the ALM Server, respectively.
If already launched Minium Manager (i.e. the folder ./data/jenkins/ already exists), edit the ./data/jenkins/com.hp.application.automation.tools.settings.AlmServerSettingsBuilder.xml
file as well.
It is also required edit the ./config/application-prod.yml` as follows:
minium:
  manager:
    alm:
      url: <alm_url> - also defined at the com.hp.application.automation.tools.settings.AlmServerSettingsBuilder.xml file
      server-name: <alm_server_name> - also defined at the com.hp.application.automation.tools.settings.AlmServerSettingsBuilder.xml file
      username: <alm_username> - the username of the user configured at HP ALM
      password: <alm_password> - the password of the username of the user configured at HP ALM encrypted (see the Encrypt password section below how to encrypt the password)
      baseURL: <baseURL_Minium_Manager> - the base URL of Minium Manager to create the link at HP ALM
Launch Minium Manager and create/configure a project imports the tests results to HP ALM.
The ALM properties can be found at the project properties by clicking at Advanced configuration button and selecting the ALM at Modules.
6.12.1. Encrypt password
Access the jenkins console through:
http://localhost:8080/jenkins/script
Update the following script to replace the <password_here> with the password desired to encrypt.
println(hudson.util.Secret.fromString('<password_here>').getEncryptedValue())
Press Run and retrieve the password at the result.
6.13. Update Minium Manager
-
Download the
WARfile provided by VILT -
Stop the Minium Manager by running
minium-manager\tomcat\bin\shutdown.(bat|sh)script -
Delete
ROOT.war(if exists), and the folder ROOT inminium-manager\tomcat\webapps -
Copy and paste the new .war in
minium-manager\tomcat\webapps -
Restart tomcat by running
minium-manager\tomcat\bin\start.(bat|sh)script
7. Troubleshooting Minium Manager
Most common problems with Minium Manager are reviewed in this chapter.
Cannot start Minium Manager:
-
Check if already have another service listening on the same port of the Minium Manager (default port: 8080). To configure a new port (to a standalone installation), change the
portattribute value of the connector with the protocol="HTTP/1.1", at the./tomcat/conf/server.xmlfile. For the docker installation, check this website in order to update thedocker-compose.ymlfile. -
If configured Minium Manager with MySQL database, check if Minium Manager database is running and is reachable from the Minium Manager host.
-
Check if the CATALINA_HOME environment variable is defined with the path to a different tomcat.
Cannot execute tests with Selenium Node:
-
The error
org.openqa.selenium.remote.UnreachableBrowserException: Could not start a new session. Possible causes are an invalid address of the remote server or browser start-up failure.-
This error can occur when the Node configuration (
capabilitiessection at thenode_5555.jsonfile) is wrong, or the webdriver version is no compatible with the browser version. Check the [Support Matrix] chapter to see if the webdriver version is compatible with the browser version. Also, check the Node Configuration chapter to see if the configuration is correct.
-
-
The errors
org.openqa.selenium.WebDriverException: Session * was terminated due to SO_TIMEOUTandorg.openqa.selenium.WebDriverException: Error forwarding the new session Error forwarding the request Read timed out Command duration or timeout: * seconds-
Raise the browserTimeout value at the
./selenium/hub/hub_4444.jsonand restart the Selenium Grid (Hub and Nodes).
-
-
The error
org.openqa.selenium.WebDriverException: JavaScript error (WARNING: The server did not provide any stacktrace information)-
Check if the browser has the JavaScript disable. If disabled, so enable it.: http://www.enable-javascript.com/
-
-
The error
org.mozilla.javascript.WrappedException: Wrapped org.openqa.selenium.WebDriverException: Failed to navigate to https://<username>:<password>@<host>/. This usually means that a call to the COM method IWebBrowser2::Navigate2() failed.-
This error can occur when we are using the basic authentication at internet explorer. To fix this you need to register a key:
-
The 64-bit variant of IE with 64-bit variant of IEDriverServer.exe: HKEY_LOCAL_MACHINE/SOFTWARE/Wow6432Node/Microsoft/Internet Explorer/MAIN/FeatureControl/FEATURE_HTTP_USERNAME_PASSWORD_DISABLE
-
The 32-bit variant of IE with 32-bit variant of IEDriverServer.exe: HKEY_LOCAL_MACHINE/SOFTWARE/Microsoft/Internet Explorer/MAIN/FeatureControl/FEATURE_HTTP_USERNAME_PASSWORD_DISABLE
-
-
After create a DWORD
iexplore.exewith value0in this registry key you just created. More info at https://stackoverflow.com/a/23519791
-
Cannot connect to the internet due to proxies issues:
-
Maven: edit the file
settings.xmlof the maven used by Jenkins (at./tools/maven/conf) in order to put the proxies detail inside (uncomment the proxy options and fill in the proxy server detail) and save the file. -
VN at Jenkins (java based): check the documentation to pass the settings to the tomcat (e.g. -Dhttps.proxyHost=host … -Dhttp.nonProxyHosts=localhost|…)
-
Git: check the documentation to configure the proxy.
Minium Manager is slow
If some pages are taking too long to load, it might be because the buffer pool size of MySQL is too small for the amount of data stored on the database.
To increase it, change the value of the innodb_buffer_size configuration option of MySQL.
A value of 1G should be enough for most cases.
PDF reports do not look as expected
If the appearance of PDF reports do not look as expected, it usually can be fixed by adding some options to the property’s minium.manager.pdf-generator.additional-settings and minium.manager.pdf-generator.additional-settings-object.
If the elements on PDF reports look too big or too small, set the load.zoomFactor parameter accordingly.
Or, if there are icons missing on some reports, add the load.jsdelay parameter with a value of around 500 (milliseconds).
Example:
minium:
  manager:
    pdf-generator:
      additional-settings-object:
        load.zoomFactor: 0.75
load.jsdelay: 2000Black videos (and black screenshots at progress) for Selenium Nodes (Windows)
When using Remote Desktop to connect to a remote computer, closing Remote Desktop locks out the computer, displaying the logon screen. If you use RDP to connect to the machine, every time you exit the machine the GUI is disabled, and the video will be recorded as black. Also, the progress screenshots will be black.
To avoid problems with GUI, use the tscon utility to disconnect from Remote Desktop. tscon returns the control to the original local session on the remote computer, bypassing the logon screen. All programs on the remote computer continue running normally, including GUI tests.
To solve this issue:
-
create a batch file with this code:
for /f "skip=1 tokens=3" %%s in ('query user %USERNAME%') do (
  %windir%\System32\tscon.exe %%s /dest:console
  timeout 5
)-
Create a desktop shortcut to this file. To do this, right-click the batch file and select
Send to | Desktop (create shortcut). -
In the shortcut properties, click Advanced and select Run as administrator.
Now, when you need to disconnect from Remote Desktop, double-click this shortcut on the remote computer (in the Remote Desktop window).
|
It is recommended to configure the Autologon. With the Autologon, when the Selenium Node machine boots, it will sign in with a user and will have the GUI available. |
An alternative is to use the VNC server to access the Selenium Nodes machine instead of RDP.
8. Uninstalling Minium Manager
Before actually removing Minium Manager please read all the chapters in this section.
8.1. Remove Databases
If using the embedded H2 database the database directory is removed by deleting the directory created by the extraction of the installation bundle minium-manager.zip.
If MySQL it is be used it is necessary to manually drop the database.
8.2. Remove Standalone Installation Files
|
Note
Before proceeding shutdown Minium Manager. |
Finally, after everything else is removed, remove Minium Manager installation files by deleting the directory created by the extraction of the installation bundle minium-manager.zip.
8.3. Remove Docker Installation Files
Through the docker commands, remove the installed docker with the following command:
docker rmi minium-manager:productionFinally, after everything else is removed, remove the Minium Manager configuration files by deleting the directory created by the extraction of the installation bundle minium-manager.zip.
User Guide
VILT Minium Manager: User Guide
9. Introduction
This document describes the user interface of the VILT - Minium Manager, version 2.7.18.
Minium Manager is a web testing automation platform designed to asure your platforms and applications perform as intended across several combination of browsers and OS’s on a continuous integration fashion. If something is not working as expected, Minium Manager can send you notifications and can also record videos so you can easily identify problems, and also provides access to detailed reports on test executions and its results. With Minium Manager it is easy to write and manage tests: writing new tests gets almost as easy as writing English and test management is very straightforward.
With the purpose of giving you a way of asuring the quality of your platforms and applications, it provides you with different types of projects that can focus on different components of an application, such as usability, availability and performance. By allowing you to design more focused tests you can guarantee the robustness of you platforms and applications with Minium Manager
10. Projects
Configure projects in Minium Manager, in order to run and analyze end-to-end tests.
All projects need to have a repository (Git or SVN) associated, where the code is stored, except the Cookie Crawler.
There are three type of projects: Web application testing, Monitoring and Cookie.
The Web application testing project is a Minium project that navigates a website in the same way a human would.
The Monitoring project is a Minium project that are executed with high frequency (every 5, 10, 20 minutes), and can give us a report about the availability of a certain page and performance metrics, with the objective to check that the page are working as expected.
The development workflow for a Monitoring project in Minium Developer will be similar to the web application testing project, providing an easy and quick way to write test. The configuration in Minium Manager is similar to other projects. The monitoring project does not have the browser configuration.
The Cookie project generates a report of cookies found during the navigation or crawl of a website. The Cookie is divided in two projects: Cookie Report project and Cookie Crawler project. The Cookie Report project is a Minium project (based on the monitoring project) that extracts the all browser cookies at the end of a scenario. The Cookie Crawler project is a crawler that given one or more URLs, it crawls the websites and, for each URL, extracts the all browser cookies.
10.1. Monitoring
To start the development of a monitoring project, you need to check the checkbox Is a Monitoring Project? to generate the monitoring project:
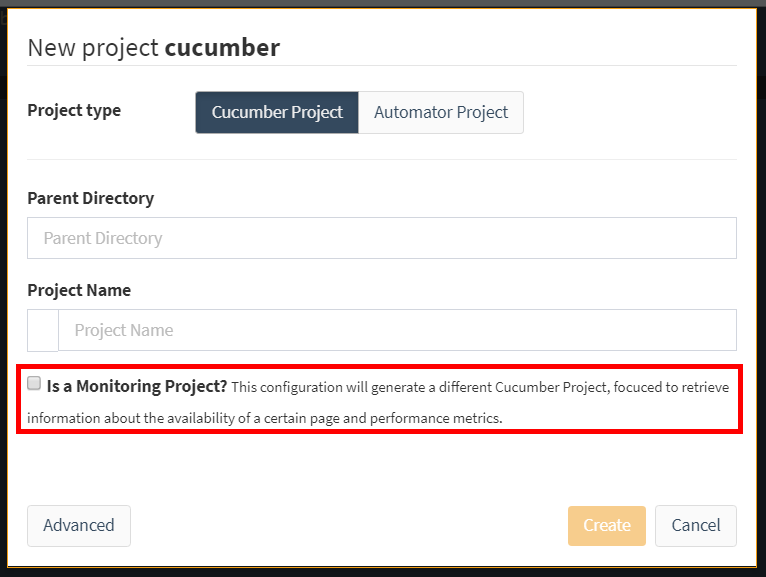
Here are some examples of the development workflow in Minium Developer of the monitoring project:
10.1.1. Check if the website is ok
Use case: You want to test if the URL is ok and get the performance in the reports
Scenario:
Scenario: Check Blog La caixa
  When Check if website responds: "https://blog.caixabank.es/"
Step:
When(/^Check if website responds: "([^"]*)"$/, function(url) {
  browser.get(url);
});
For a monitoring project, the expression browser.get(url); retrieves the data related to page load performance, the URL status, the number of requests, the page size and javascript errors. This information will be presented at the Minium Manager report.
10.1.2. Do a search on the website with refresh and check how long it took to load.
Use case: You want to perform a search on the website (where’s there’s a refresh after the search) and check if the results appear and get the performance of the page.
Scenario:
Scenario: Search
    Given I'm at "https://www.caixabank.es/particular/home/particulares_es.html"
    When Search for "CaixaBank" and check the results
Steps:
When(/^I'm at "([^"]*)"$/, function(url) {
  browser.get(url);
});

When(/^Search for "([^"]*)" and check the results$/, function(search) {
  $("#cookies-accept-full a").click();
  $("#search-field").fill(search);
  $("#prebuscadorCabecera input[type='submit']").click();
  expect($(".search-result-block")).to.exist();
  scenario.write(browser.getPerformance());
});
The expression scenario.write(browser.getPerformance()); retrieves and store the data related to the last page load performance, the URL status, the number of requests, the page size and javascript errors. This information will be presented at the Minium Manager report.
10.1.3. Click on a link and get the performance of the page
When(/^I click on link with text "([^"]*)"$/, function(text) {
 $("a").withText(text).click();
 expect($(".page-title")).to.exist();
 scenario.write(browser.getPerformance());
});
10.2. Cookie
Since the Cookie Report project is a Minium project (based on the monitoring project), to create a Cookie Report project, simply generate a Monitoring project in Minium Developer. It is not necessary to add extra instructions to the minium code, since all browser cookies will be automatically extracted at the end of each scenario.
For the Cookie Crawler project, development is not necessary, you only need to provide one or more URLs to crawl.
10.3. Setup a project
To set up a project, click on the button New Project:
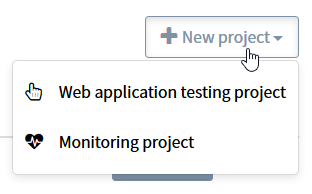
There are 4 project types we can select:
-
Web application testing project
-
Monitoring project
-
Cookie Report project
-
Cookie Crawler project
Then, fill the form:
10.3.1. General
On the General tab, fill the following fields:
Name |
Display name of the project (e.g gmail-e2e-tests) |
Description |
Optionally provide a project description |
Labels |
Associated labels to a project in order to organize and filter projects. |
Type |
Type of SCM repository |
Url |
URL of the repository where the project with the features is stored (GIT and Subversion only). The following are examples of valid git URL’s (or a local file path): https://github.com/github/git.git //path-to-repo/repos/gmail-e2e-tests |
Username/Password |
Credentials for authentication on the repository (GIT and Subversion only). |
Branch |
The name of the branch you want to execute (GIT only). The default value is |
Code |
Upload one archive zip with the minium project (File system only). If no archive zip is uploaded, Minium Manager will use the template projects. |
Download Zip |
Downloads the current minium project (File system only). |
Edit |
Opens the editor to edit the minium project (File system only). |
Cookie Crawler
For the Cookie Crawler project the General tab is different:
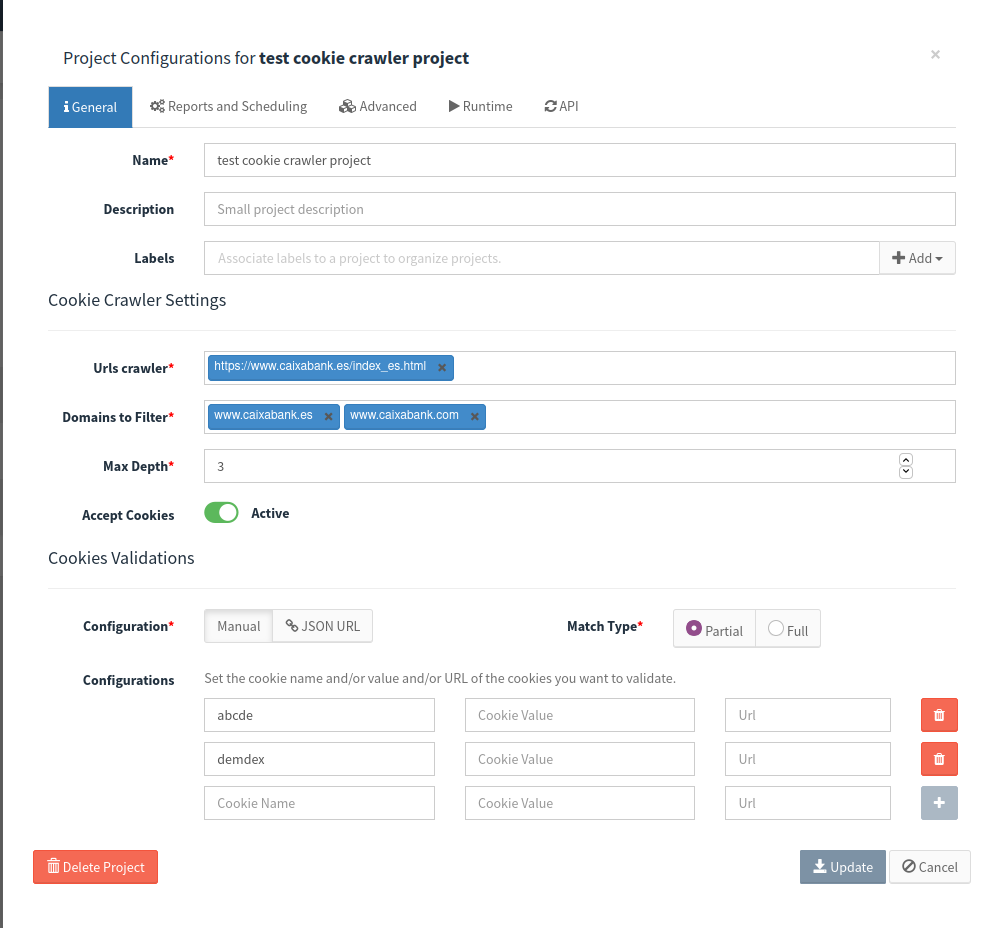
Urls crawler |
The URLs you want to crawl (e.g. |
Domains to Filter |
The domains you want to filter at the crawl (e.g. |
Max Depth |
Maximum depth for the crawler to follow links automatically |
Accept Cookies |
Accept the cookie warning during the crawl (is related to the field |
Configuration |
The type of configuration to validate the cookies. The |
Match Type |
The type of match that will be used to validate the cookies. The |
Configurations |
the cookie name and/or value and/or URL of the cookies you want to validate. After you configure one validation, click at the button |
JSON URL |
Add the url to the json that contains the cookies to validate. |
10.3.2. Browsers
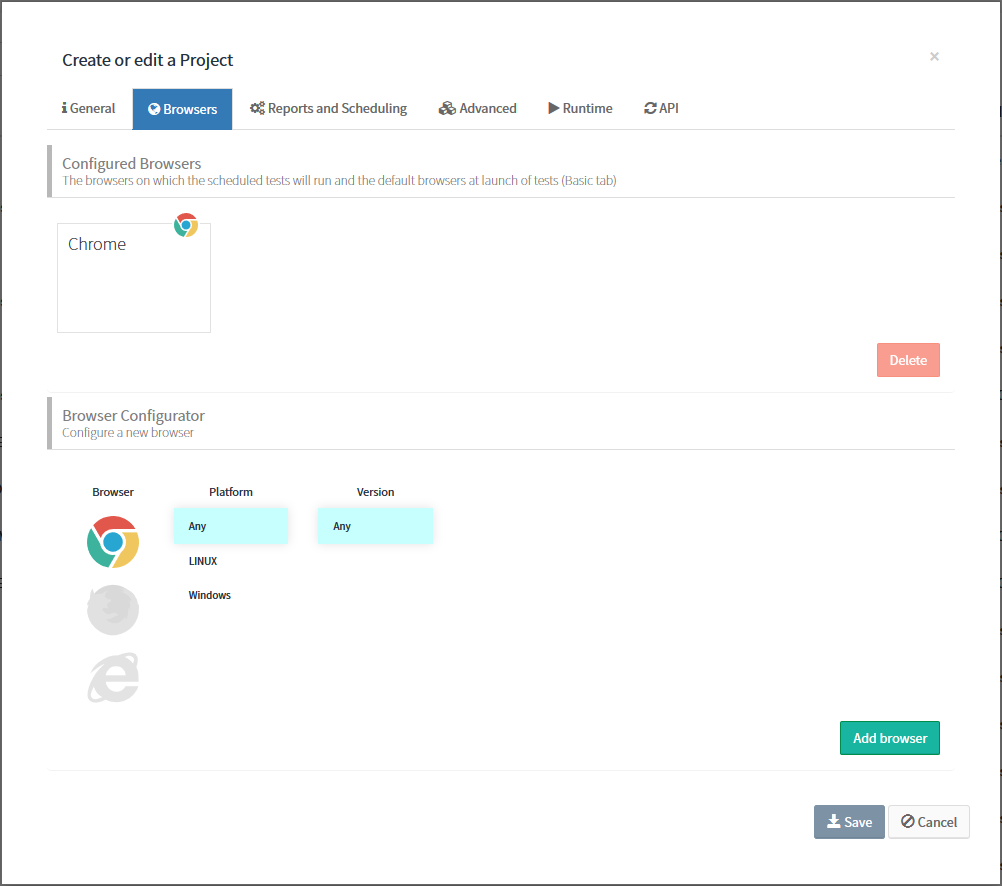
On the Browsers tab, choose the browsers on which the scheduled tests will run, and the default browsers at launch of tests.
To configure the browsers, click Add more browsers to expand the available browsers and select a browser (and the properties) and/or the mobile devices (emulated via chrome). After, click Add browser or Add device (for mobile devices).
If you want to remove a configured browser, move the mouse over the browser configuration (below the configured browsers) and click on the trash icon.
|
Note:
The Browsers tab is not available for the monitoring and cookie projects.
|
10.3.3. Reports and Scheduling
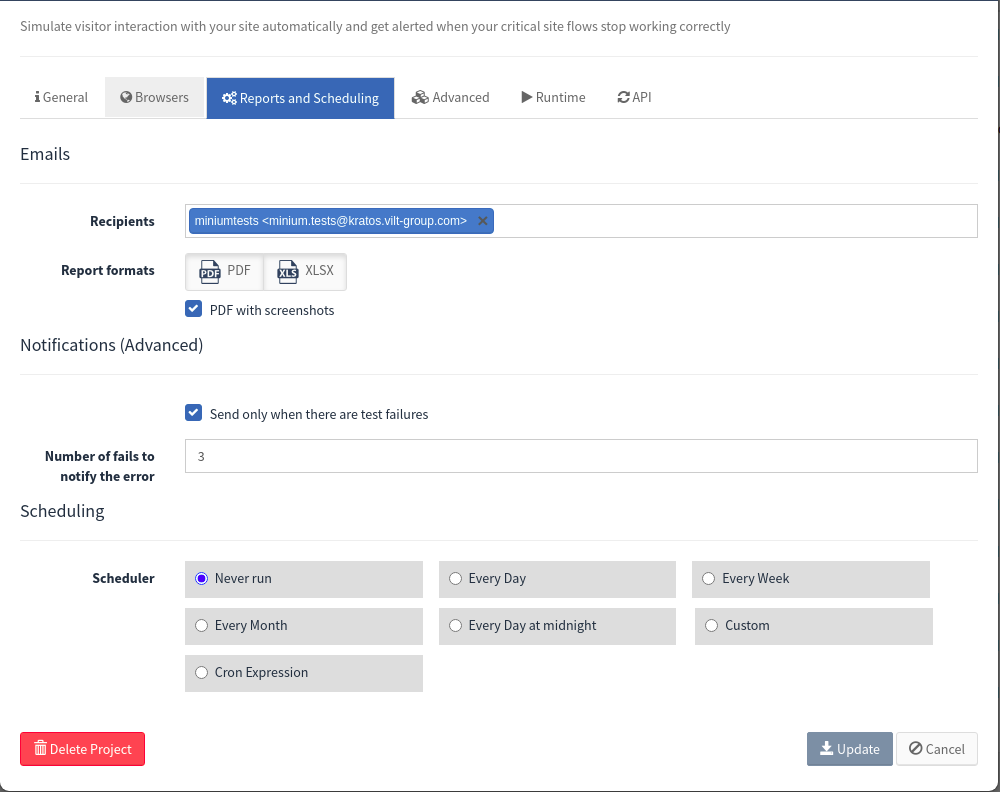
On the Reports and Scheduling tab, fill the following fields:
Recipients |
Set email addresses to receive a report of execution for the project. You can search by the username or email in the list of users registered in the system (or present in ldap). You can also add emails that are not on the list. If you want to receive the pdf report with screenshots, check the option "PDF with screenshots". |
Send only when there are test failures |
If you only want to receive the report of the executions that contains failed tests, check this option. Also, if the credentials of the SCM repository fails, the email addresses will receive a notification warn the users that the SCM credentials are invalid ou incorrect. |
Number of fails to notify the error |
Set the number of failed tests in a row to notify the user (via email and sms). |
Scheduler |
Set the schedule you want to execute the project and send the report of the execution.
If you choose the option |
Scheduler Custom Configurations |
Set the schedule you want to execute the project and send the report of the execution with different levels of granularity. |
Cron Expression |
Set the schedule you want to execute the project and send the report of the execution via a cron expression. |
Monitoring
For the monitoring project the Reports and Scheduling tab contains more configurations:
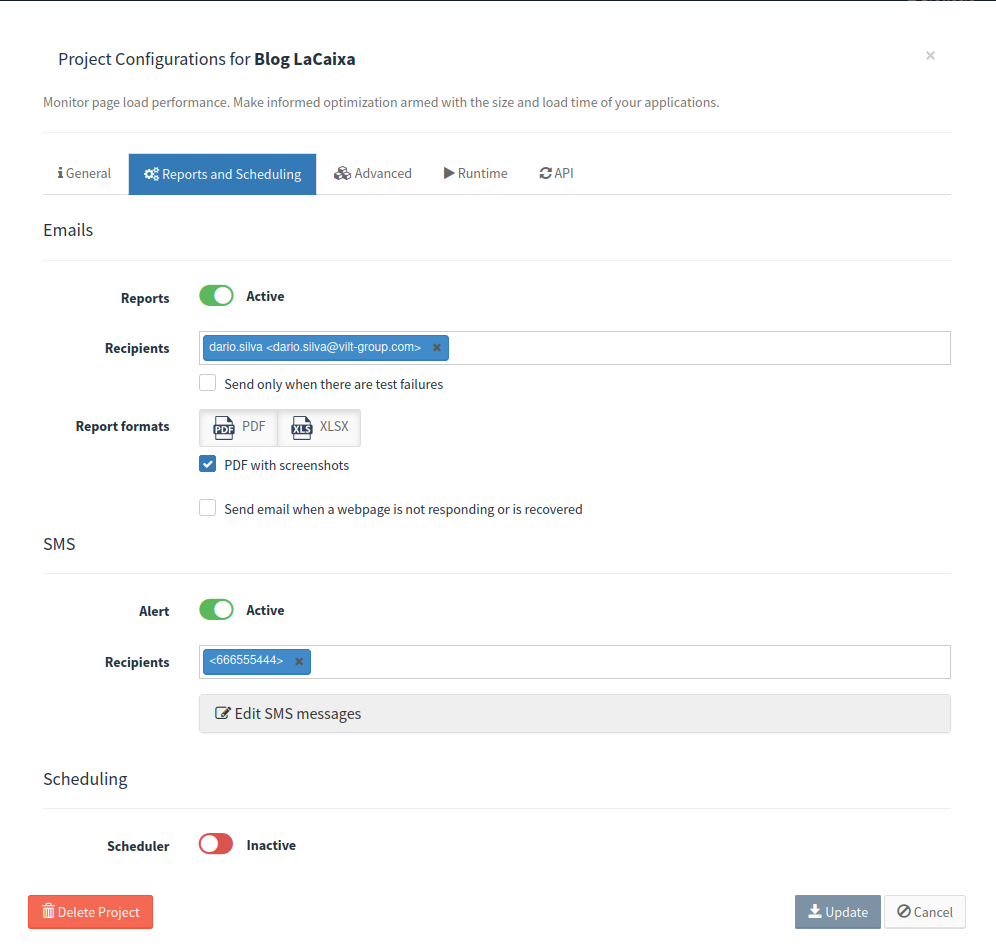
On the Reports and Scheduling tab for the monitoring projects, you can also need to fill the following fields:
Send email when a webpage is not responding or is recovered |
Send the email notification to the emails configured at the Recipients (Emails) configured to warn the user when the website is not responding, or the website recovers (from a failure). |
Recipients (SMS) |
Set mobile phone numbers to receive an SMS when the project. You can search by the username or phone number in the list of users registered in the system (or present in ldap). You can also add phone numbers that are not on the list. |
Edit SMS Messages |
Set the messages that the users will receive on failure and on recovery. |
Cookie Crawler
For the monitoring project the Reports and Scheduling tab contains more configurations:
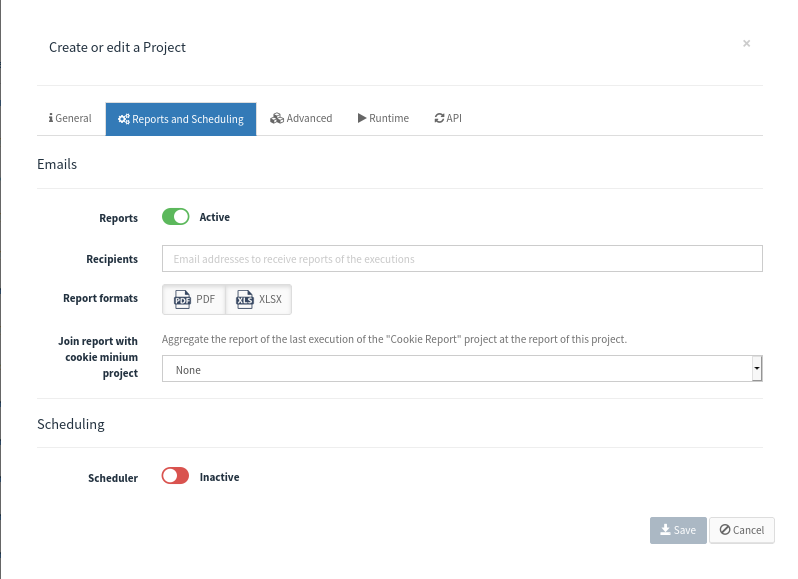
On the Reports and Scheduling tab for the Cookie Crawler projects, you can also need to fill the following fields:
Join report with cookie minium project |
Set the Cookie Report project to the Cookie Crawler project to join the cookie report in a single project. The report generated will contain the result of the last execution of the Cookie Crawler project, and the result of the last execution of the Cookie Report project. |
10.3.4. Advanced
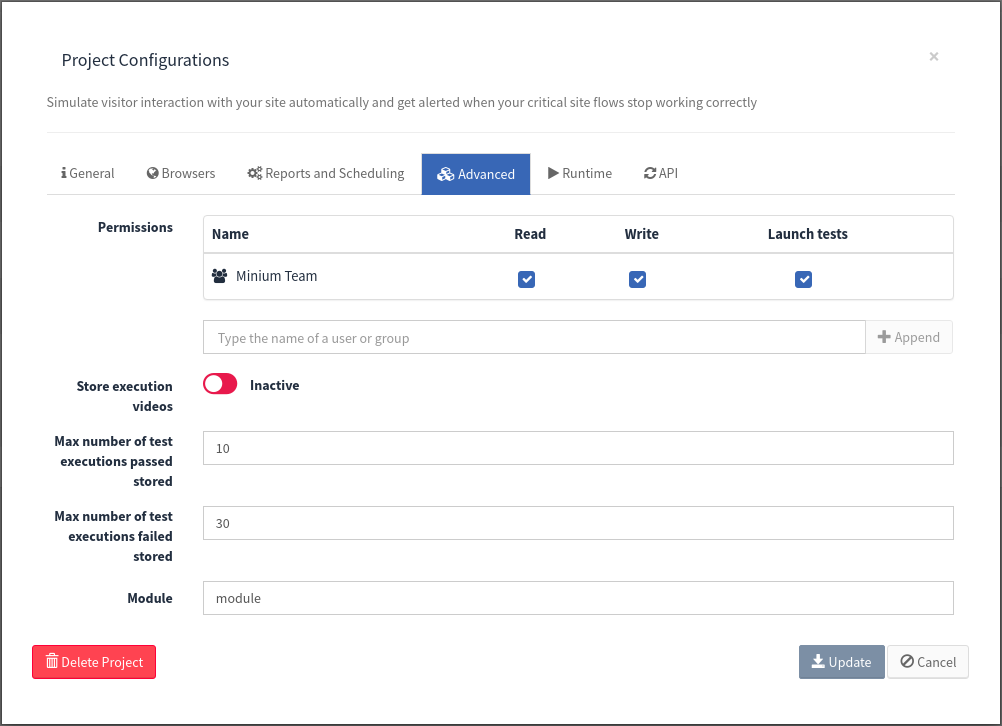
On the Advanced tab, fill the following fields:
Permissions |
Add and personalize the level of access that assigns to each user or group. |
Store executions videos |
Configuration to allow the storage of videos of the executions. When inactive, no videos will be stored, otherwise the videos will be stored. By default, the storage of videos is inactive. |
Max number of test executions passed stored |
Set the max number of executions passed to be stored at Minium Manager. The default value is 30. |
Max number of test executions failed stored |
Set the max number of executions failed to be stored at Minium Manager. The default value is 30. |
URL Loading time threshold |
Maximum time to load a page (in seconds) to warning the user at the executions page. Available only to Monitoring projects |
Module |
The path to the folder where the features are in the repository (e.g. minium-developer-e2e-tests). |
10.3.5. Runtime
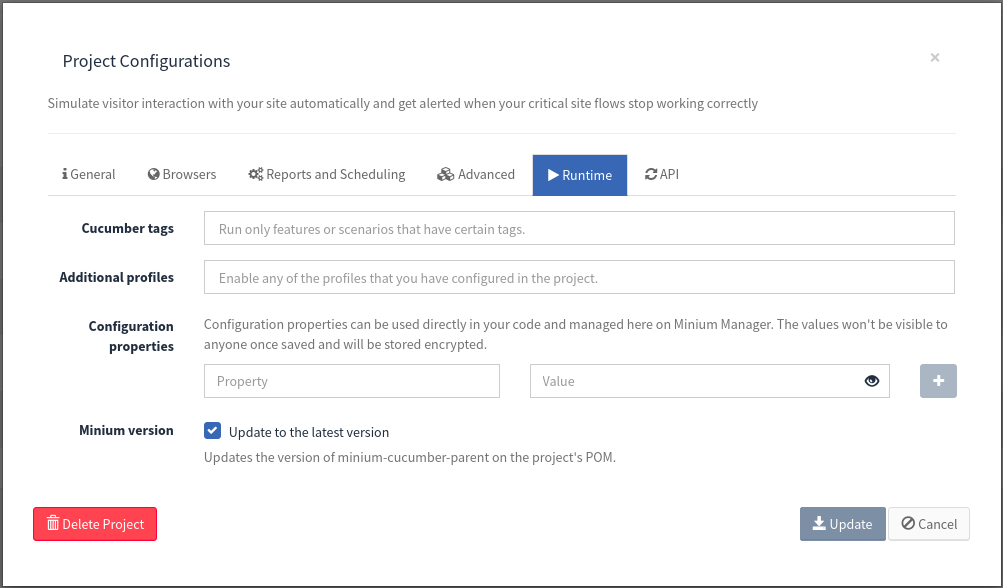
At the Runtime tab, fill the following fields:
Cucumber tags |
Use this option to tell Minium Manager that only run features or scenarios that have certain tags. |
Additional Profiles |
Enable any of the profiles that are configured in the |
Configuration properties |
This configuration properties can be used directly in your code and managed here on Minium Manager. The values won’t be visible to anyone once saved and will be stored encrypted. |
Cookie Crawler
For the Cookie Crawler project the Runtime tab is different:
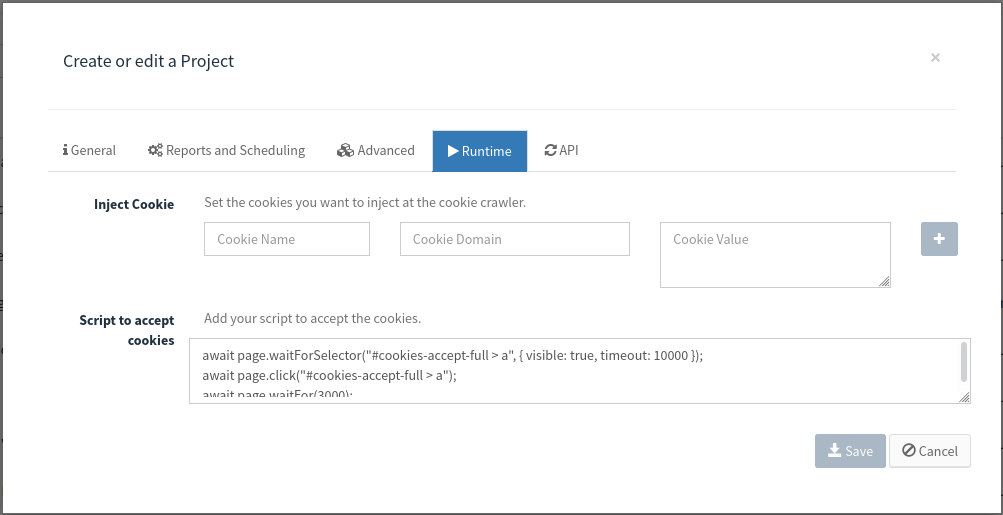
Inject Cookie |
The cookies you want to inject at the crawl (e.g. cookie to accept the cookie warning) |
Script to accept cookies |
The script to accept the cookie warning (in puppeteer). This field is related to the field |
10.3.6. API
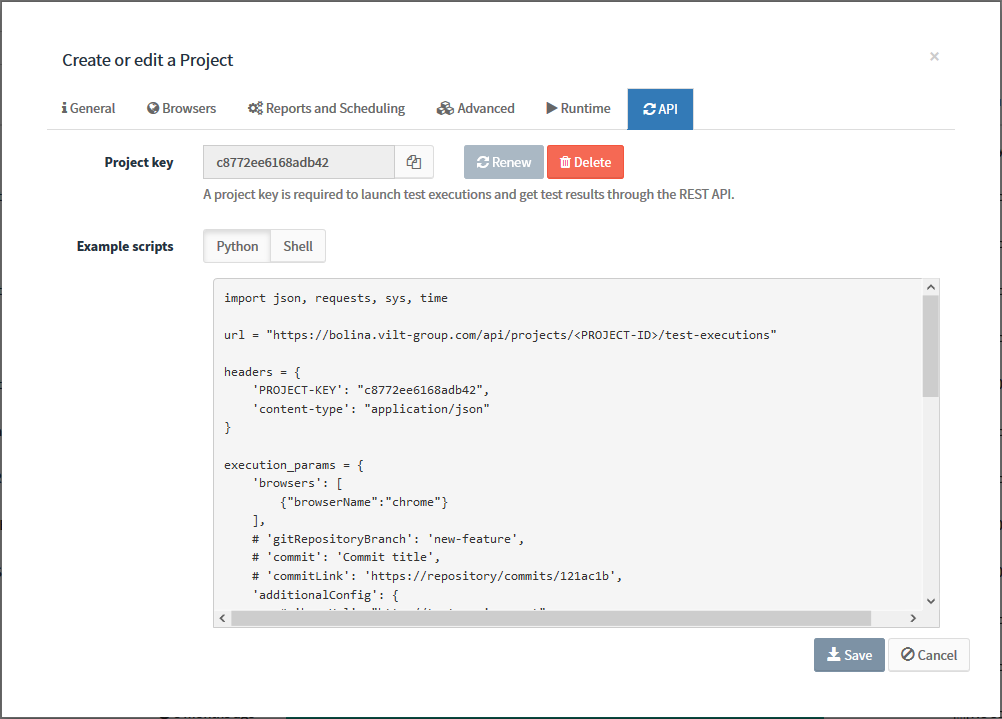
On the API tab, fill the following fields:
Project key |
Generate a project key (required to launch test executions and get test results through the REST API). |
Example scripts |
Once the project has an API key, the scripts will be fulfilled with the project-specific data and ready to use. The first part of the script shows how to launch a test execution. |
10.4. Project permissions
Manage the access levels of the users/groups in the projects. It is also possible to add and personalize the level of access that assigns to each user or group, per-project.
|
Note:
Write permissions is required to update the permissions of a project. |
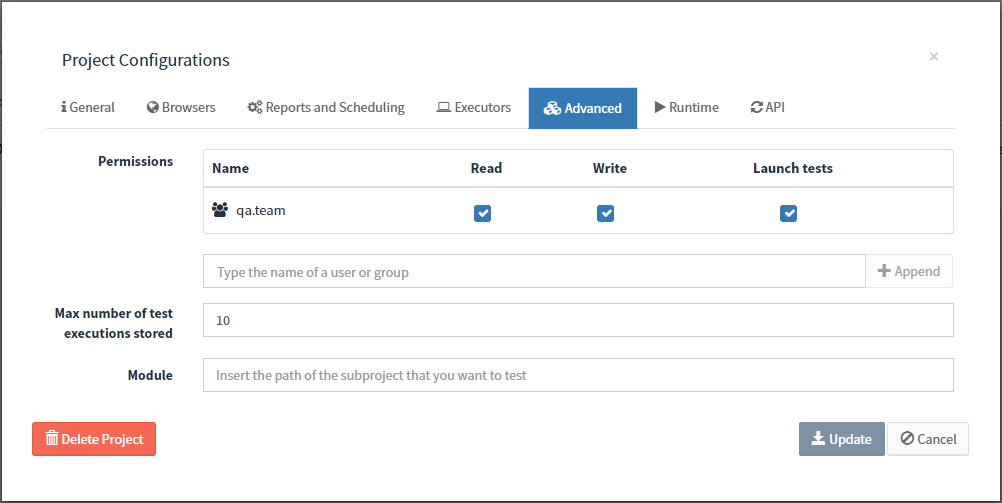
In order to change the project permission the first step is go to the project configuration and click on tab Permissions.
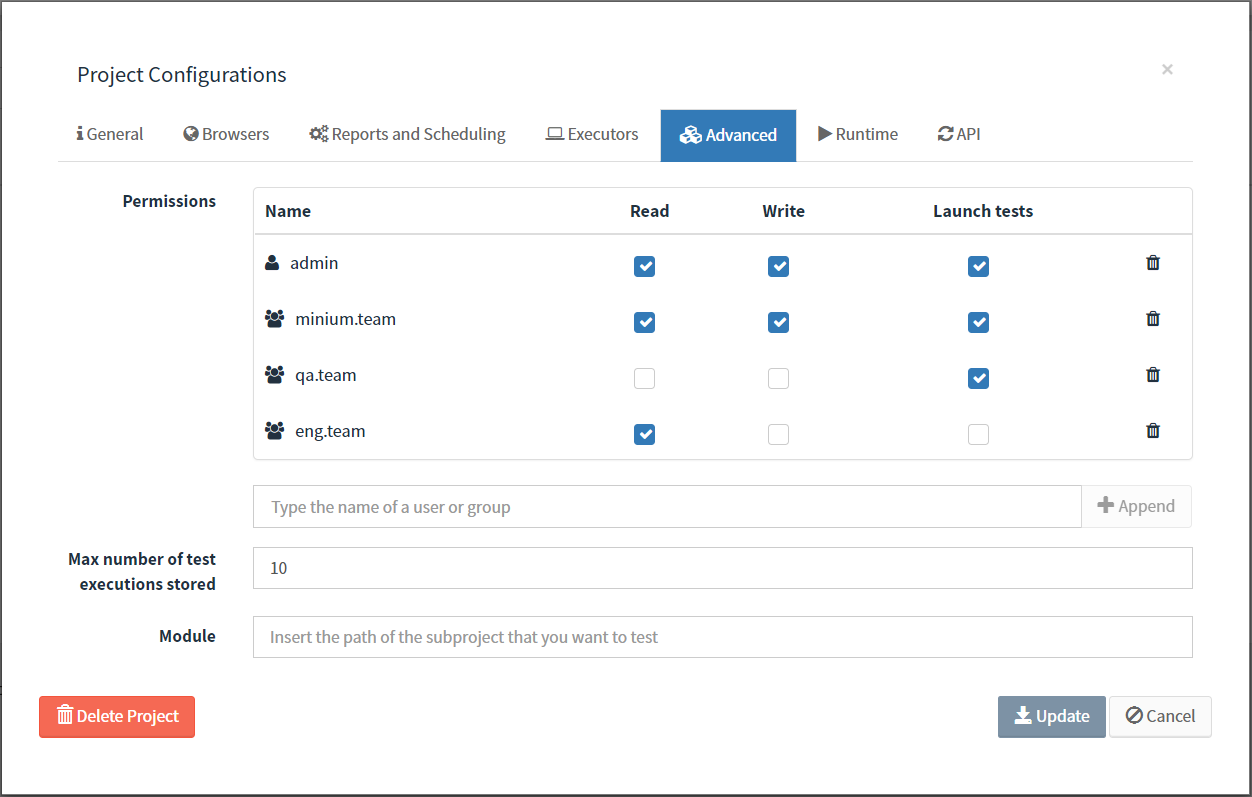
Add user or groups to the permission table. Below the permission table, start typing the name of the user or group desired. Then click on the button Append.
|
Note:
It is possible to select more than one user or group. |

After the users or groups was appended to the permissions table, define the permission for each entry appended and click Update to save the project configurations.
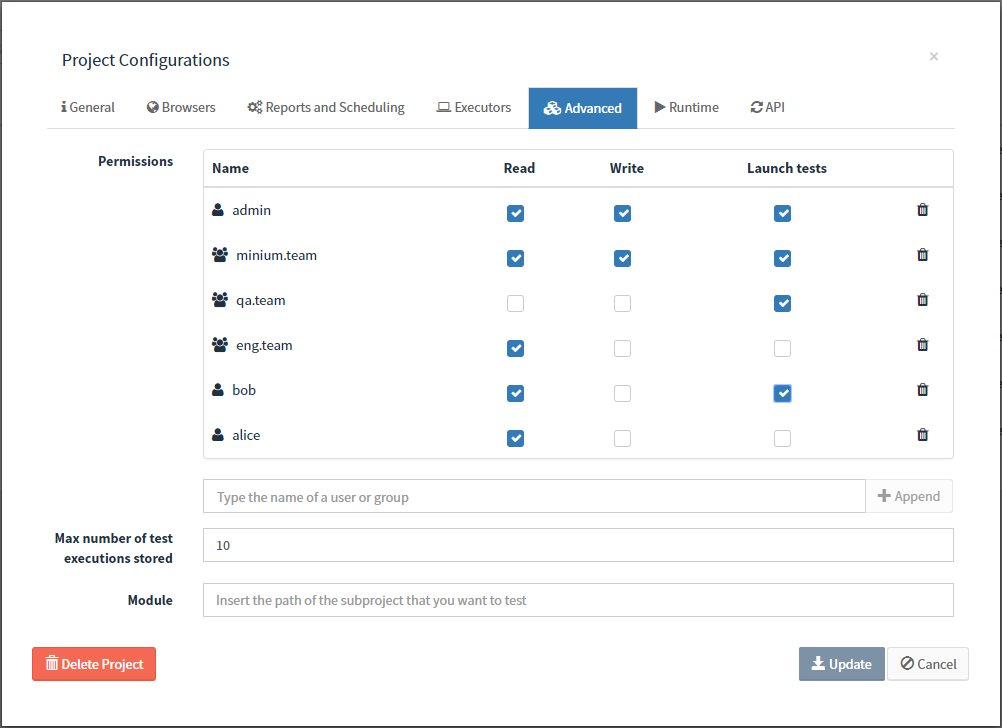
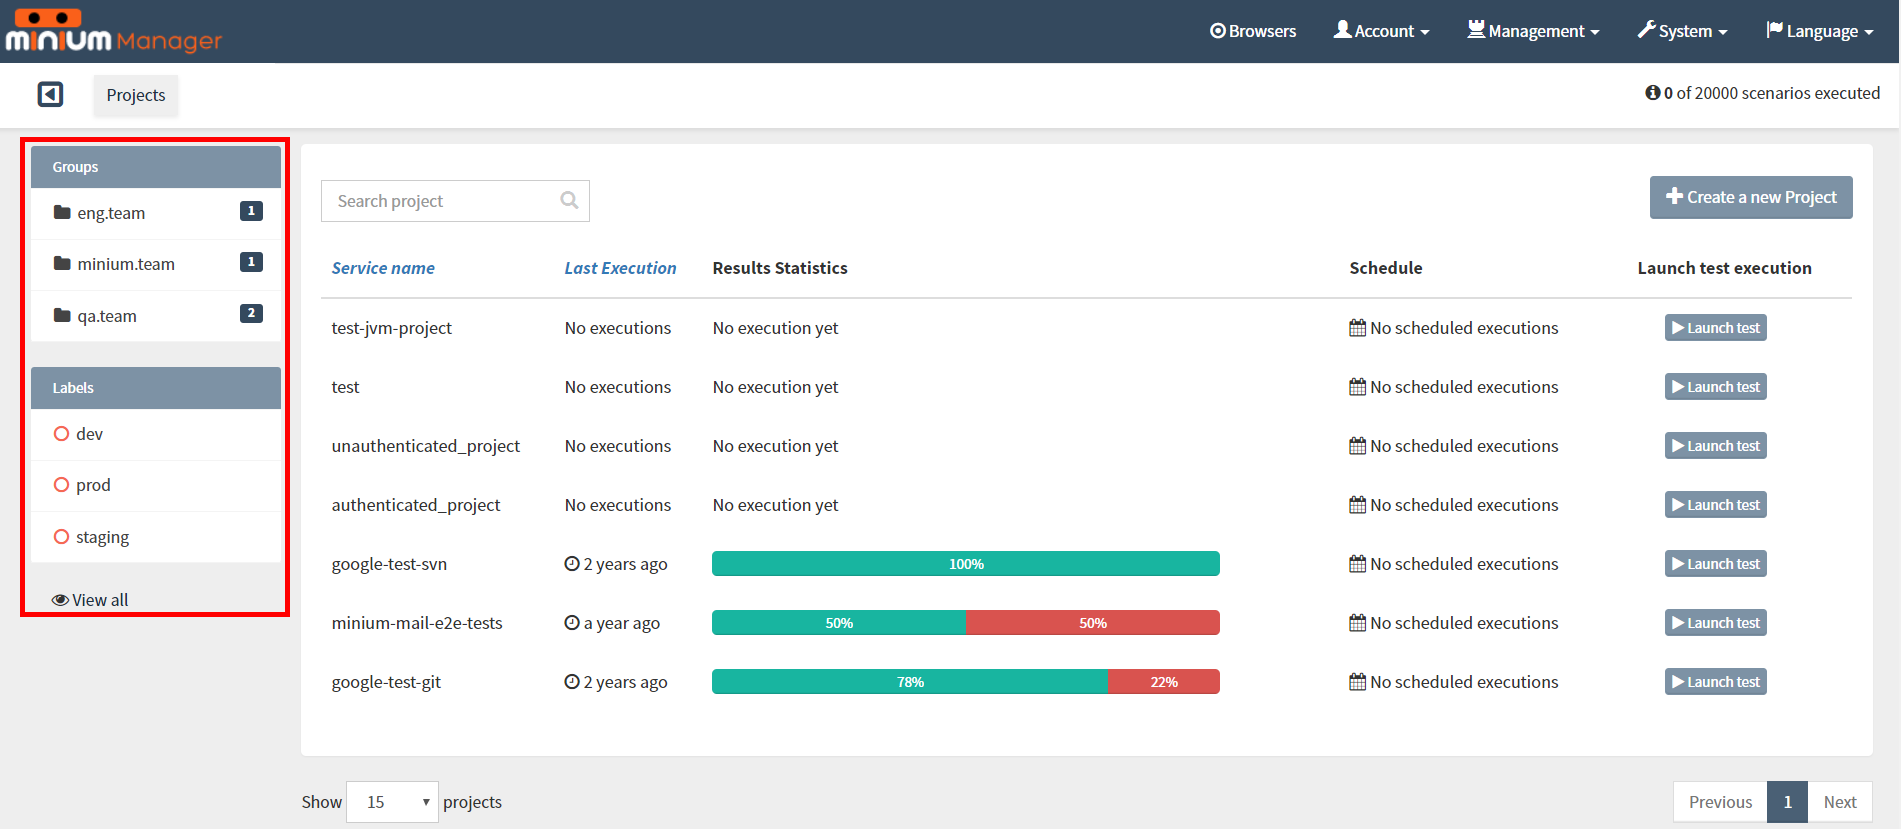
10.5. Organise projects by Labels or Groups
Labels were meant to be used only to filter projects in the Projects page providing a useful way to organize the projects.
10.5.1. Manage Labels
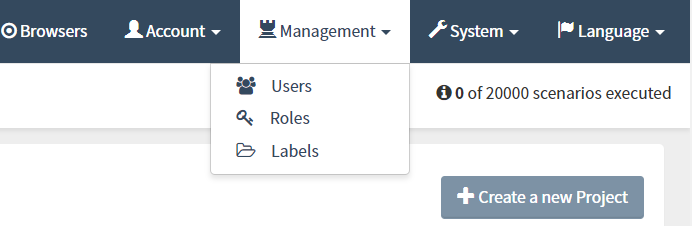
To manage the labels, open the Management menu and click on Labels:
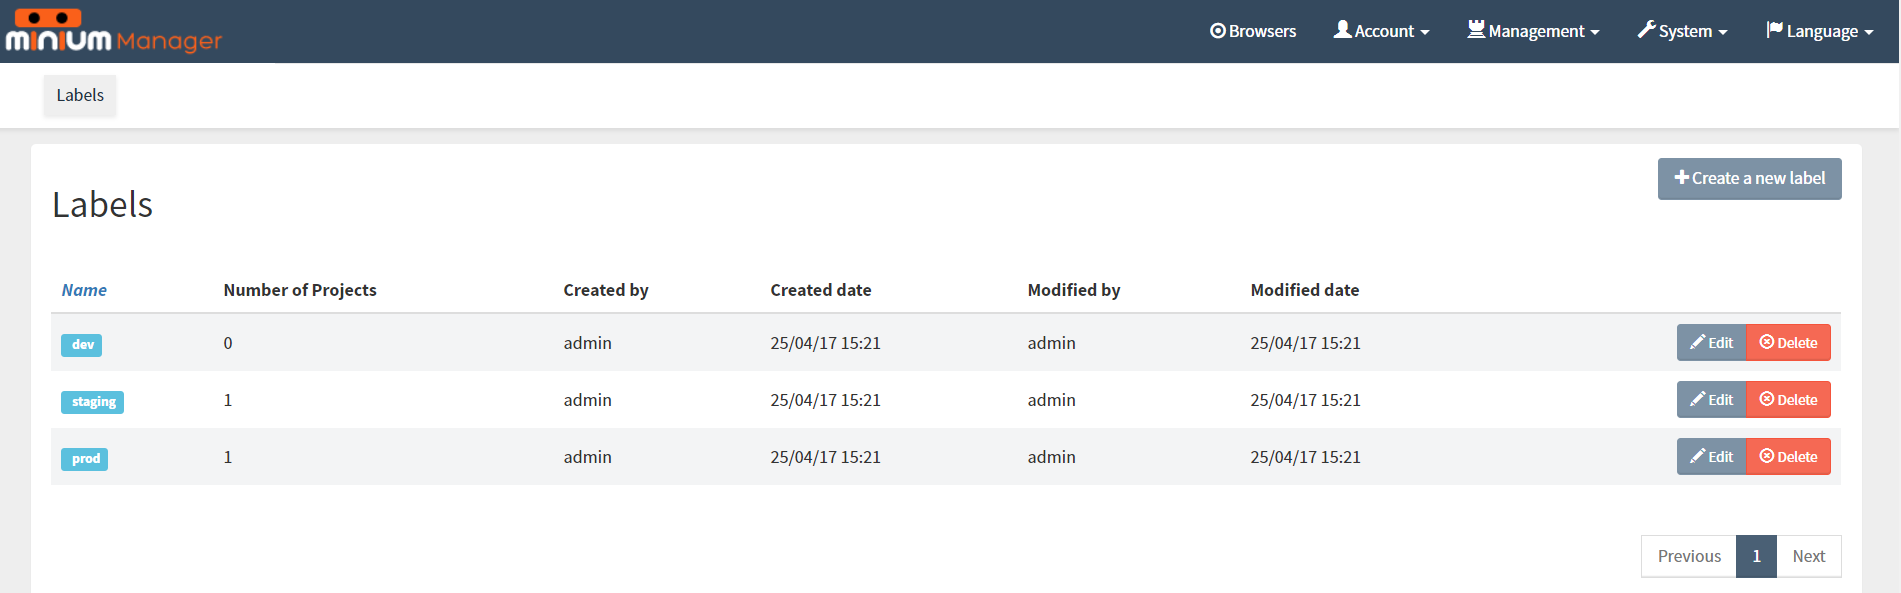
The Labels page is shown with all current labels. Edit, delete and create new ones if desired.
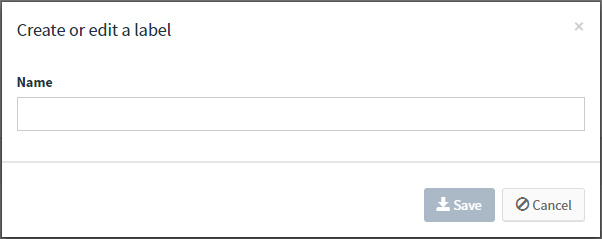
To create a new label, click on Create a new label.
To delete or edit an existing label, click on Edit or Delete respectively.
10.5.2. Assign labels to the projects
To assign some labels to a project, go to the project configurations:
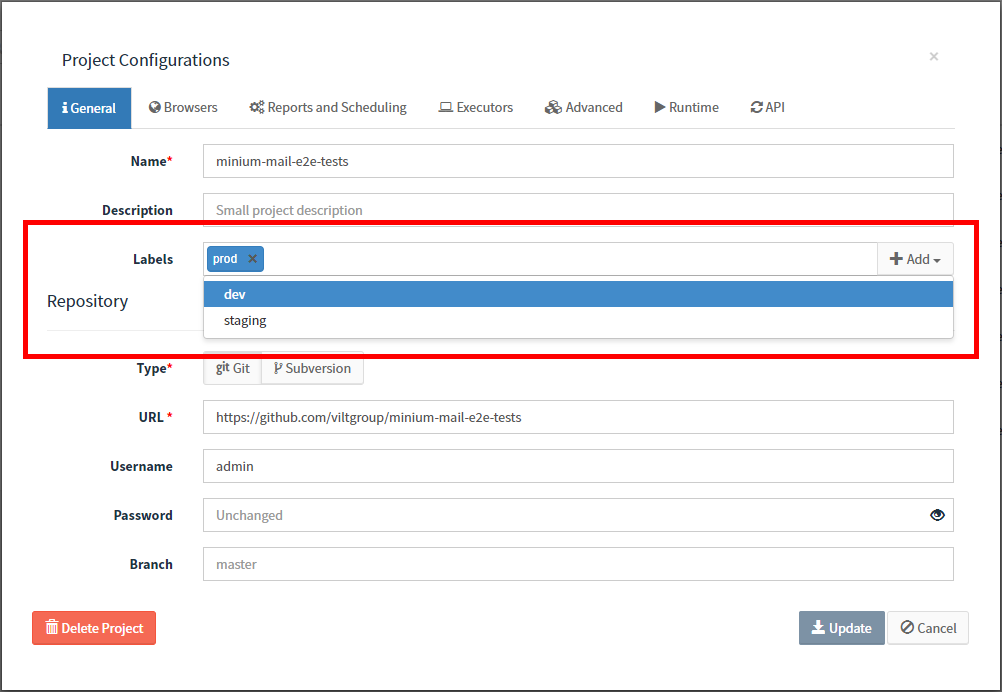
The Add button can be used to create new labels if needed.
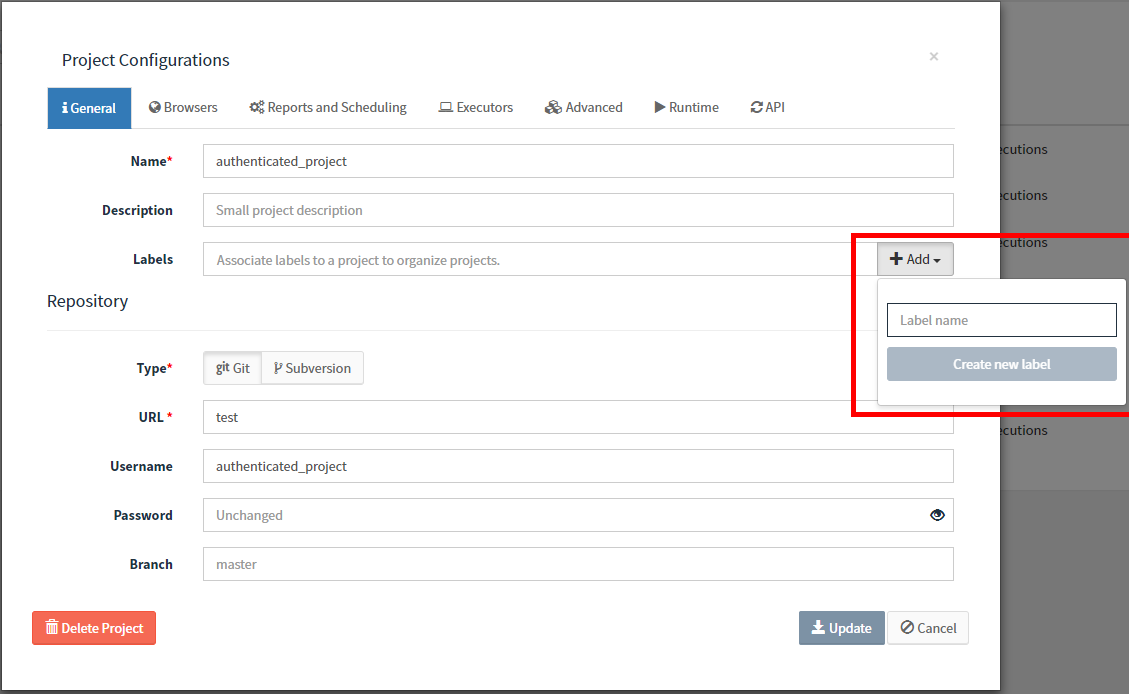
10.5.3. Manage groups
Groups are intended to organize projects at a higher level and to perform changes in several projects at a time.
Manage groups using LDAP authentication
If Minium Manager is using LDAP to manage the users, the groups are configured through the LDAP.
In the project configuration, search for groups. Below the permission table, start typing the name of the user or group. This will perform a search into the LDAP directory.
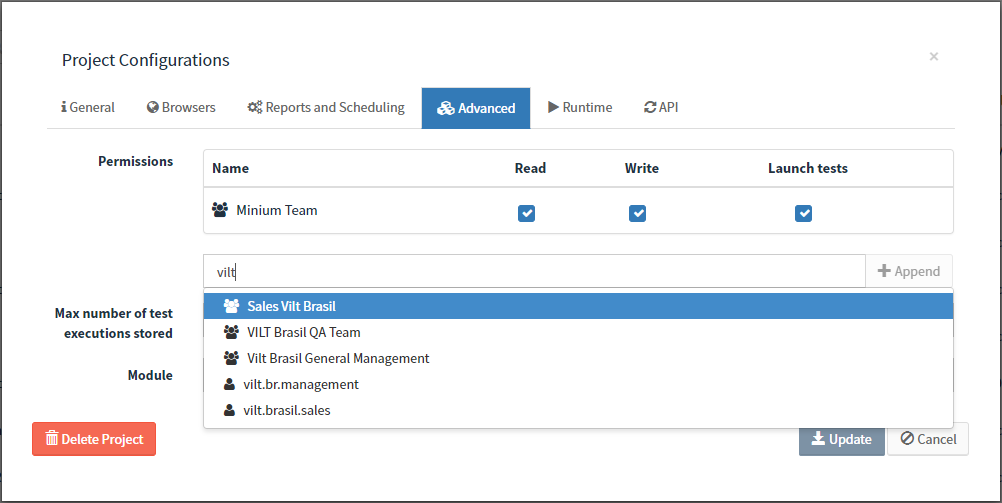
Manage groups without LDAP authentication
If Minium Manager is not using LDAP authentication, create new groups through the user management UI.
|
Note:
Only the users with Admin privileges are allowed to create groups.
|
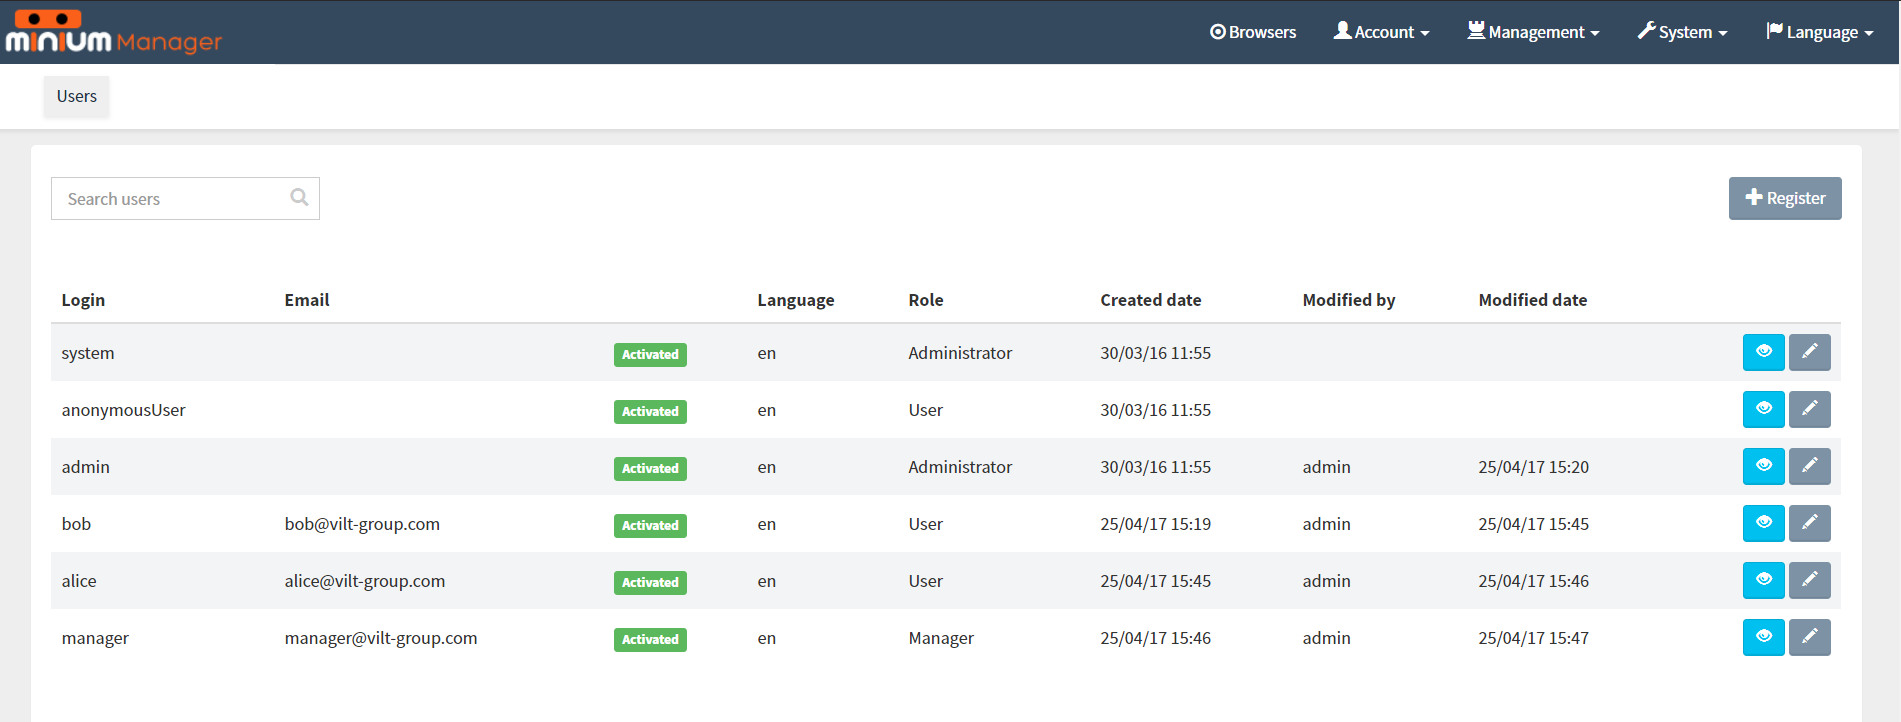
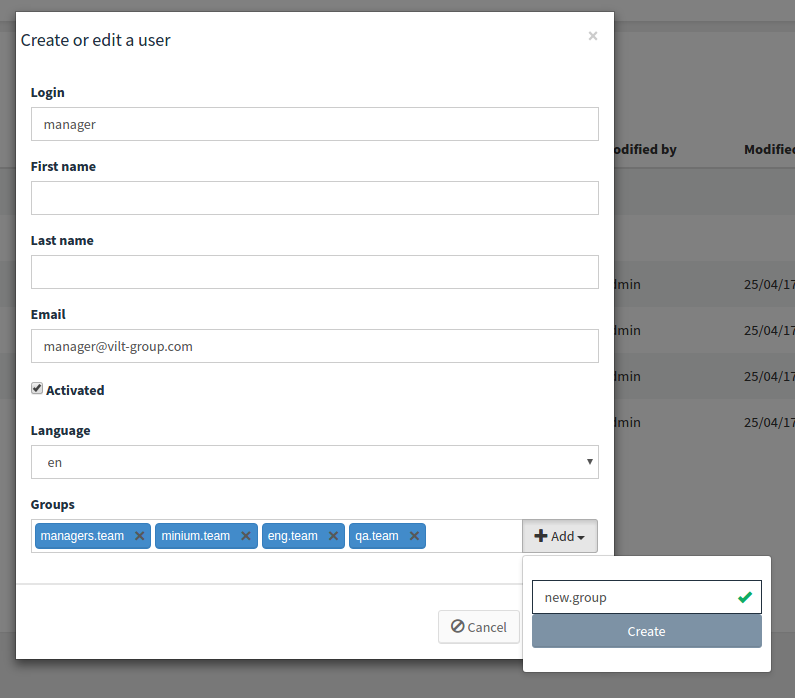
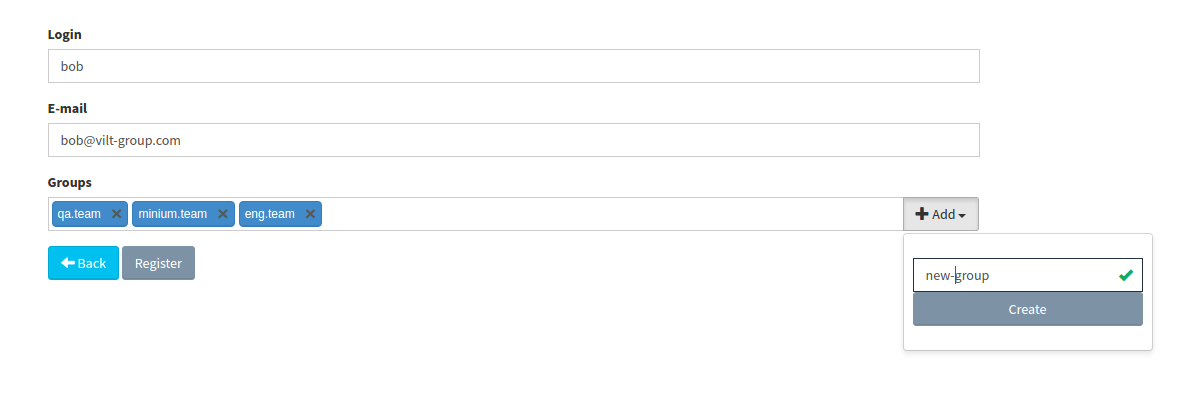
If desired, add permissions to the group recently created in the project configuration. Below the permission table, start typing the name of the group created.
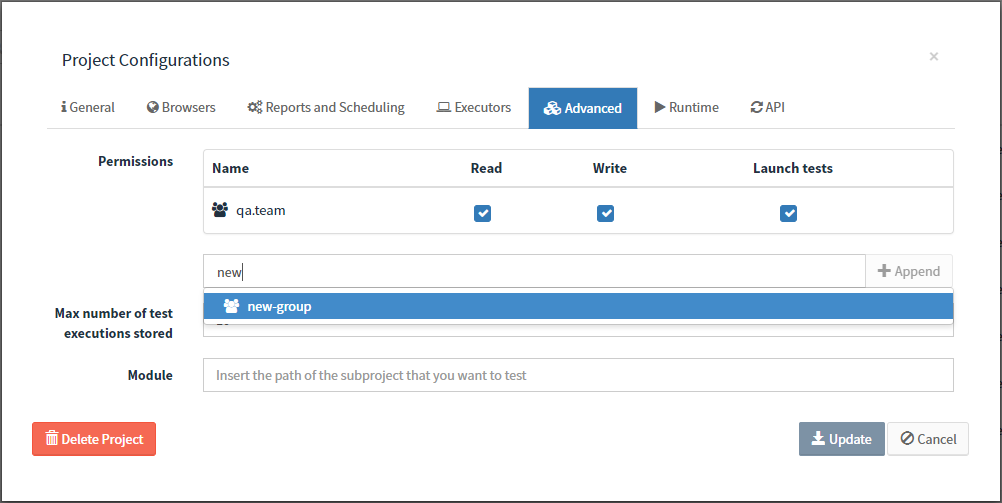
10.5.4. Organise Projects
Using groups and labels to organise the projects selecting a group and labels from the sidebar.
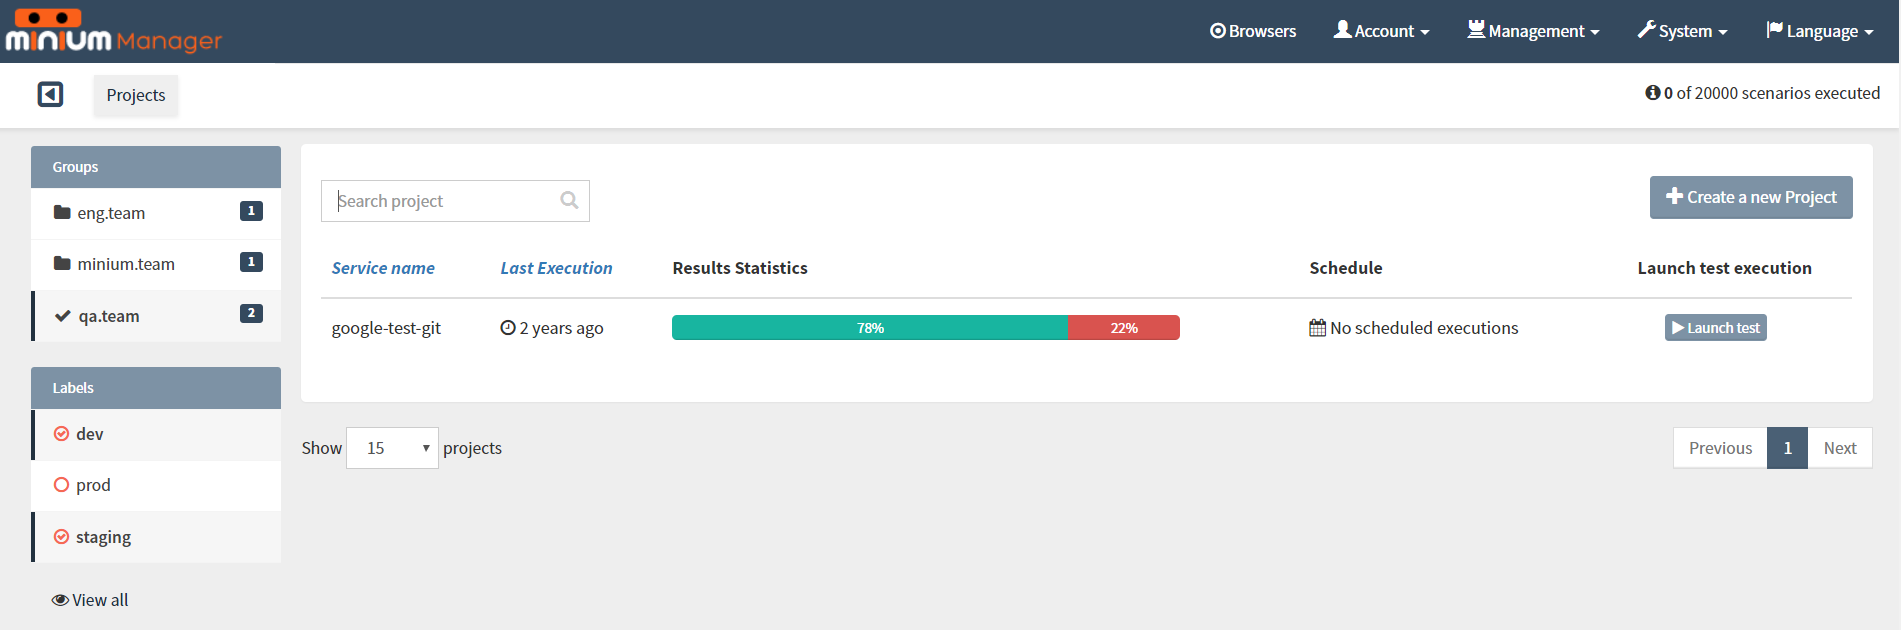
Select one group at a time, but select multiple labels and combine both.
In the case of the figure above, notice that the group qa.team is selected and two labels are also selected (dev and staging). With filters applied, exists one project shown in the project list.
This means that the one project belong to the group qa.team (see it in the figure below).
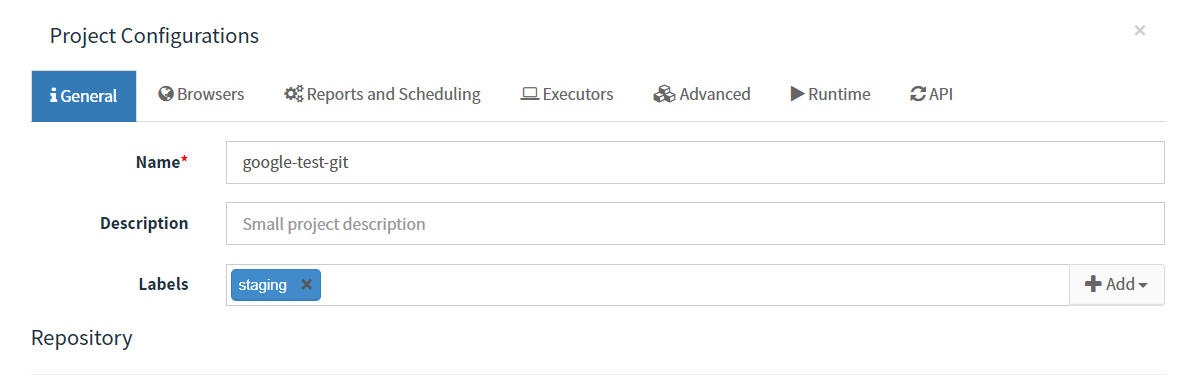
The project either has the label dev or staging associated with it in the project configuration (as shown in the figure below).
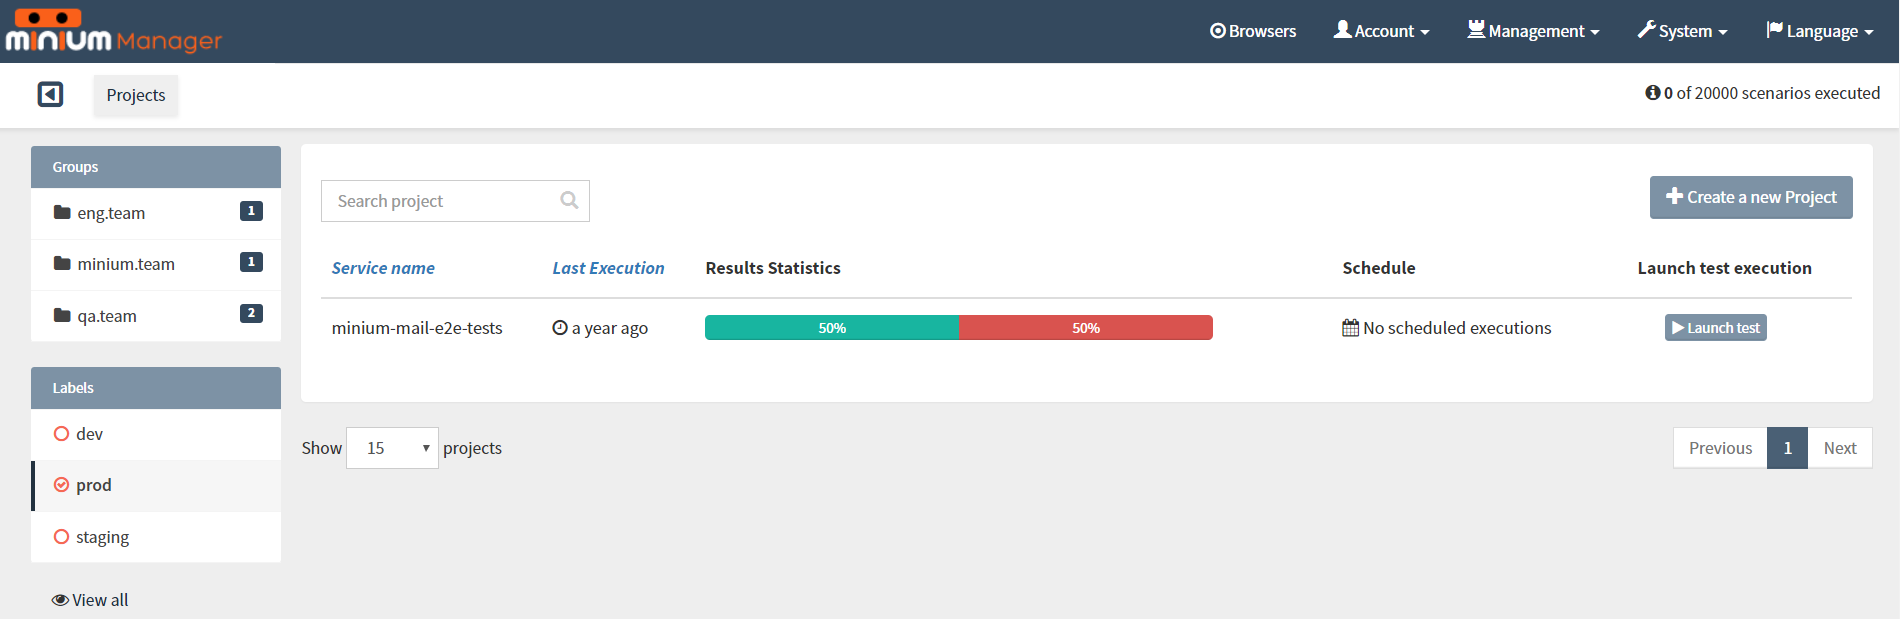
Select a group or one or more label, like shown in the figure below. In this specific case, are selected only the label prod, without selecting any group. It means that all the projects in the list have the label prod associated.
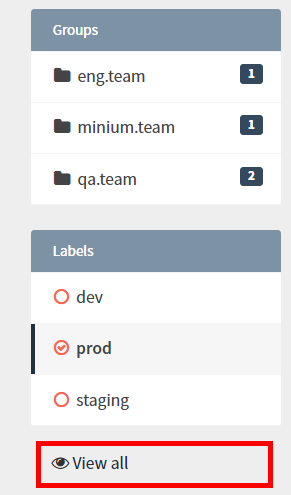
Clean project filters
By clicking on the link CLEAR ALL, it will remove all the selected filter.
Project Type
We can filter the projects by its type. Select the project type(s) to filter the project list:

Auto Refresh
By default, the project page will be refreshed every minute. Also, you can configure the project page to refresh every 5 and 10 minutes.
To disable the auto refresh, just click on the link "AUTO REFRESH":
|
Note:
The link "AUTO REFRESH" with the ban icon, means that is disabled; The link "AUTO REFRESH" with the check icon, means that is enabled. |
Filter by Results
Select the result status to filter the projects in the projects list:
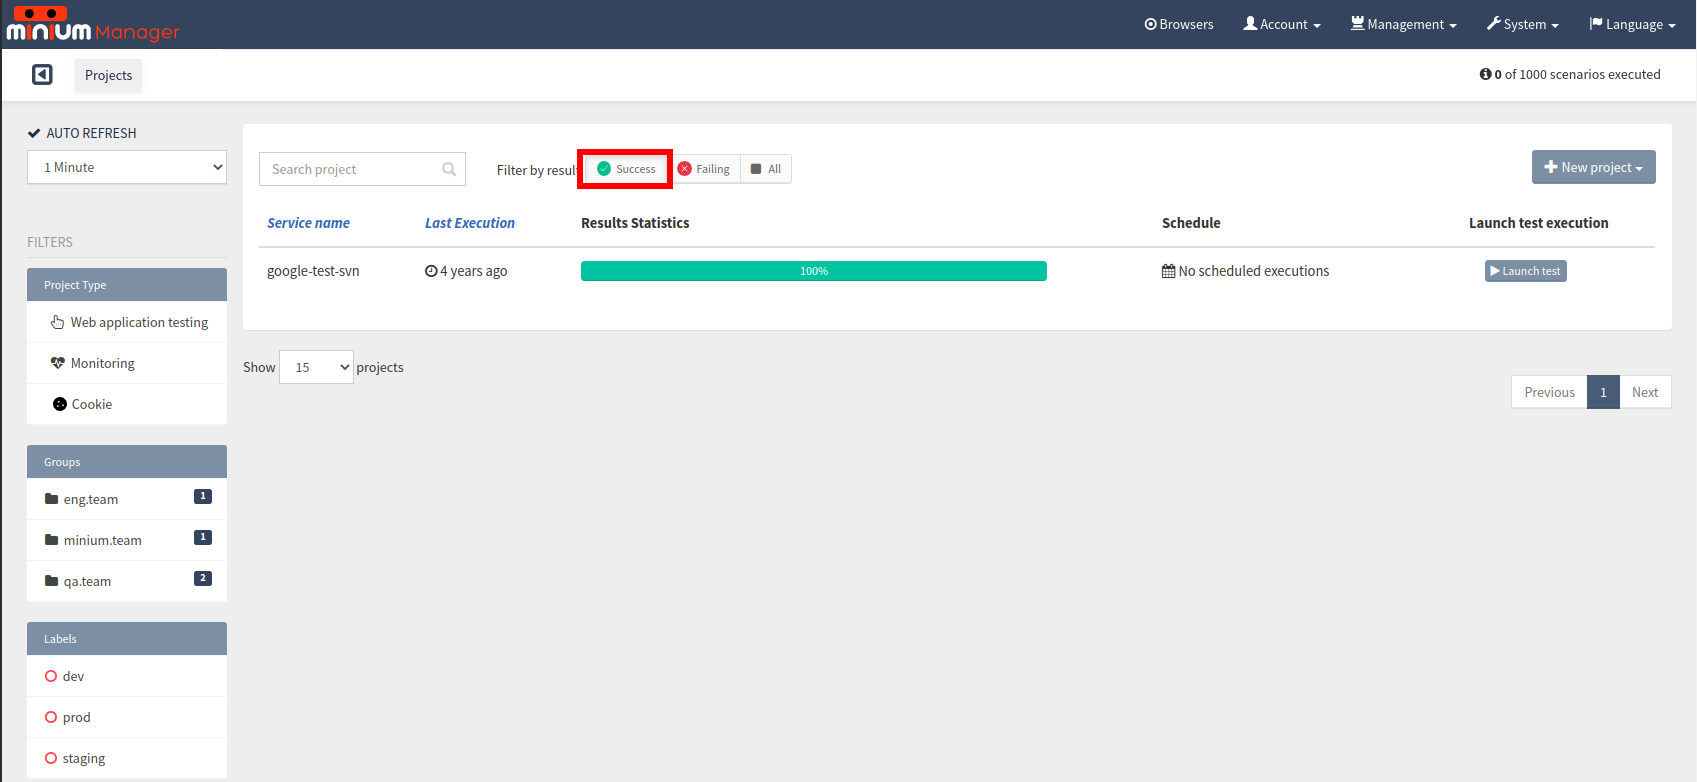
10.6. Configuration profiles
Configuration profiles can be defined on the config/application.yml of a project and used to load configuration properties that vary based on the environment being tested. Such a configuration could be for example the URL of the application or the language:
# default values
minium:
  config:
    baseUrl: http://localhost
    language: English
---
spring.profiles: qa
minium:
  config:
    baseUrl: http://staging
---
spring.profiles: es
minium:
  config:
    language: Spanish
These configuration properties can then be used on the step definitions like this:
When(/^I go to the homepage"$/, function() {
  browser.get(config.baseUrl);
  $(".dropdown").withText("Language").click();
  $(".dropdown a").withText(config.language).click();
});
Then to run test executions with the configuration properties of a profile, go to Project Configurations and add it to Additional profiles:
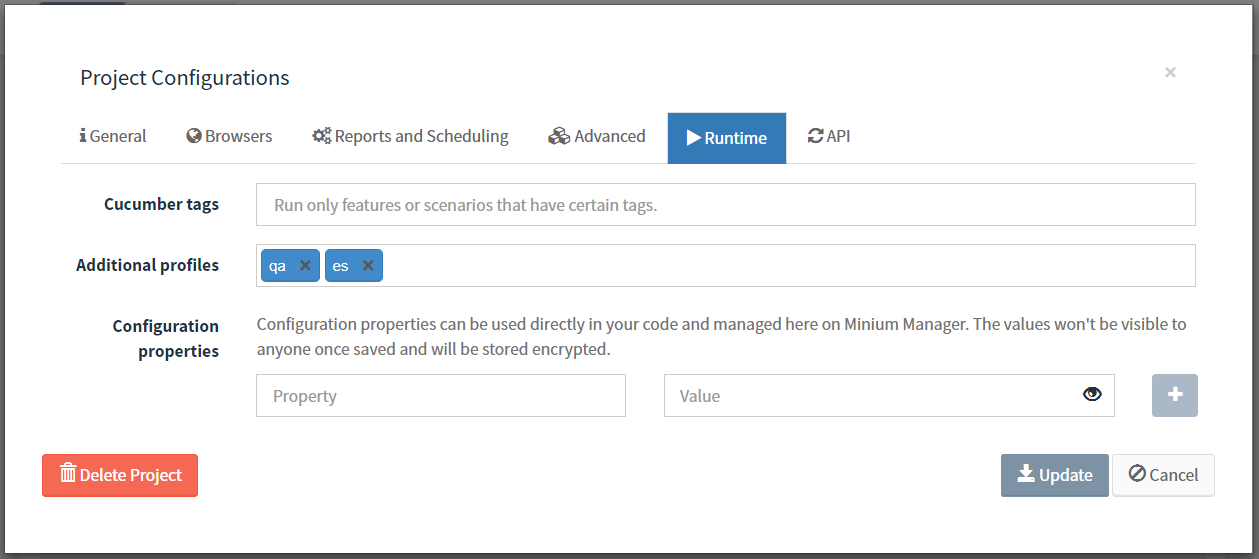
10.7. Secret configuration properties
Sensitive configuration properties that cannot be included on the repository of the tests can be safely stored on Minium Manager. They can be used just like the configuration properties defined on the config/application.yml file of the project. As an example, consider that some tests need to be executed against a production environment which requires a password that cannot be exposed on the code. In that case, only the password to be used on the test environment would be defined on the config/application.yml file:
minium:
  config:
    baseUrl: http://staging
    username: test
    password: minium

---
spring.profiles: prod

minium:
  config:
    baseUrl: https://production
    username: admin
Which would be accessible through the config.password during the tests:
When(/^I login"$/, function() {
  browser.get(config.baseUrl);
  $(":text").fill(config.username);
  $(":password").fill(config.password);
  $(":submit").click();
});
The password to be used on the production environment would then be defined on the Project Configurations:
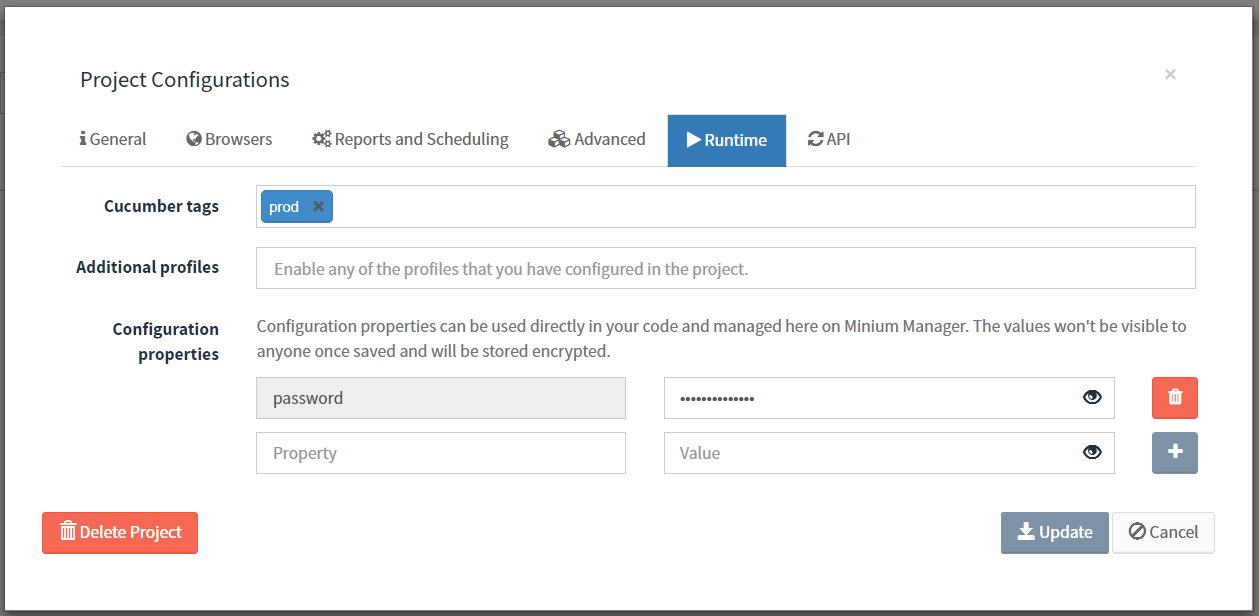
10.8. Add test information to Minium Manager Report (output)
We can add information of the test execution to the Minium Manager report by adding a simple minium instruction to the code of the Minium Project.
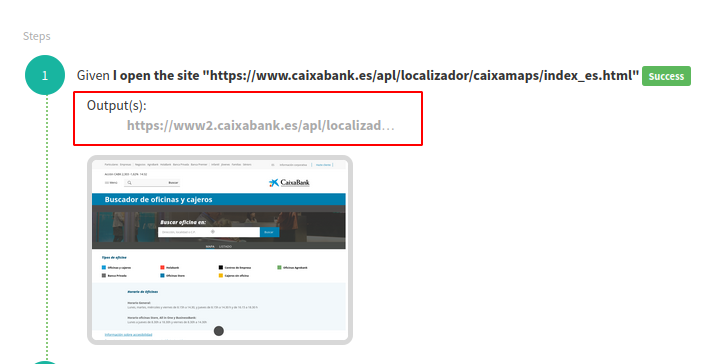
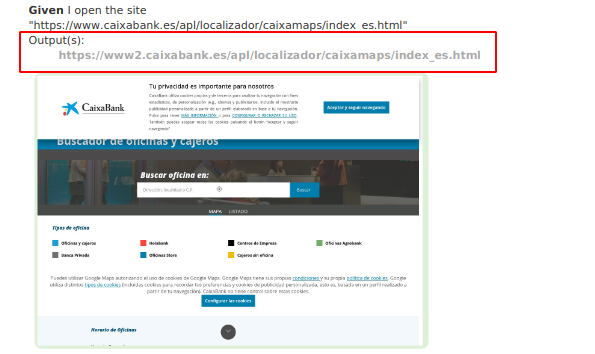
By add the minium expression scenario.write(…); we are able to pass data to the Minim Manager report. E.g.:
Given(/^I open the site "([^"]*)"$/, function(url) {
    browser.get(url);
    scenario.write(browser.getCurrentUrl());
    scenario.embed(browser.screenshot().asBytes(), "image/png");
});
The previous script will generate the following output in the Minium Manager console:
On the PDF report:
10.9. Delete a project
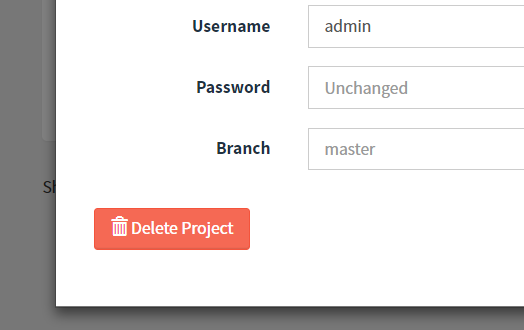
To delete a project, go to the project configurations and click on the button Delete Project, at the bottom-left corner:
10.10. Edit projects in batch
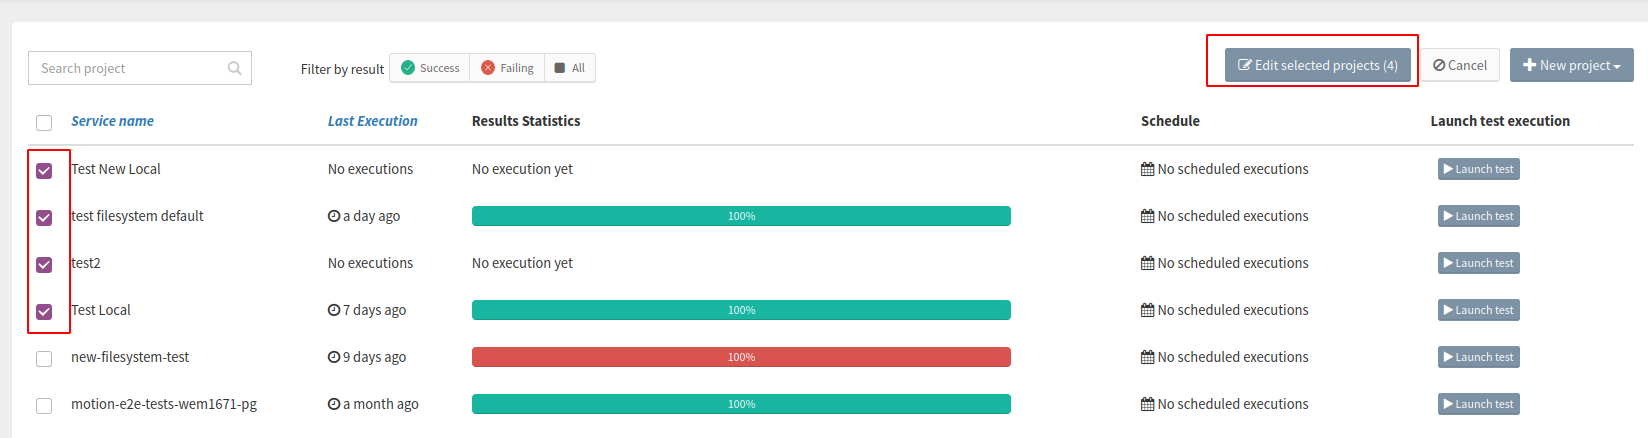
To edit projects in batch, click on the button Edit multiple projects:

After the click, select the projects you want to edit and click on the button Edit selected projects:
After, you can edit the common properties of the projects in the modal:
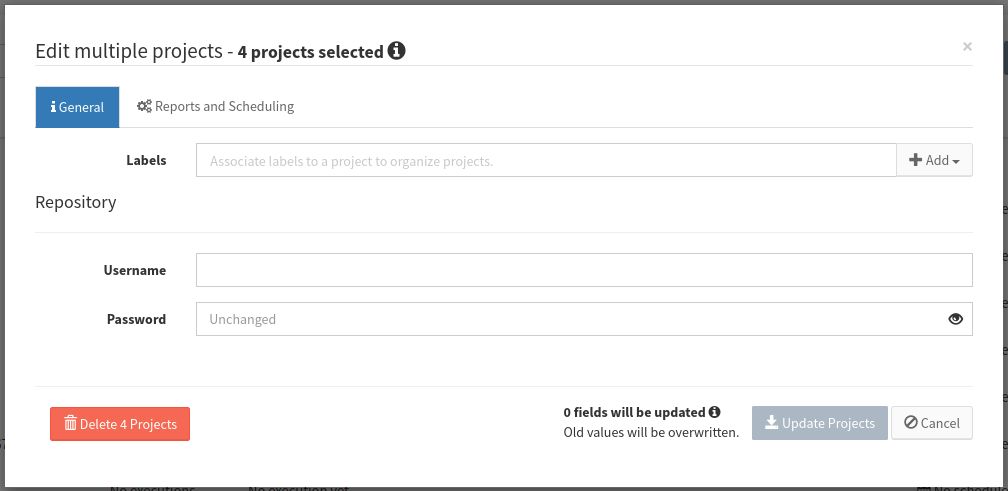
After the changes, click Update Projects to save the changes ou Cancel to return to the projects page.
To stop the edit and deselect the projects, you can click Cancel:
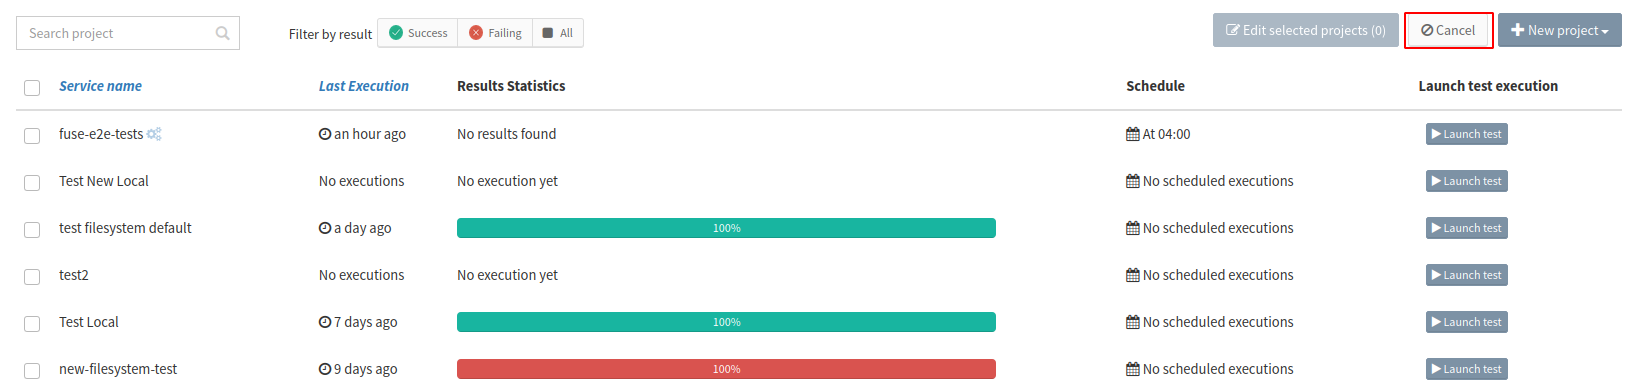
10.11. View Queue
To view the current queue of executions, click on the Project Queue under the navbar:
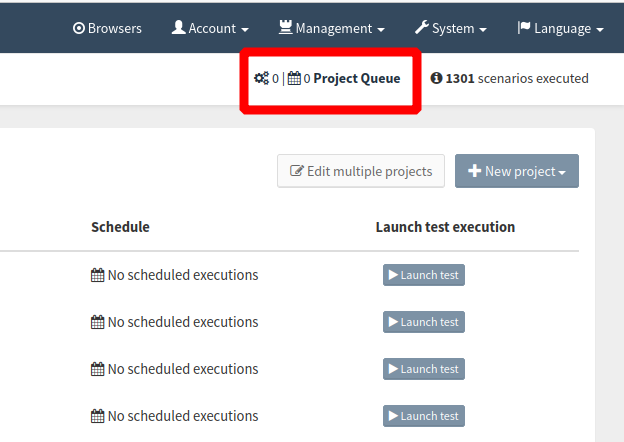
After the click, you can see the modal with the queue, with the projects Running and In Queue:
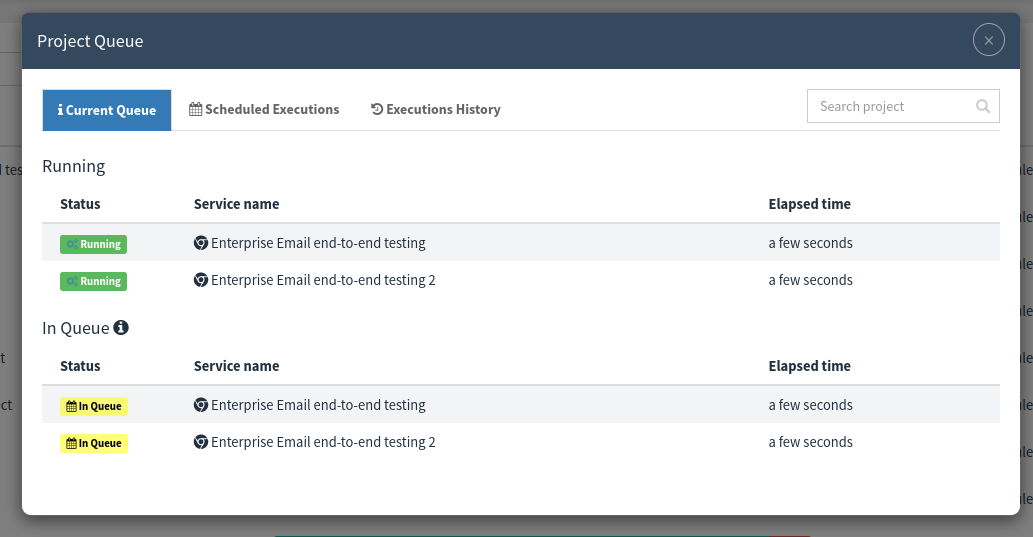
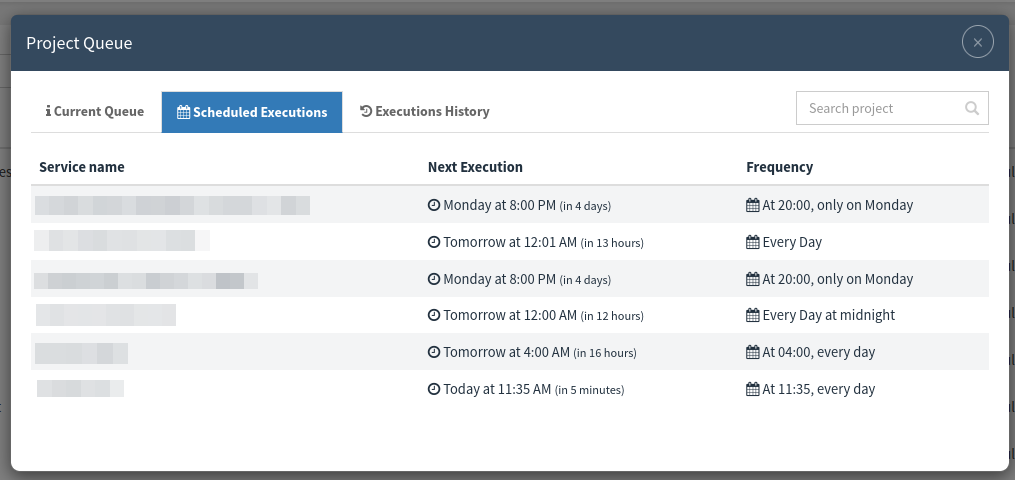
At the modal, we can also see the Scheduled Executions that will be executed in the future:
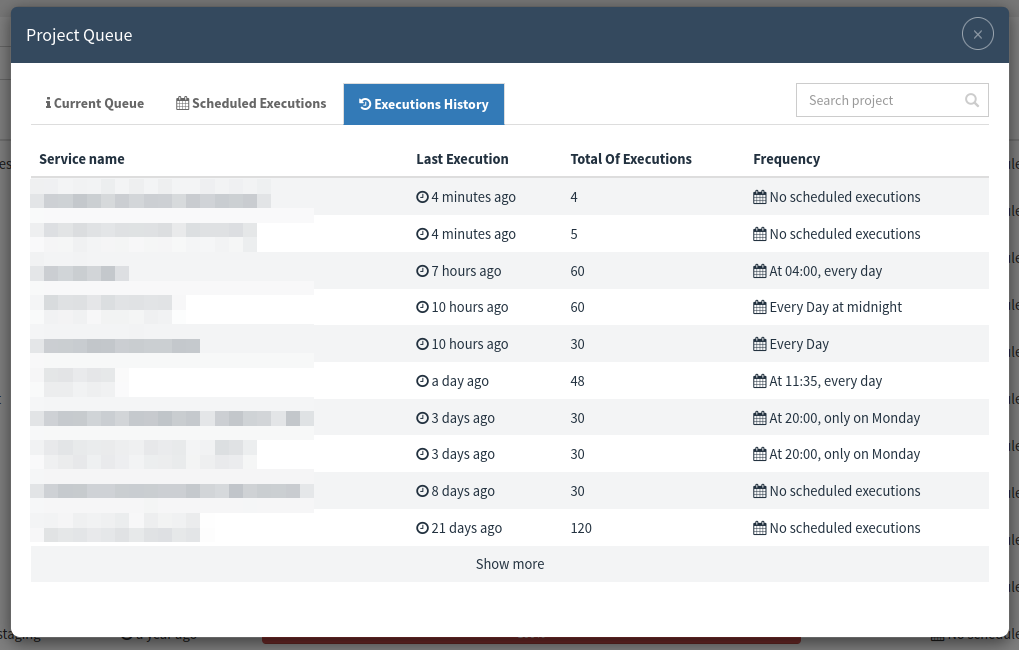
Also, the Executions History for the projects:
10.12. Edit project code (Projects in filesystem only)
If the project is configured with the repository type File System, after the upload, we can edit the code of the Minium project.
The editor can be opened through several shortcuts:
At Project Configurations by clicking at the button Edit:
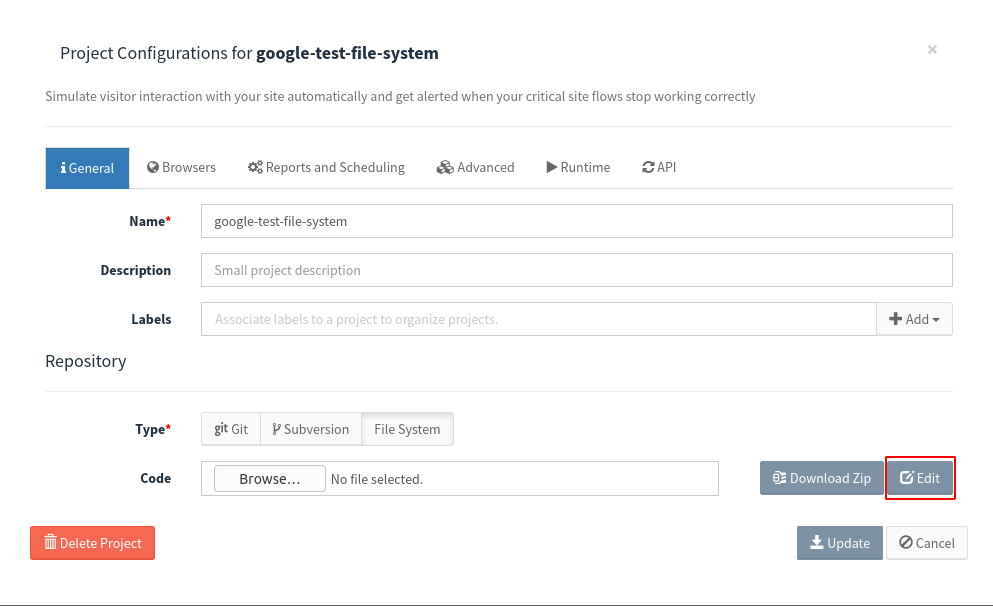
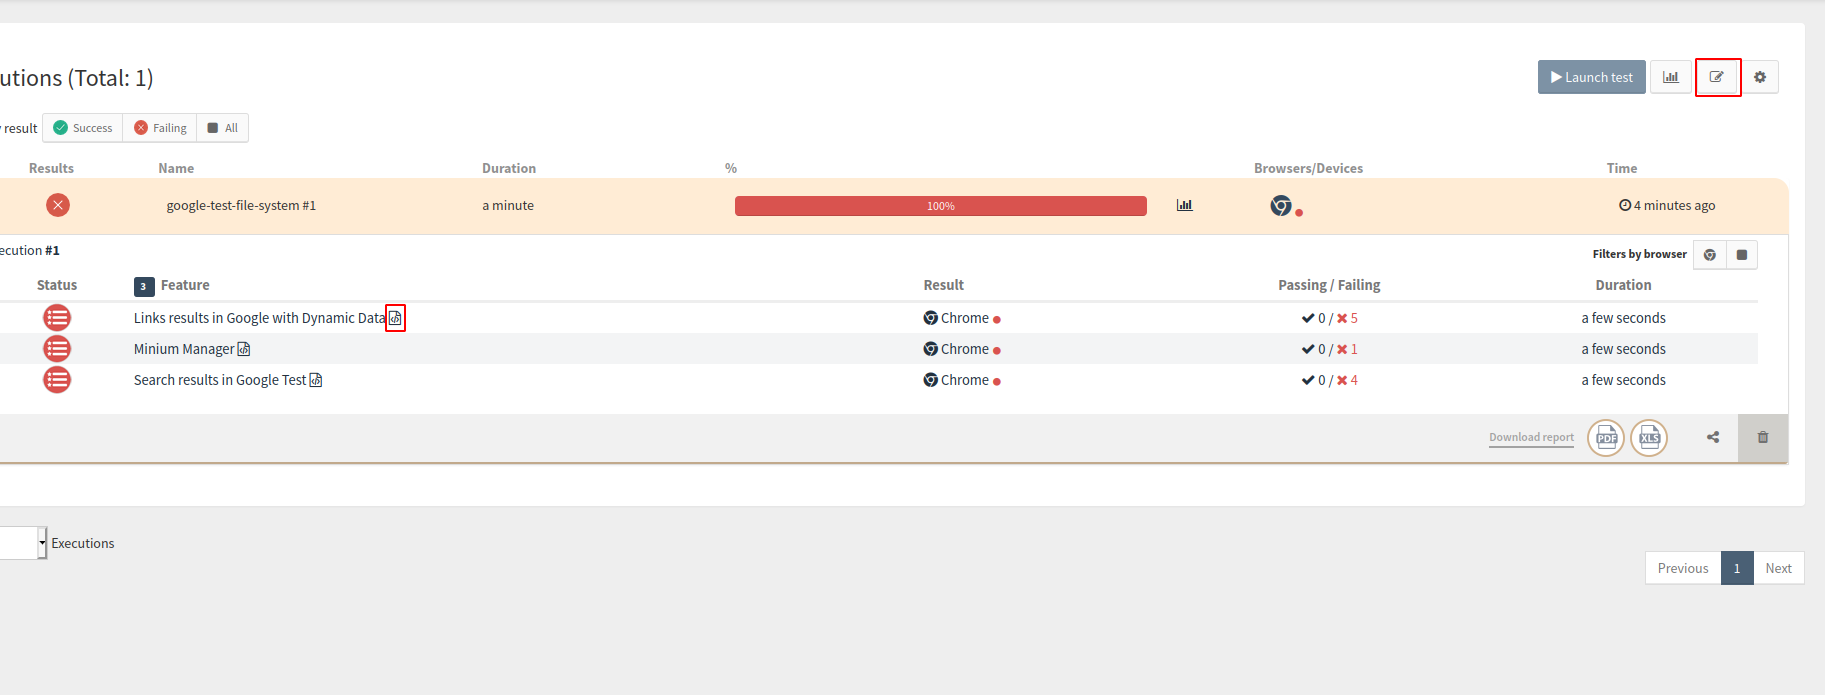
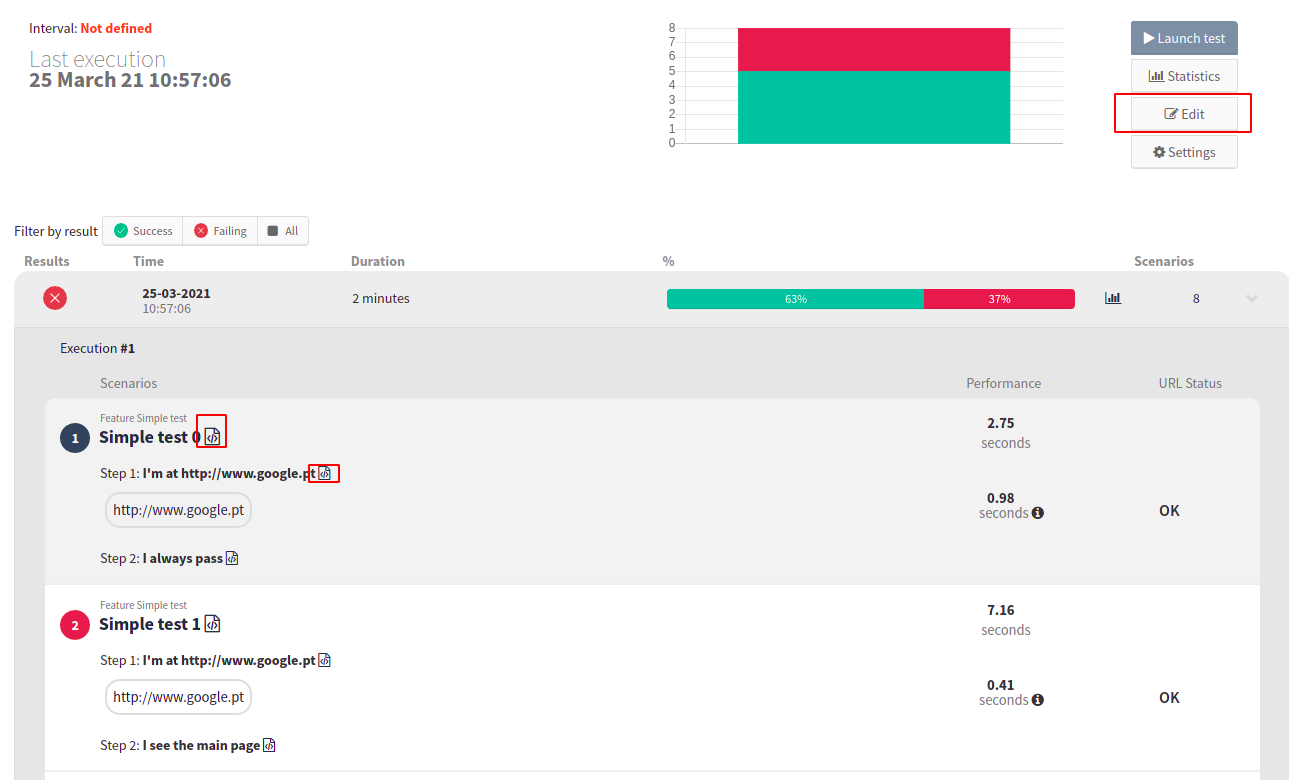
At Executions page by clicking at the button Edit, at the feature shortcuts (at web application testing project) and at the scenario and step shortcuts (at monitoring and cookie report project):
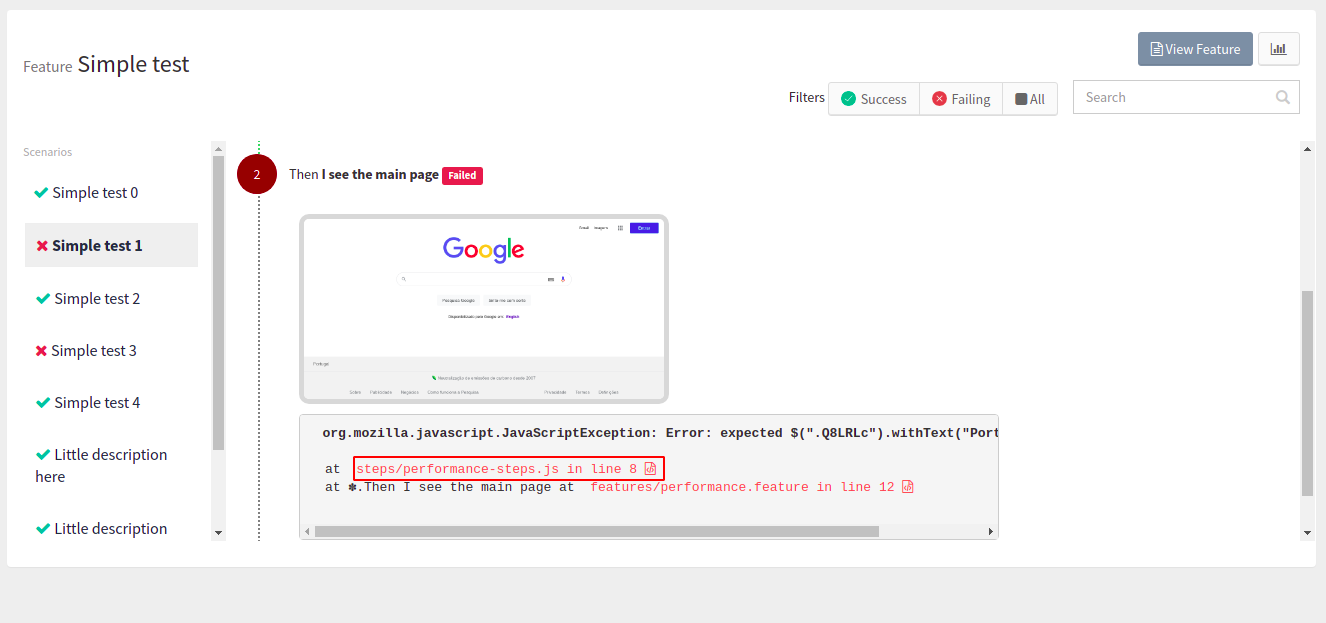
And at the Feature page, at the feature, scenario, step, and the links at the error message will have a shortcut to the editor:
After click on the button or the shortcut to the editor, a new tab will open with the code of the project.
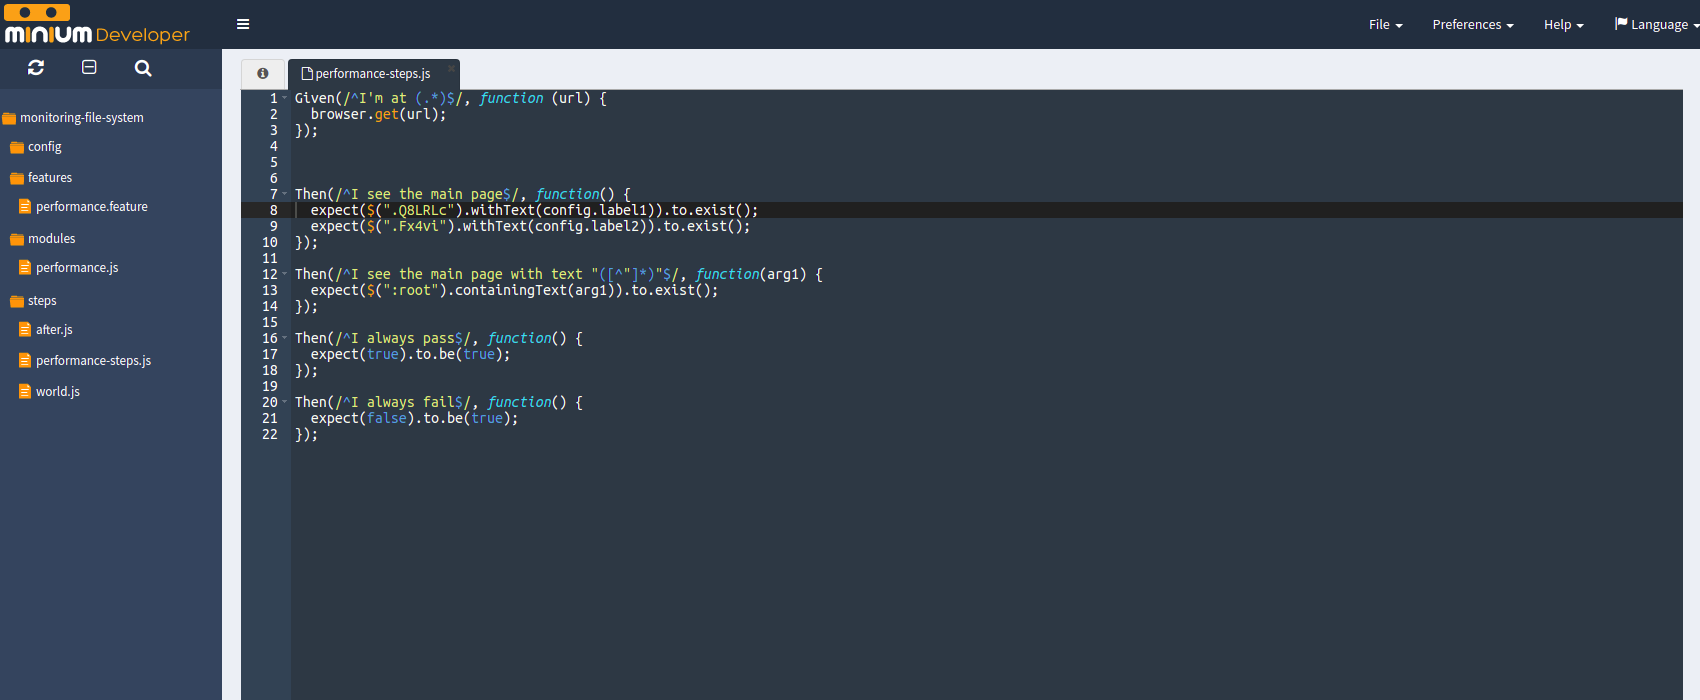
In the editor, we can update the code of the minium project. after the changes, the editor can be closed.
|
Note:
The recorded changes will be reflected in the minium manager. |
10.13. Check the available browsers
To check the available browsers, click on Browsers, at the navigation bar.
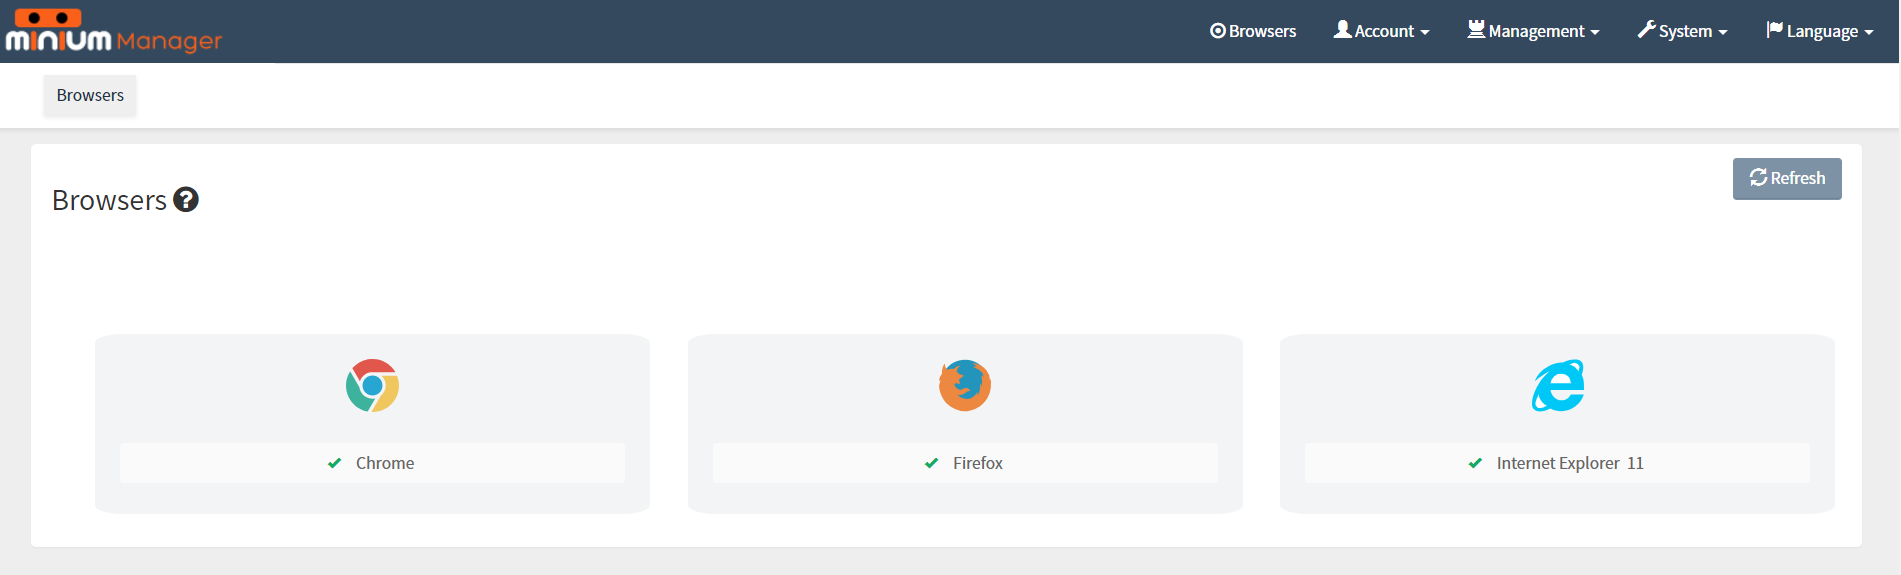
In the figure above, we only have one provider available, but we can have two or more providers configured (e.g. "BrowserStack" and/or "Selenium Grid Extras"). The provider configured has the browsers Chrome, Firefox and Internet Explorer available.
This means that with this environment is able to run the tests in Chrome, Firefox and Internet Explorer at the provider configured.
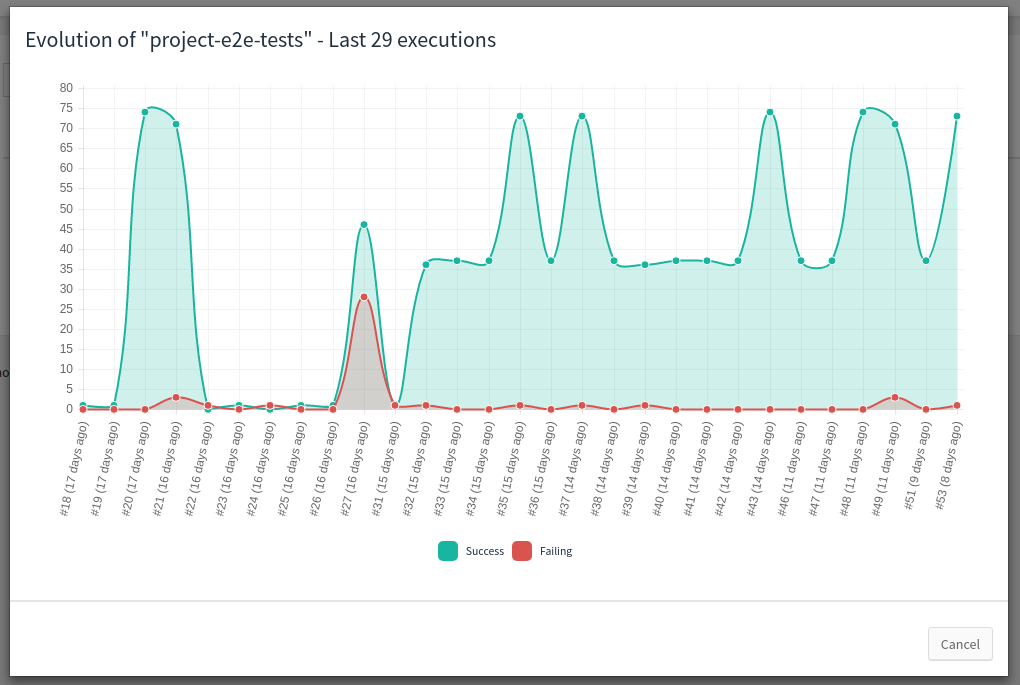
10.14. Project Statistics
Evolution chart to the test executions of a project.
Statistics for a single execution.
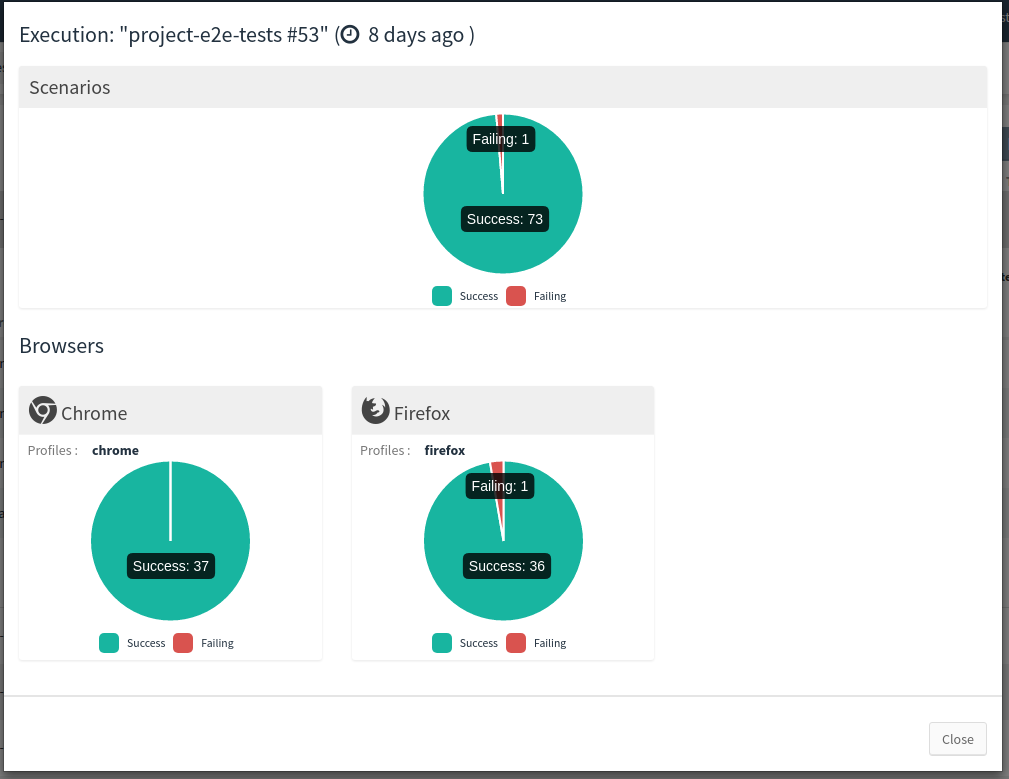
11. Test executions
11.1. Launch test executions
A test execution will execute the tests present in a project on one or more different browsers. There are alternative ways for launching test executions.
11.1.1. Launch a test execution manually
On the homepage or the page of a project, click on button Launch test, which opens a modal for selecting the browsers.
Select the desired browsers by clicking on them. If needed, click on Add more browsers to expand the available browsers and select a browser (and the properties) and/or the mobile devices (emulated via chrome).
After, click Add browser or Add device (for mobile devices).
Then, click on Add browser.
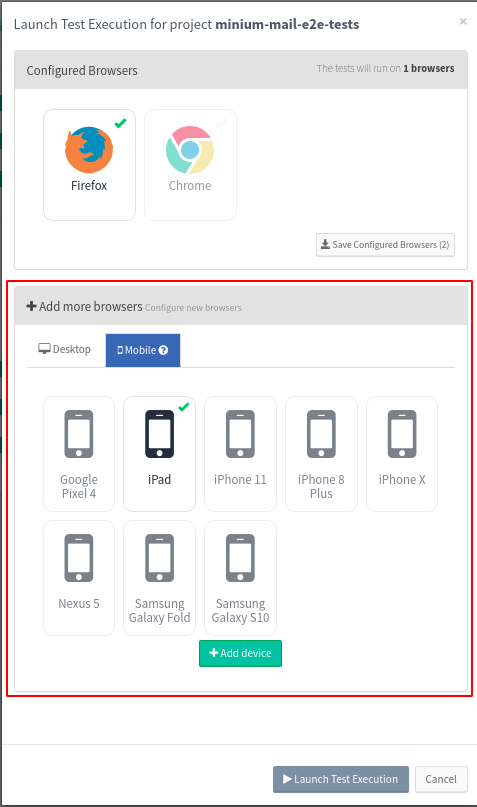
The new browser is now available to be selected on the Configured Browsers.
To save the current browser(s) configured to the project configurations, click Save Configured Browsers to persist the browser configured. Next time you open the launch modal it will show the Configured Browsers saved. Also, the executions created by the scheduler, will use the configuration saved.
After selecting all the browsers, click on Launch Test Execution.
|
Note:
At the click on button Launch test, the Monitoring and Cookie projects don’t open a modal for selecting the browsers. It launches a test immediately.
|
11.1.2. Schedule test executions
Go the configurations of a project and open the Browsers tab to see the currently configured browsers.
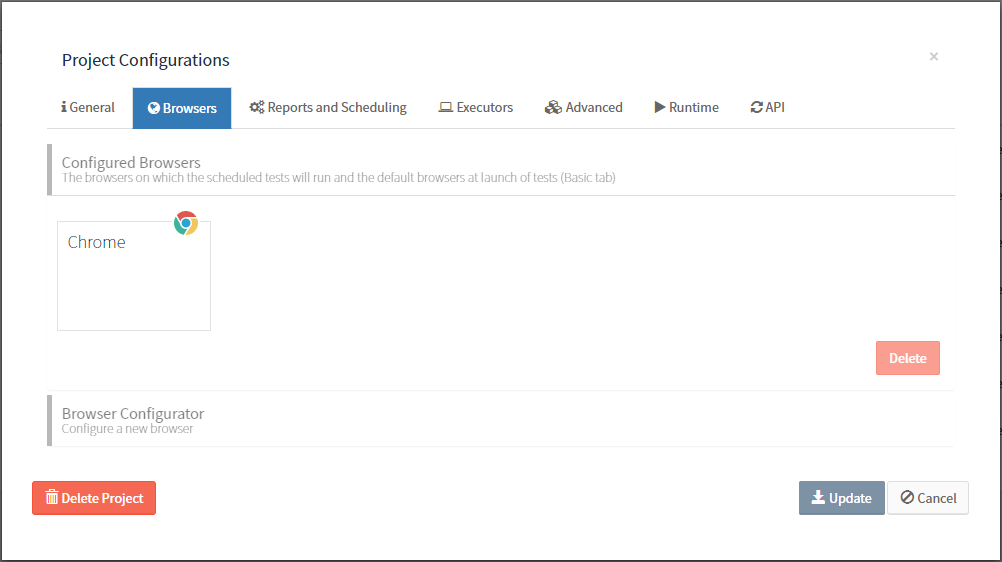
Click on Add more browsers and add more browsers if needed.
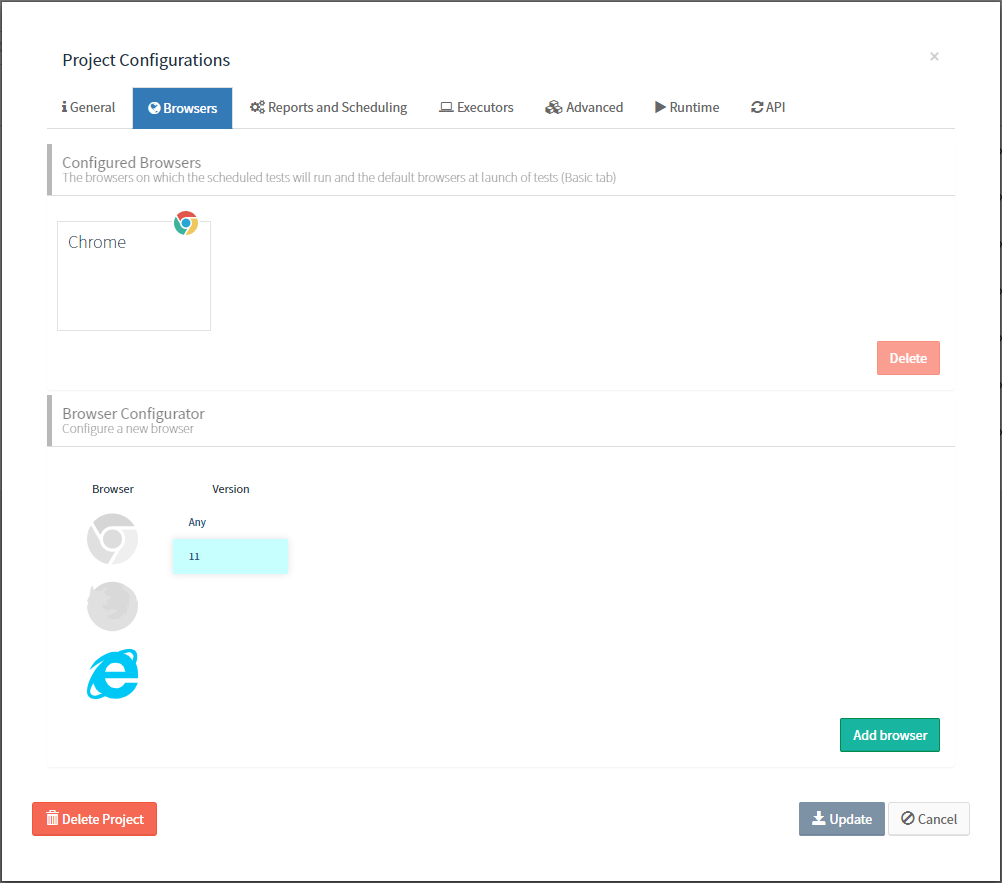
To schedule test executions on the configured browsers, switch to the Reports and Scheduling tab.
11.1.3. REST API
Minium Manager provides a REST API through which it is possible to launch test executions and get test results. In order to use it, an API key is required. API key are specific of a project. To generate a key, go to the API tab on the configurations of a project and click on the Generate button.
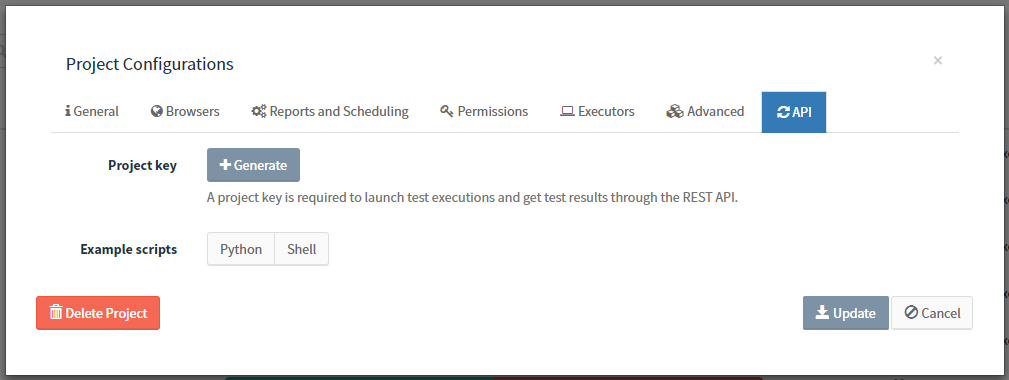
Also, on the API tab are some example scripts. Once the project has an API key, the scripts will be fulfilled with the project-specific data and ready to use. The first part of the script shows how to launch a test execution.
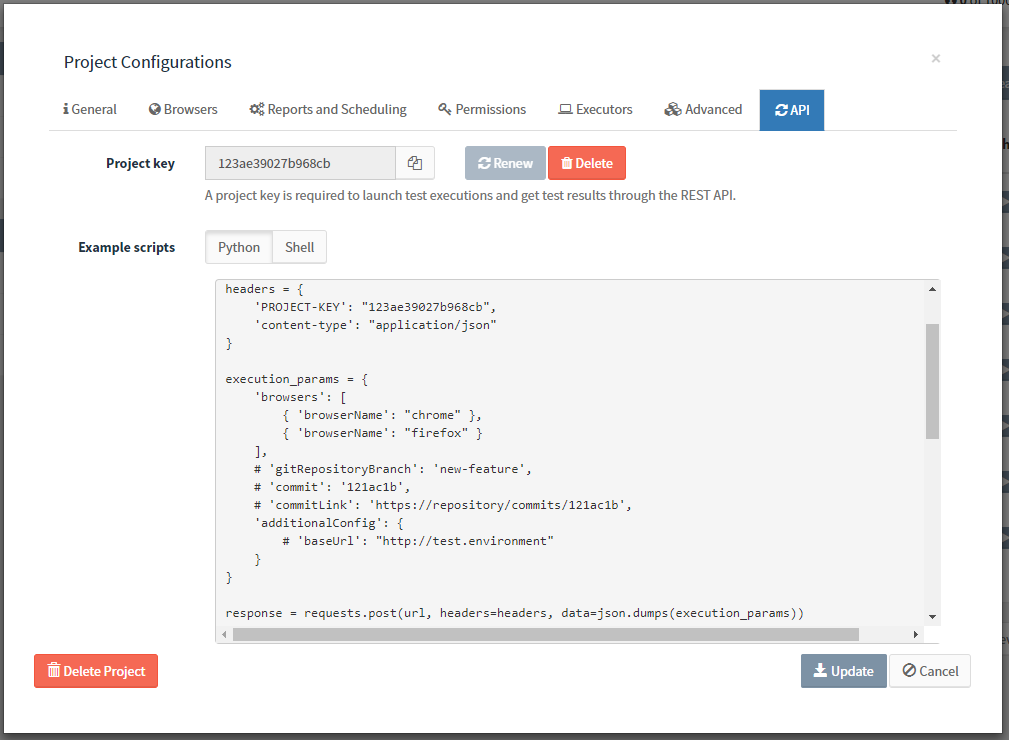
A test execution can be launched by issuing a POST request to api/projects/<PROJECT-ID>/test-executions containing the PROJECT-KEY header set to the project key, and the content-type header set to application/json. The execution parameters are sent in JSON on the request body:
-
browsers: list containing the capabilities of the browsers. Only the
browserNameis mandatory. -
additionalConfig (optional): configuration properties to be merged with the ones on the
application.ymlfile of the project. Properties already defined on theapplication.ymlfile are overridden. -
gitRepositoryBranch (optional): branch of the repository of the tests.
-
commit (optional): the corresponding commit of the system under test, to be then included on the report of the execution.
-
commitLink (optional): link to directly access the commit from Minium Manager.
To follow the progress of the execution until it finishes, poll the URL returned on the Location header of the response to the POST request.
url = response.headers['location']
response = requests.get(url, headers=headers)
while response.status_code == 404:
    time.sleep(5)
    response = requests.get(url, headers=headers)
if not response.ok: sys.exit(response.text)

execution = response.json()
while execution['state'] != "FINISHED":
    time.sleep(15)
    execution = requests.get(url, headers=headers).json()
While the tests are running, the response will be a JSON object containing the state field set to RUNNING, the name of the current browser and the corresponding progress in percentage, number of passed/failed and last finished feature/scenario. Example:
{
  "state": "RUNNING",
  "browser": "chrome",
  "progressInPercentage": 18,
  "failingScenariosCount": 1,
  "passingScenariosCount": 5,
  "feature": "Login",
  "scenario": "Successful login"
}
Once the execution finishes, the response will have state FINISHED, the global results and the number of passed/failed scenarios for each browser. Example:
{
  "state": "FINISHED",
  "globalResults": {
    "totalScenarios": 20,
    "percentageOfPassingScenarios": 95,
    "passingScenarios": 19,
    "failingScenarios": 1
  },
  "browserResults": [
    {
      "browser": {
        "browserName": "chrome"
      },
      "passedScenarios": 10,
      "failedScenarios": 0
    },
    {
      "browser": {
        "browserName": "firefox"
      },
      "passedScenarios": 9,
      "failedScenarios": 1
    }
  ]
}
11.2. Follow the progress of a test execution
After launching a test execution, follow the progress in the project page. See the browser where the test is executing, the percentage, number of executed tests, the elapsed time and the test that is currently executing.
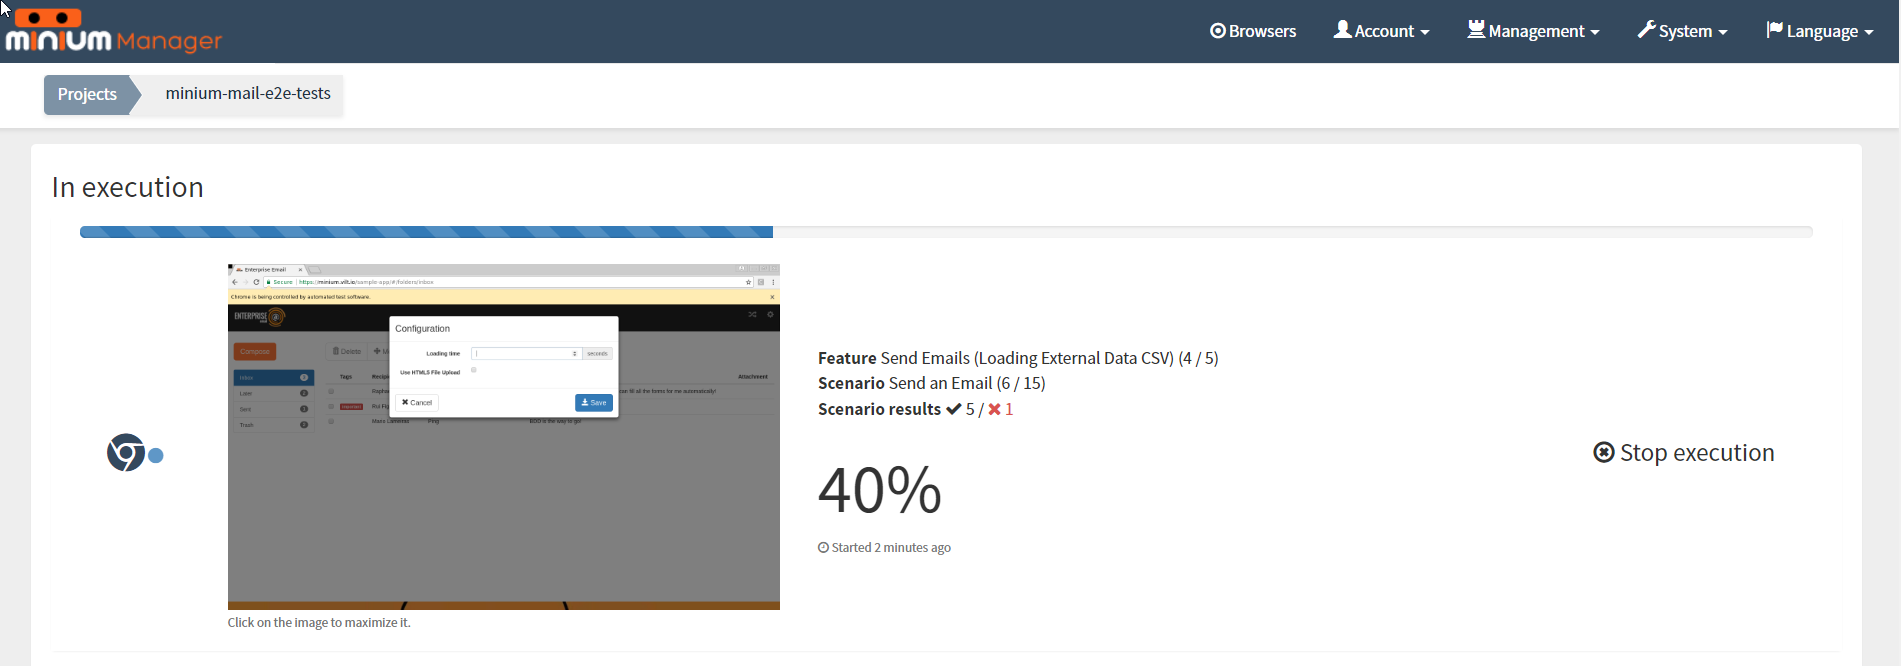
12. Monitor test results
In a project page, all the launched executions are showed:
For each execution it can be seen:
-
result of the execution
-
name
-
duration of execution
-
percentage of passed and failing scenarios
-
statistics of the execution (shown when the mouse is over the execution)
-
browser where the execution ran
-
launch time
-
number of scenarios of the execution
When expands a test execution a list of executed features, and their results can be seen:
For the execution expanded it can be seen:
-
features tested
-
the results detailed for each feature (with filters)
-
videos of the execution
-
download the report of the executions (MS excel and PDF)
-
remove execution
Click at "Recorded executions by browser" to see the videos of the recorded executions:
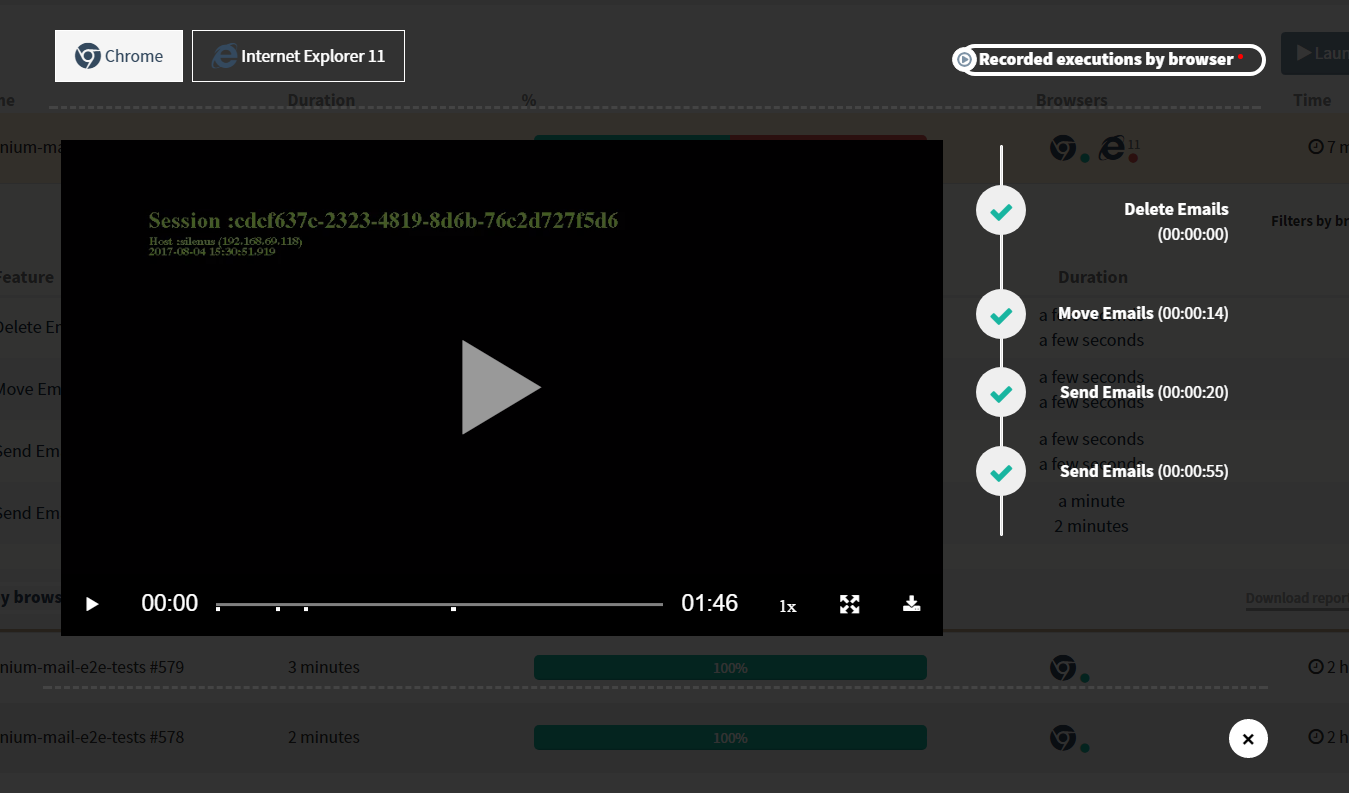
For the videos (at execution) it can be seen:
-
videos for the browsers tested
-
features to navigate through the video
-
cue points when the feature starts on the video
Monitoring project
The result of an execution of a Monitoring project is presented at the execution page:
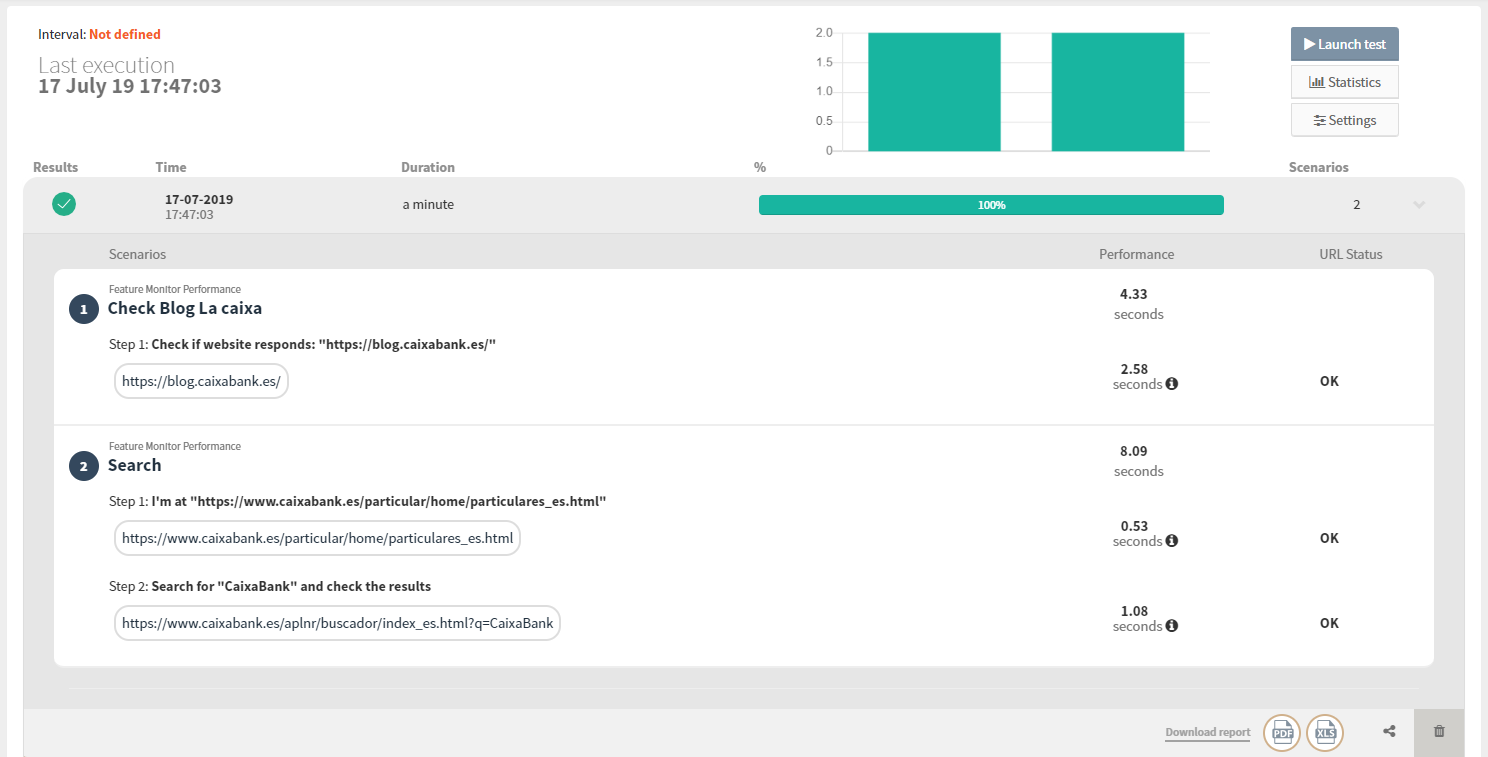
At execution page, we can see the time of each URL took to load. Also, we can see the URL status, and the time it took to execute the scenario.
Display options
The information at the execution page can be filtered to show/hide some details.
To open the Display options click at Settings:
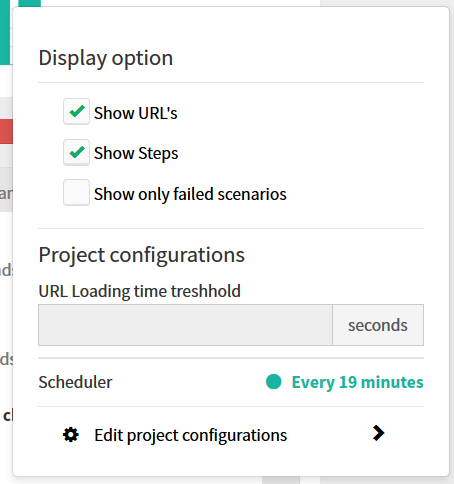
The display options allow us to:
-
Show/Hide the URL’s
-
Show/Hide the steps
-
Show only the failed scenarios
-
Consult the URL loading time threshold (This property is configured at the project configurations at the advanced tab and warns the user (at the execution page) when the loading time of a URL is higher than the loading time threshold)
-
Consult the scheduler (The scheduled is configured at the project configurations at the reports and scheduling tab)
Cookie project
The Cookie project is divided in two projects: Cookie Report project and Cookie Crawler project.
Cookie Report project
The result of an execution of a Cookie Report project is presented at the execution page:
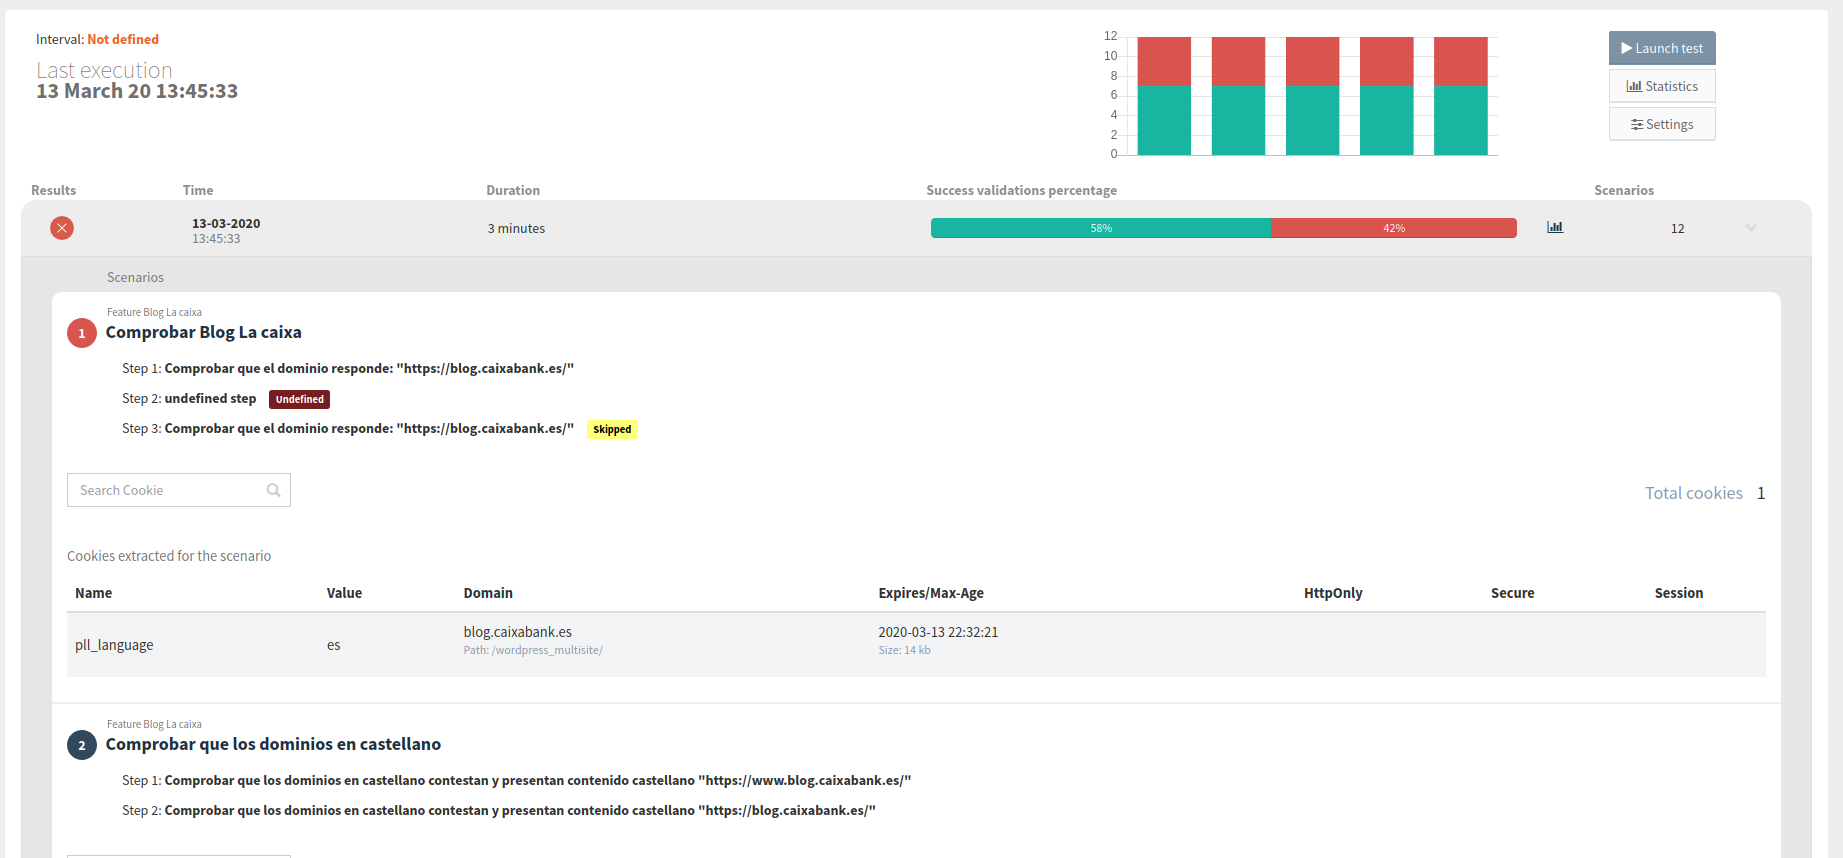
At execution page, we can see at the end of each scenario a table (with a filter) of all browser cookies at the end of a scenario.
Display options
The information at the execution page can be filtered to show/hide some details.
To open the Display options click at Settings:
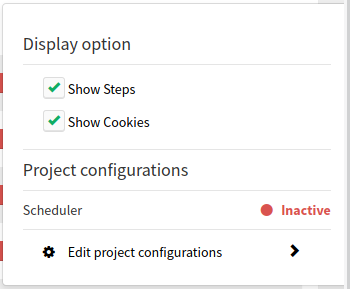
The display options allow us to:
-
Show/Hide the steps
-
Show/Hide the cookies table
-
Consult the scheduler (The scheduled is configured at the project configurations at the reports and scheduling tab)
Cookie Crawler project
The Cookie Crawler project generates a report of the all browser cookies found during the crawl of the websites.
For each execution it can be seen:
-
URL crawler - The URL(s) that was crawled
-
Filters - Domains filtered
-
Cookies Accepted - Tells whether the cookie warning was accepted or not
-
Cookies to validate - Cookies validated during the crawl (click at the eye to see the validations in a table)
-
Max Depth - Depth of the crawl
-
Validation failed - The cookies not found at the report
-
Total Cookies (Distinct by name) - Number of different cookies found at the report distinct by name
-
Total cookies - Number of different cookies found at the report
-
Total URLs - Number of different URLs crawled
There are several tabs to present execution information: Summary, Cookie table and URLs tree.
Summary:
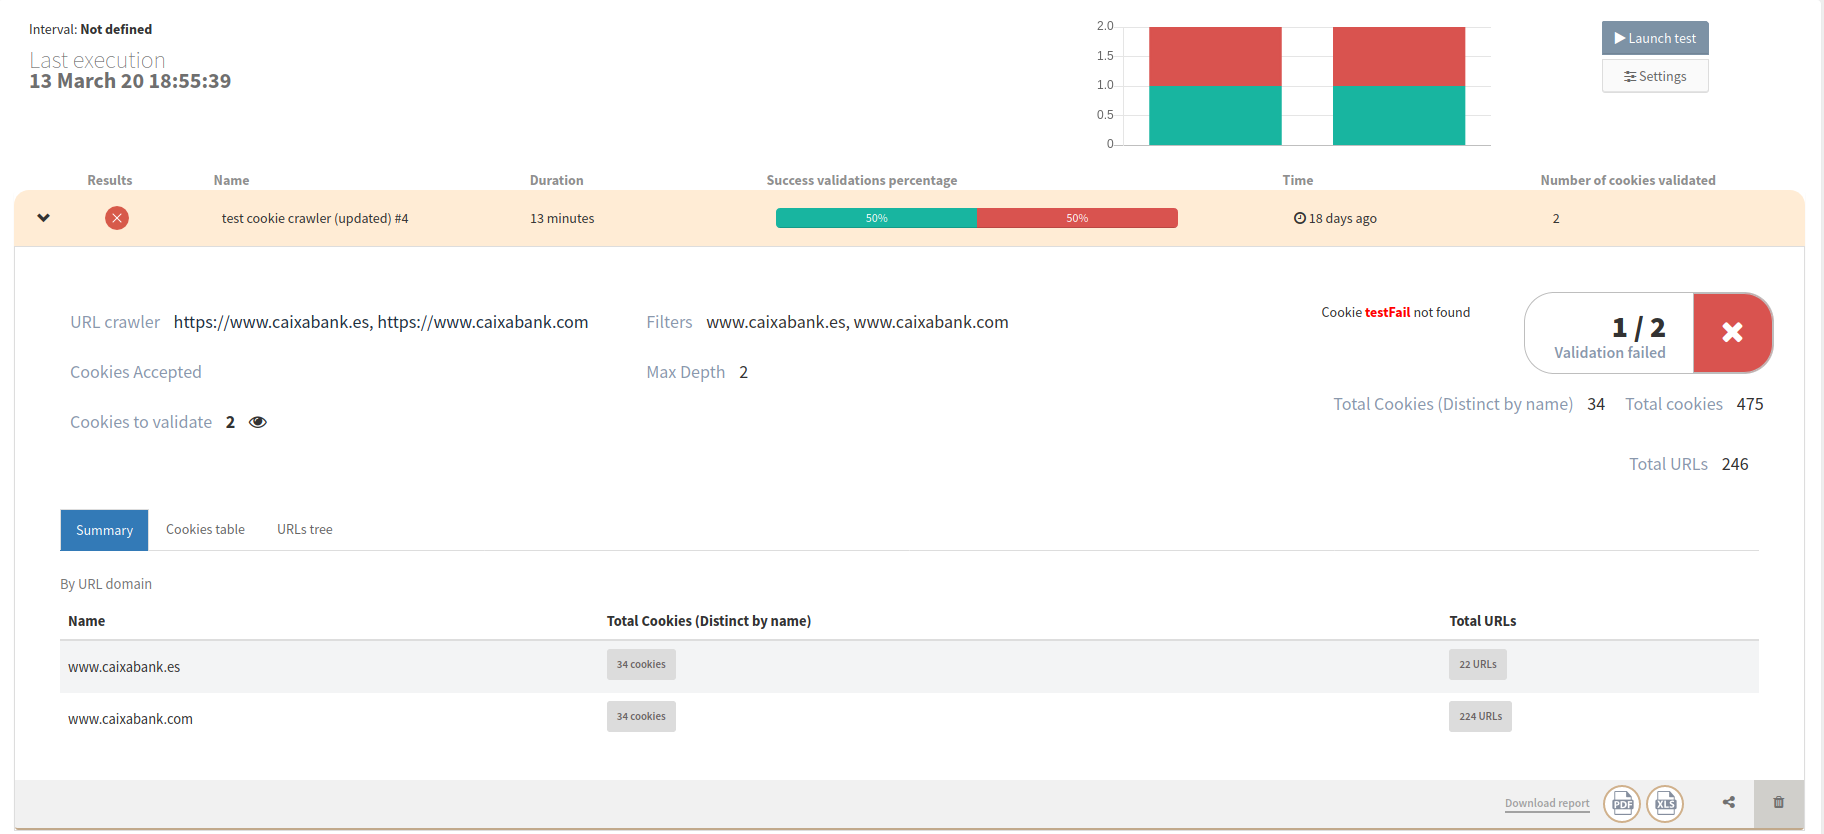
This table presents the information By URL domain.
For the screenshot above we can see that for the domain www.caixabank.es, we found 34 cookies (Distinct by name) in a total of 22 URLs.
Cookie table:
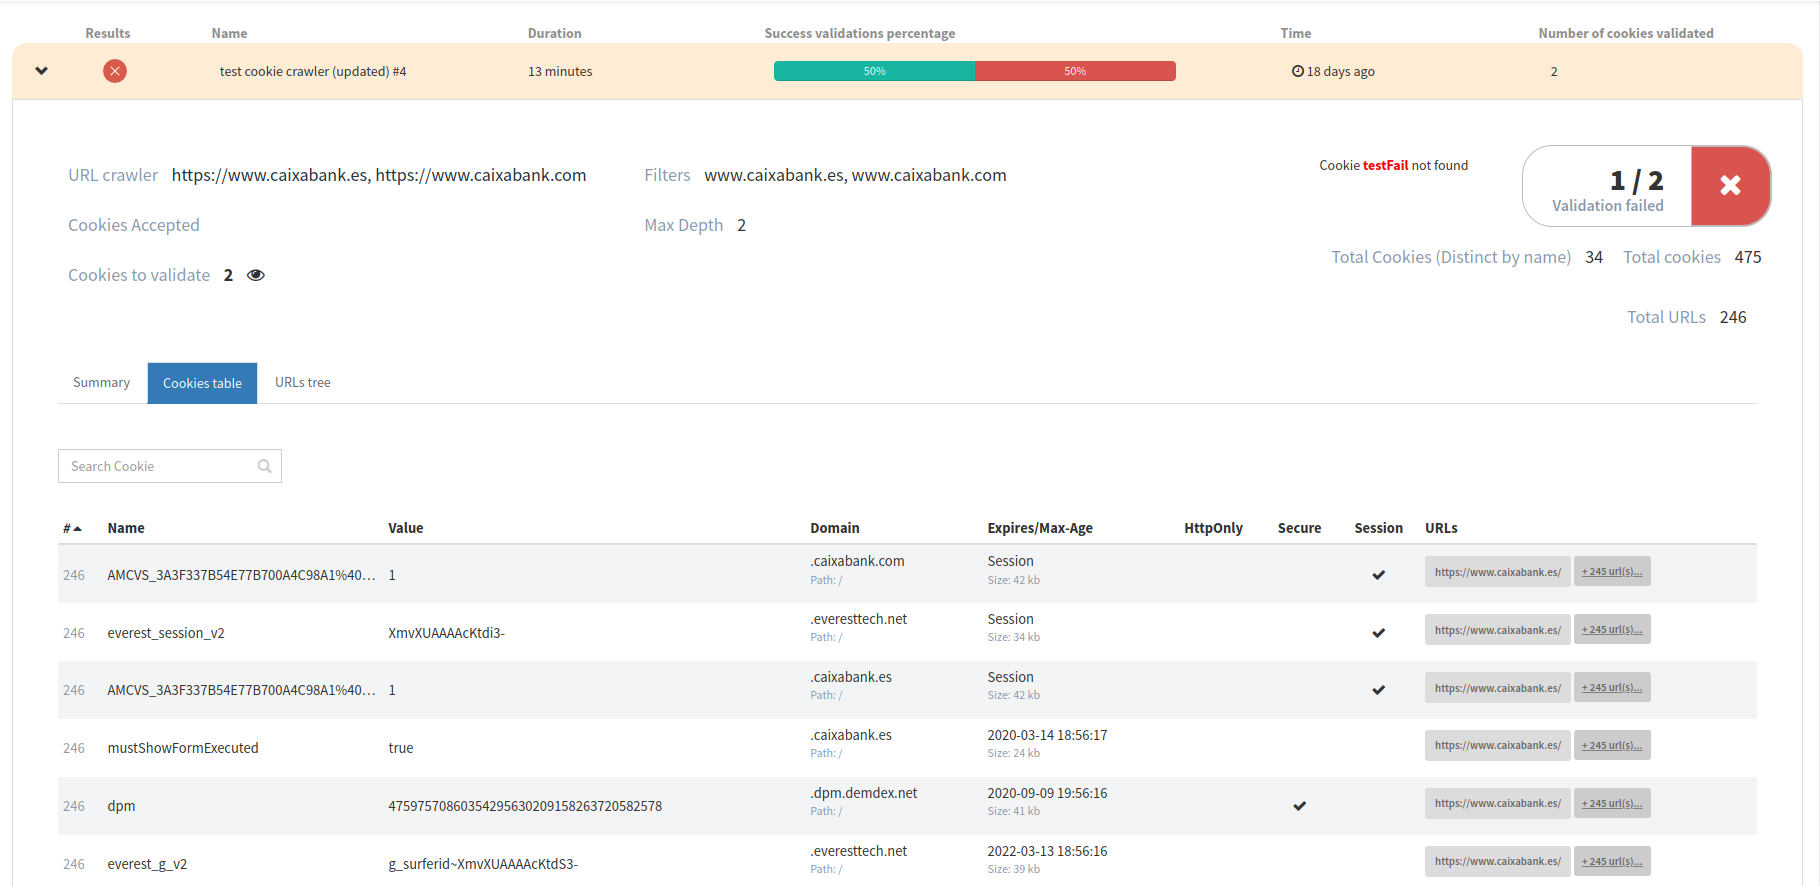
This table presents the all the cookie’s information retrieved at the crawler for the URL(s) crawled, and the URL(s) where the cookie was found.
URLs tree:
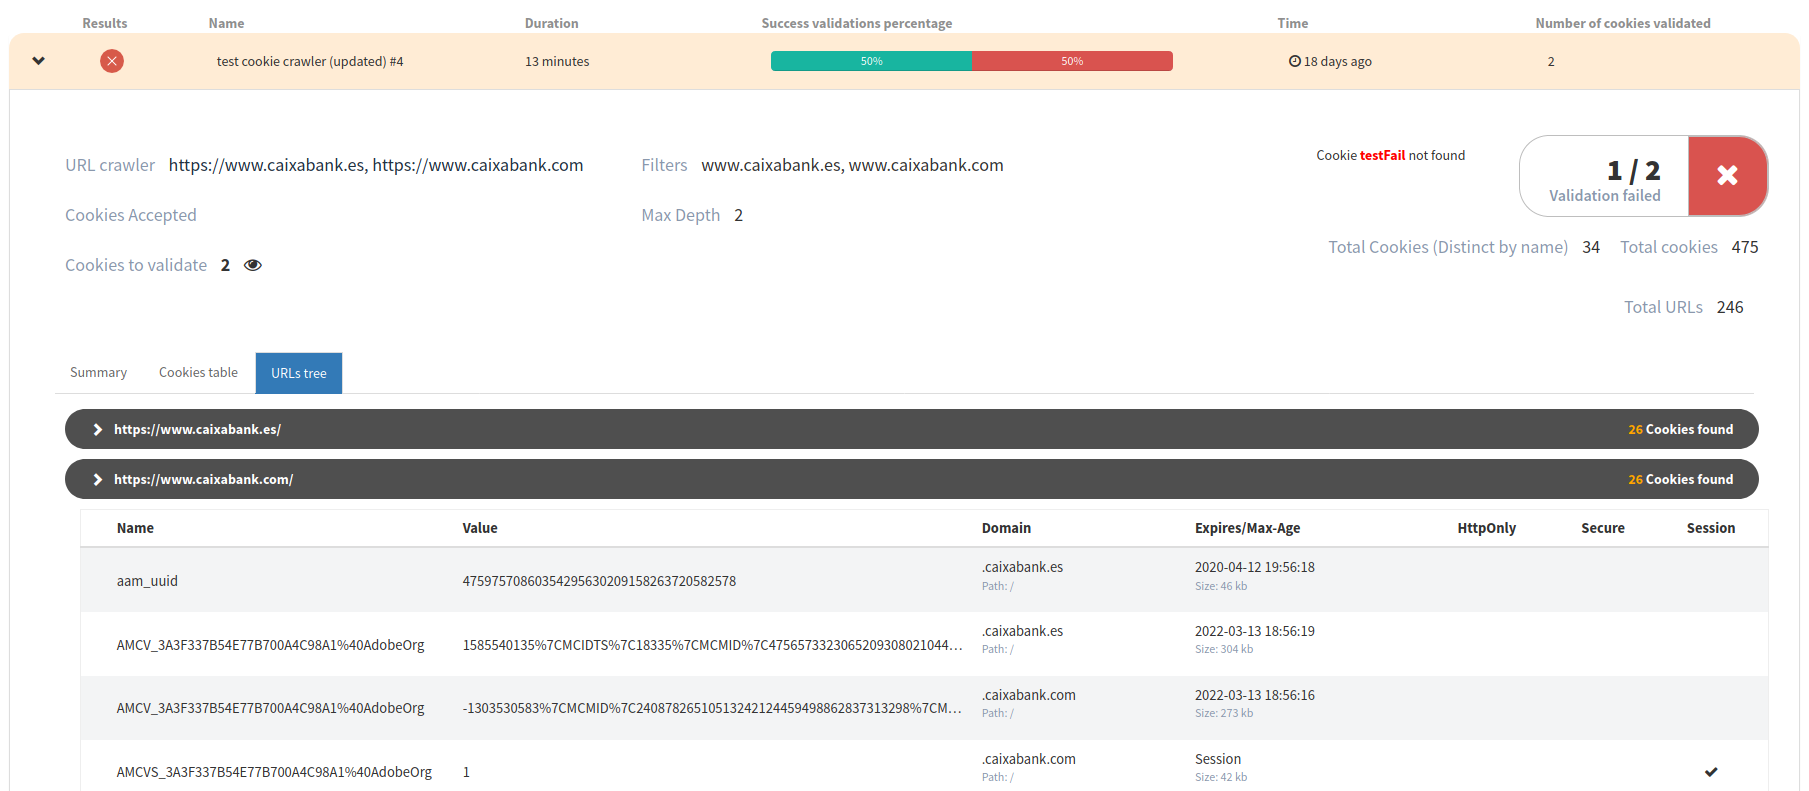
This view shows the URLs tree generated by the crawl, with the cookies found for each URL.
Display options
The information at the execution page can be filtered to show/hide some details.
To open the Display options click at Settings:
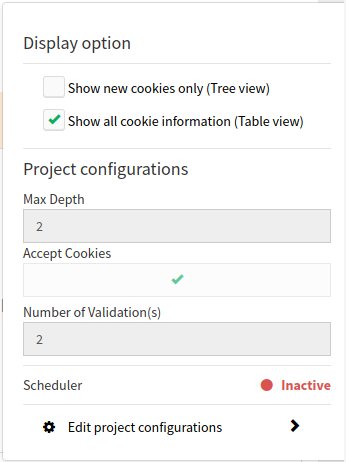
The display options allow us to:
-
Show new cookies only (Tree view) - Only shows the new cookies at the
URLs treein the child levels. The default is show every cookie (even the repeated ones). -
Show all cookie information (Table view) - Shows all the cookie information (this is the fields: domain, Expires/Max-Age, HttpOnly, Secure and Session). The default is to show the Name, Value and URLs aggregated.
-
Max Depth - The Max depth configured at project configurations
-
Accept Cookies - Shows if accept cookies are checked or not at project configurations
-
Number of Validation(s) - Shows the number of validations configured at project configurations
-
Consult the scheduler (The scheduled is configured at the project configurations at the reports and scheduling tab)
On the feature (for web application testing) view check the scenarios of this particular feature:
When expands a scenario see all the steps and results. Is easily switch to the results of another browser. More functionalities:
-
Screenshots - Minium Manager provides screenshots of the application at the moment of the failure. So it is possible to see the state of the application in the moment of failure.
-
Error messages
-
Links to the feature or step file for each step.
-
Evolution chart for the projects
-
Video with the cue points when the scenarios start
Monitoring project
Feature page of a Monitoring project scenario:
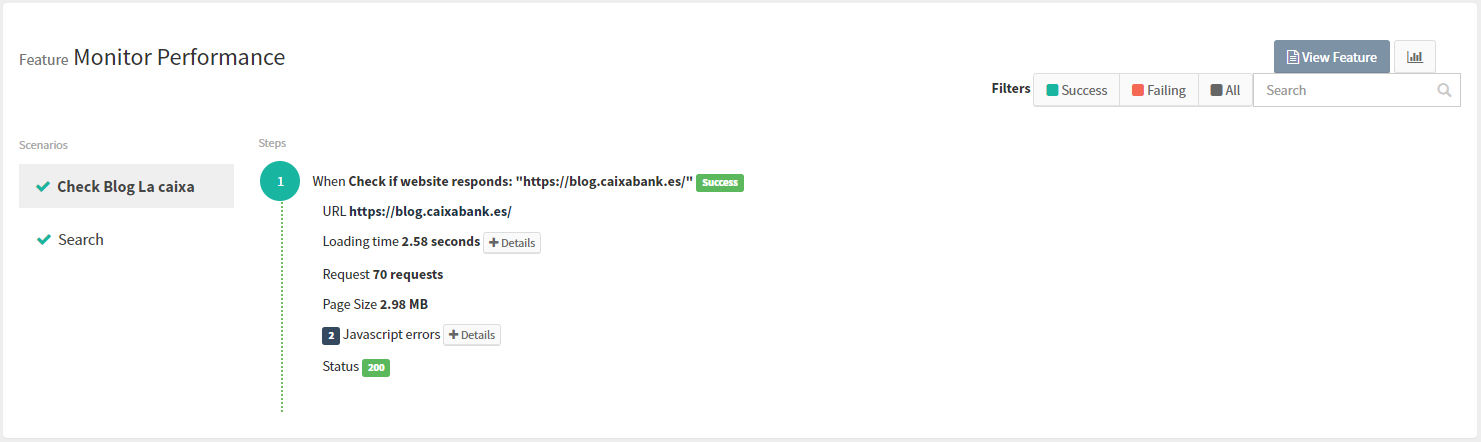
At the feature page, we can see more details about the page load performance:
-
The url loaded
-
The loading time with the times of the Backend Performance, Frontend Performance and DOM Content Loading
-
The number of requests
-
The Javascript Errors (if any)
-
The URL status code
Cookie project
Feature page of a Cookie Report project scenario:
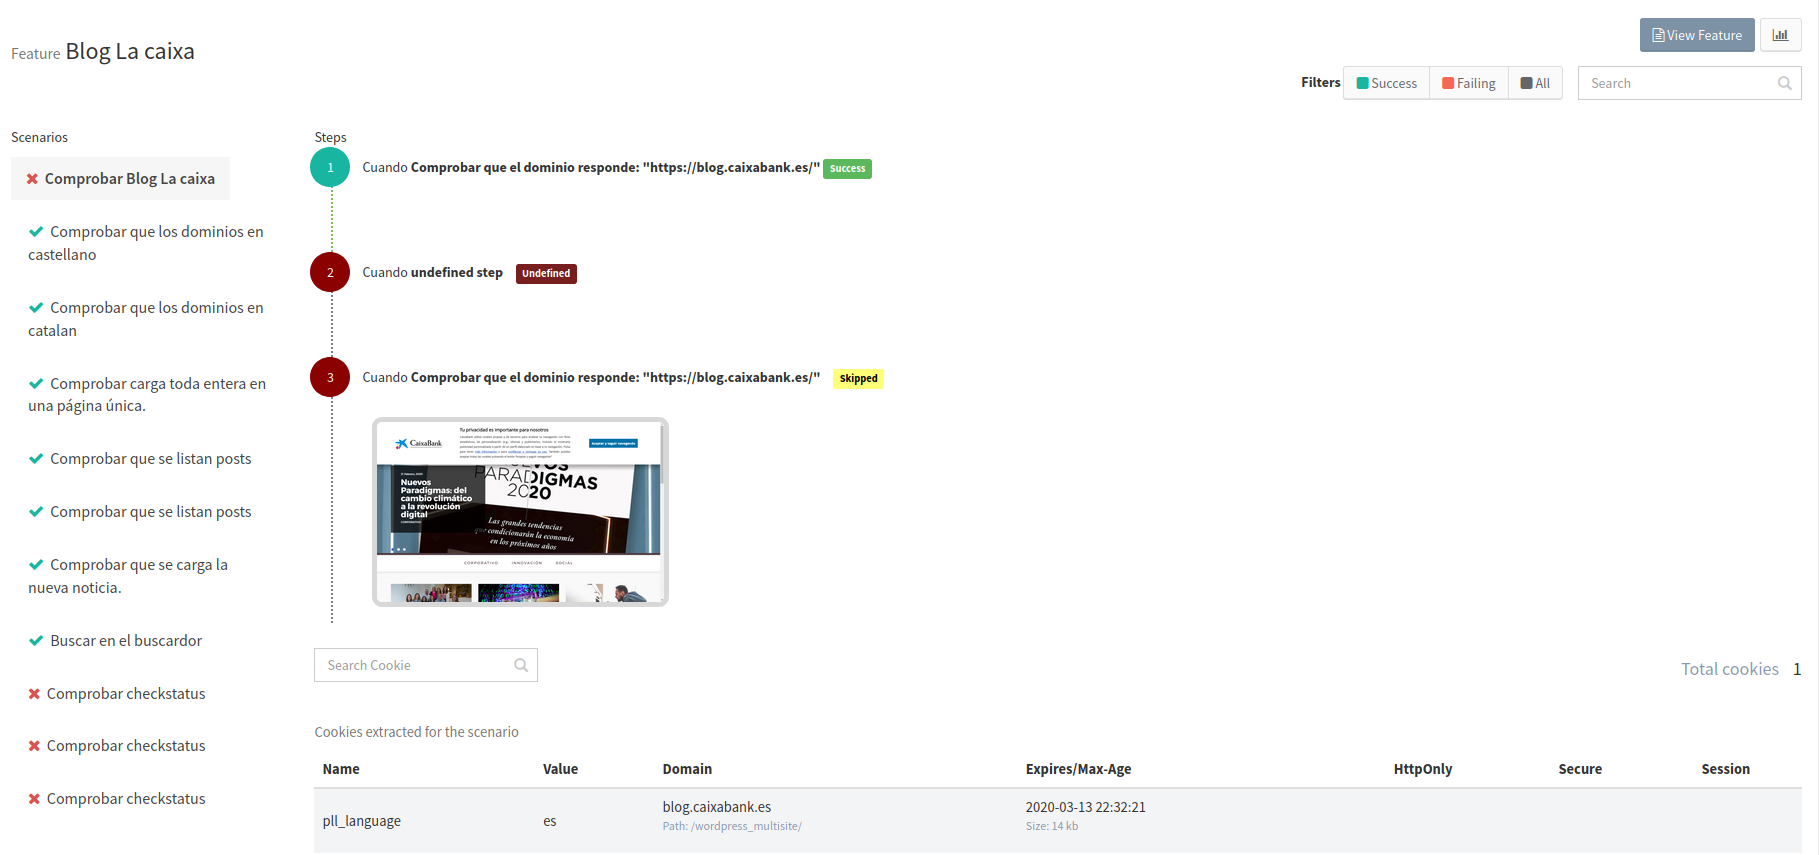
We can see at the end of each scenario a table (with a filter) of all browser cookies.
|
Note:
The Feature overview page is not available to the Cookie Crawler project. |
12.1. Feature overview
Overview of all the features, by clicking on the button View Feature.
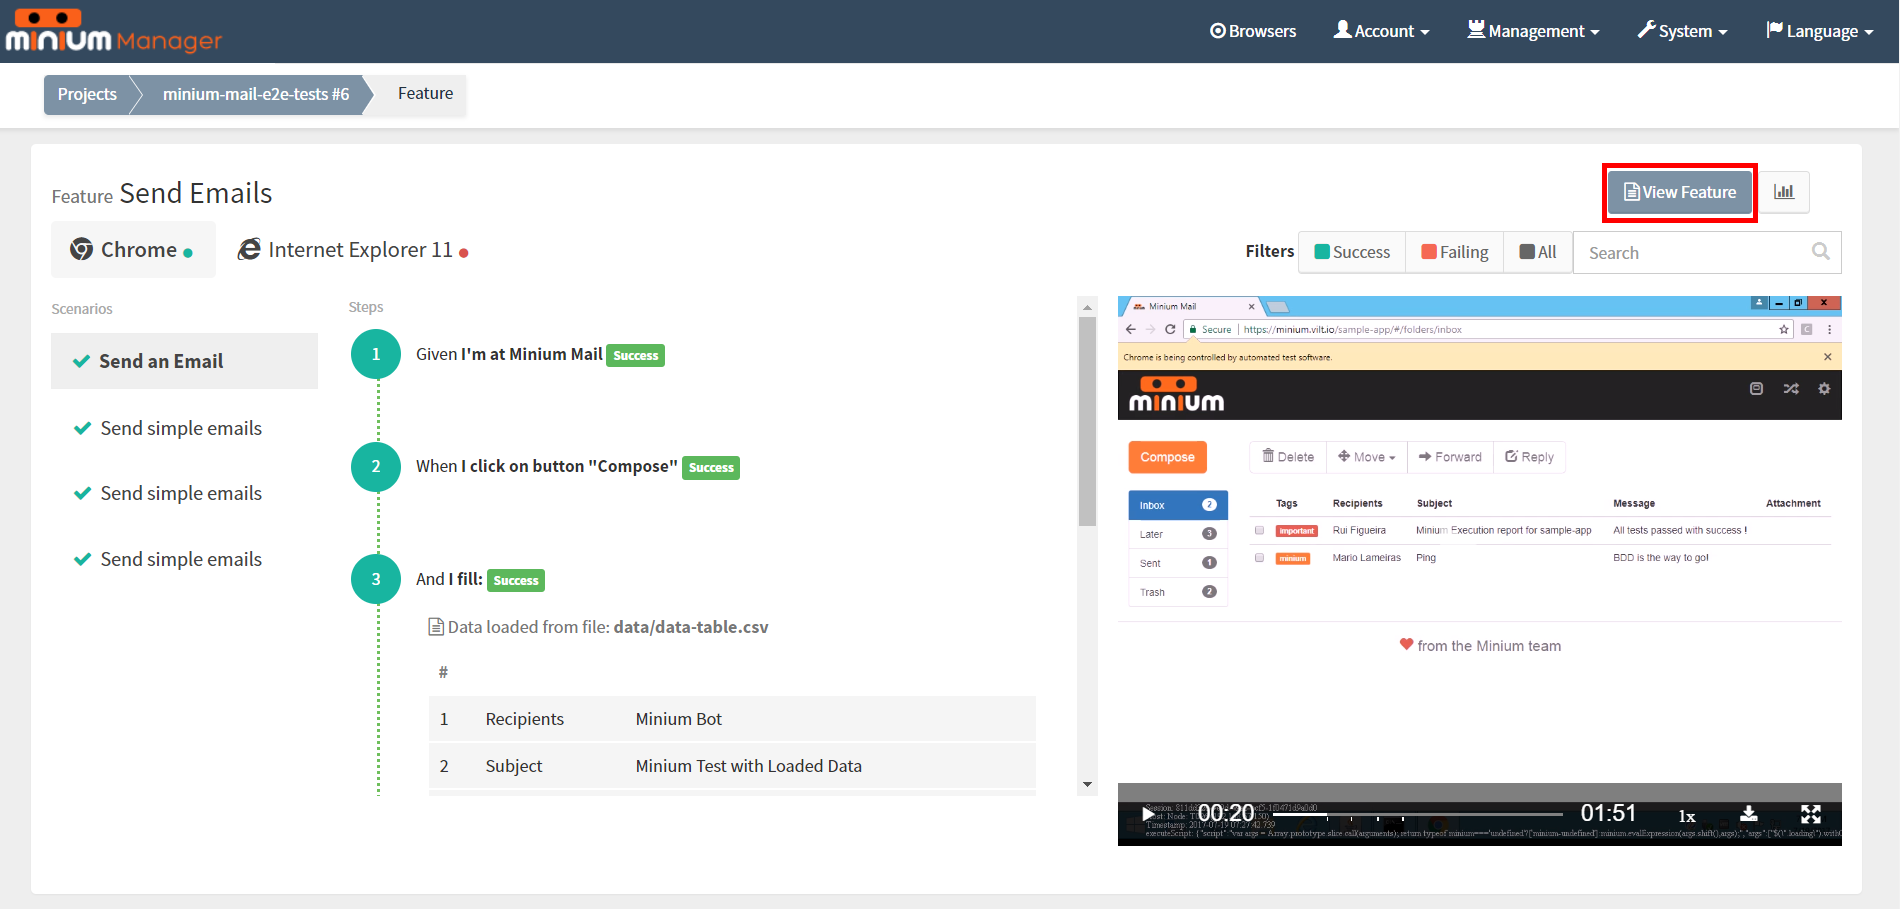
View the result of each step in each browser that the feature ran.
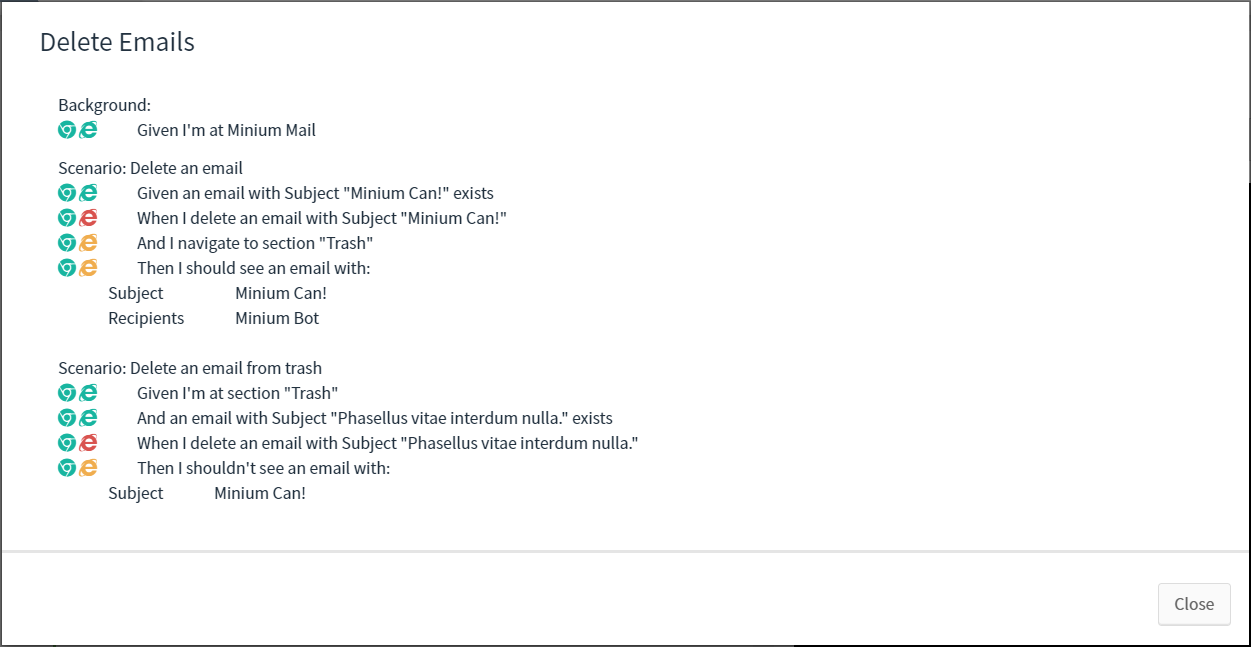
12.2. Reports
Receive the reports of each test execution, in PDF and/or Excel formats, via email. Alternatively, download them directly in Minium Manager.
To choose the formats to receive via email, go to the configurations of the project and expand the advanced configurations:
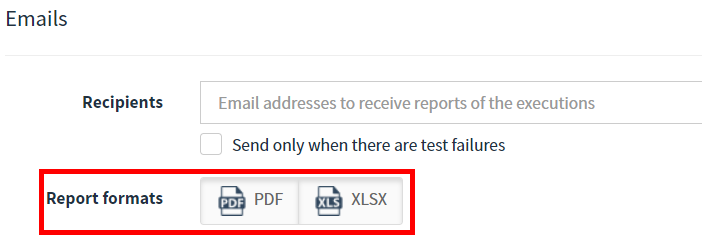
To download a report, expand the results of a test execution and click in Download report:
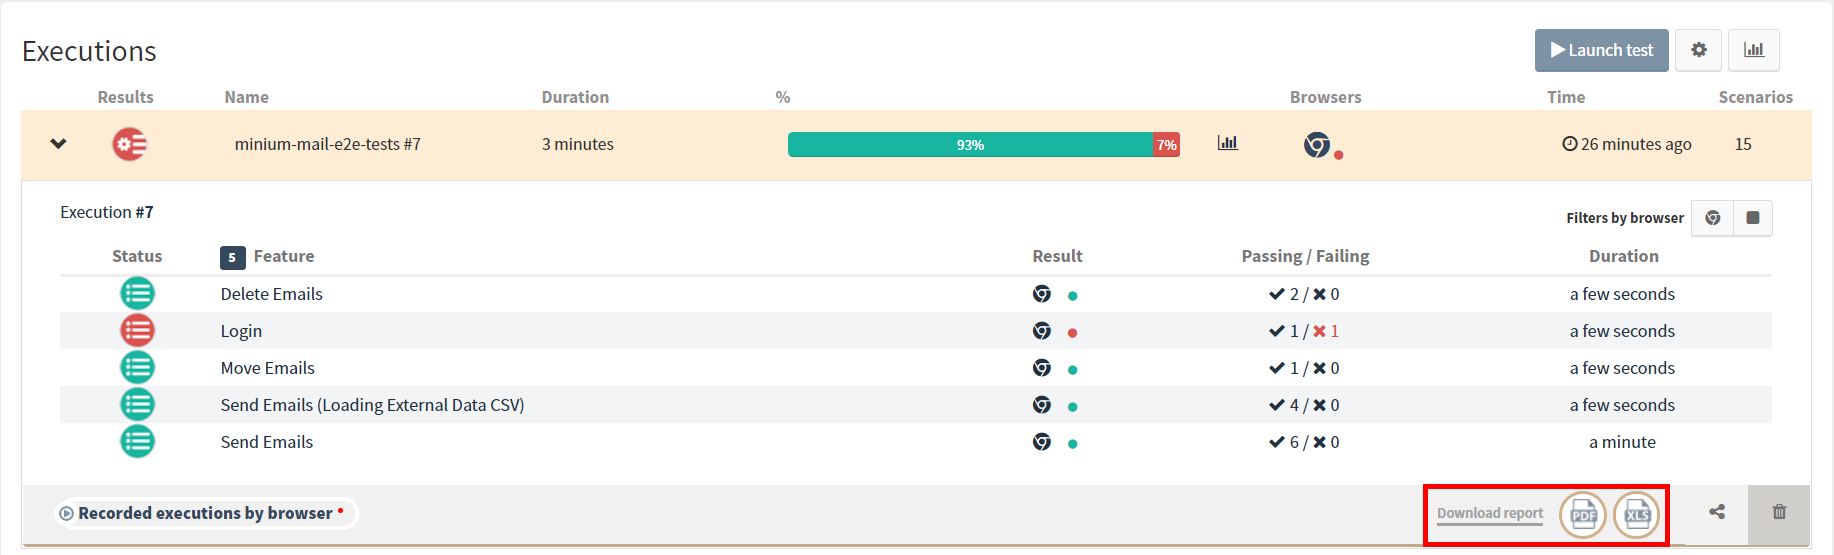
12.3. Daily Reports
The daily report is a custom report with your favorite projects that will be sent to your email with the status of the last completed execution in the last 24 hours.
Before being able to configure a daily report, first you need to set the email configured at Account > Settings.
|
Note:
If Minium Manager is using LDAP, please contact your administrator to set your email at LDAP. |
To create a daily report configuration, open the Account menu and click on Daily Reports.
Choose the projects to be included in your custom daily report:
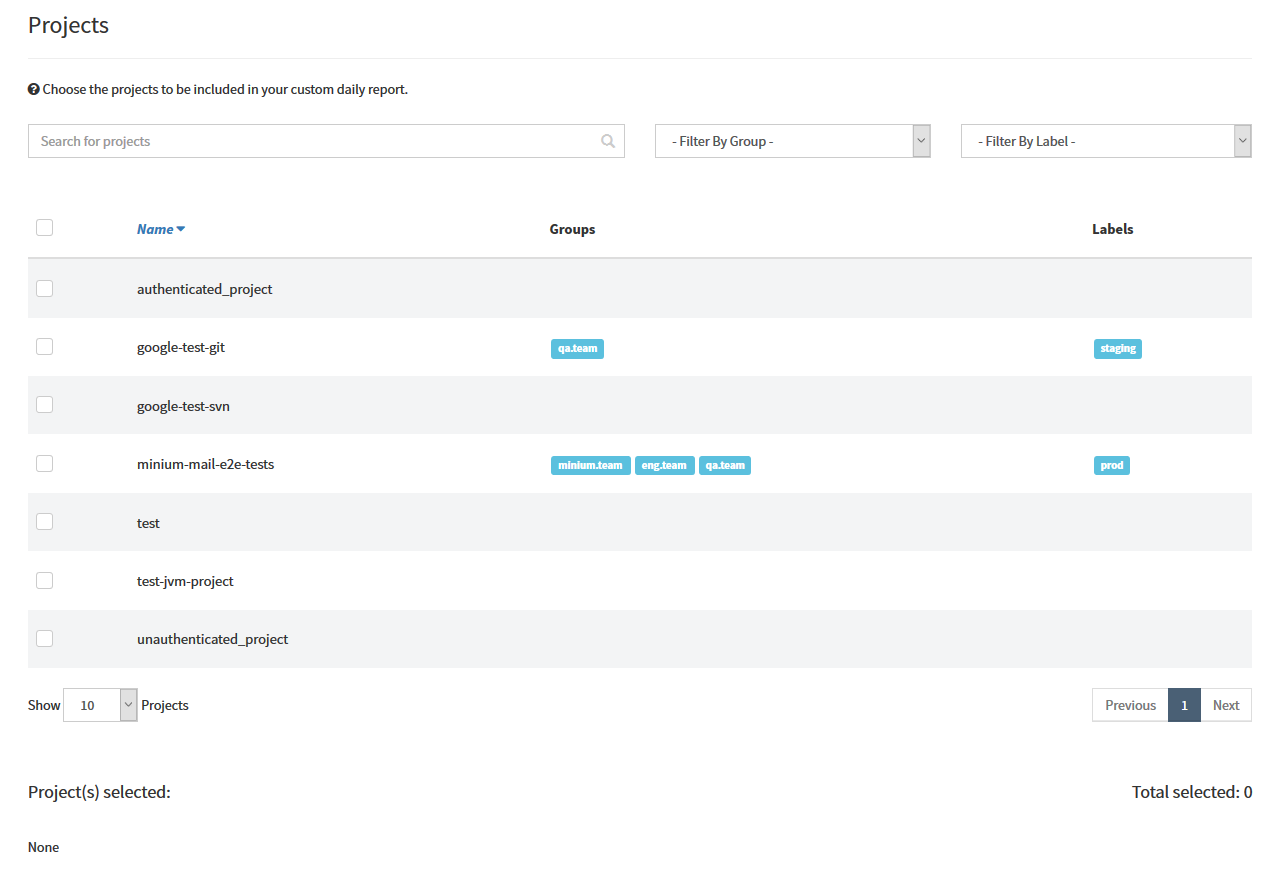
After, schedule the time the email will be sent, with a summary of the past 24h.

Finally, click on the button "Create/Update Daily Report Configuration" to create/update the daily reports:
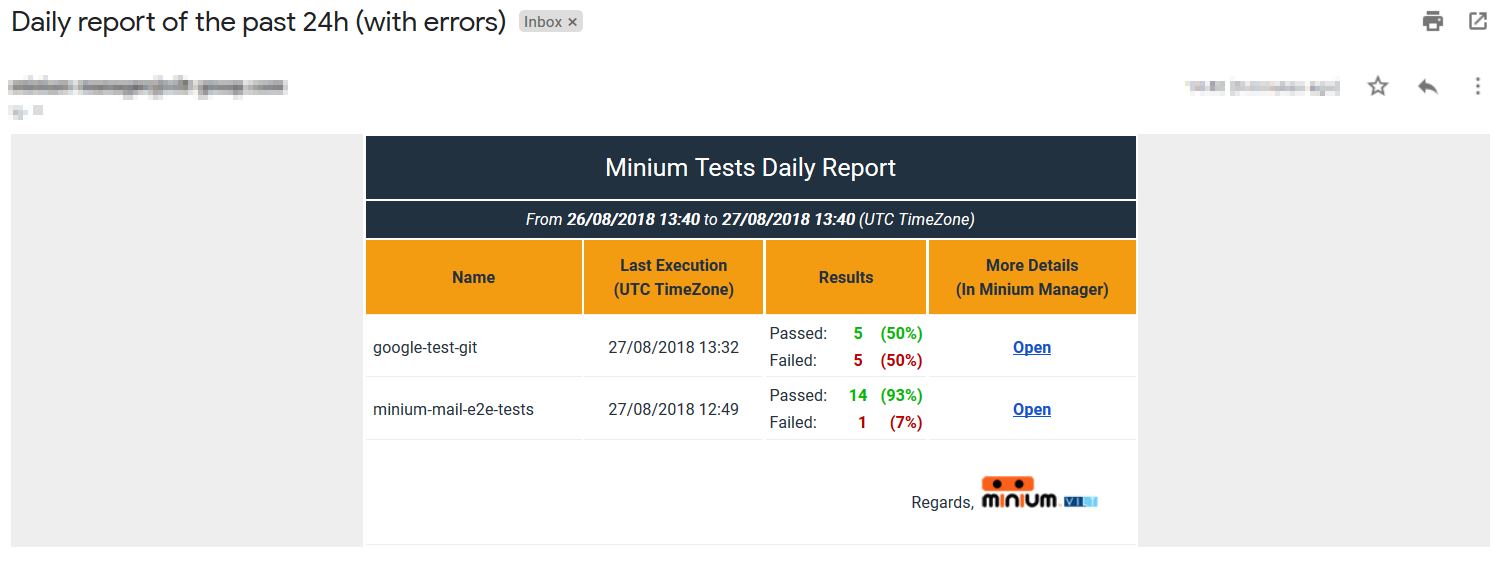
To delete the configuration, click on the button "Delete Daily Report Configuration".
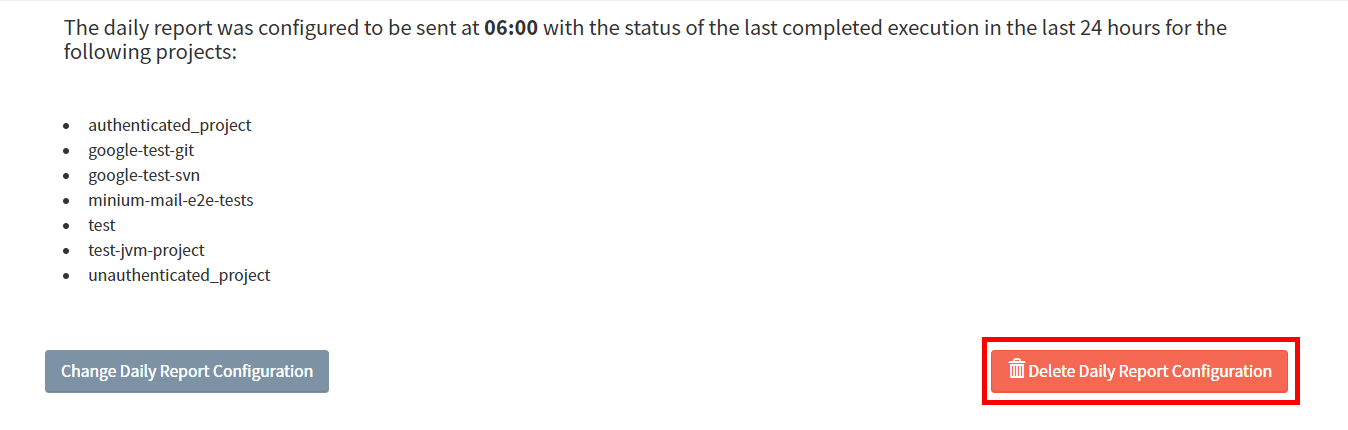
12.4. Data Extraction Reports
The Data extraction report is a custom report (in Excel format) with your favorite projects that will be sent to the specified email addresses with the status of the last completed execution, and the project details.
To create and/or consult the data extraction reports configurations, open the Management menu and click on Data Extraction Report.
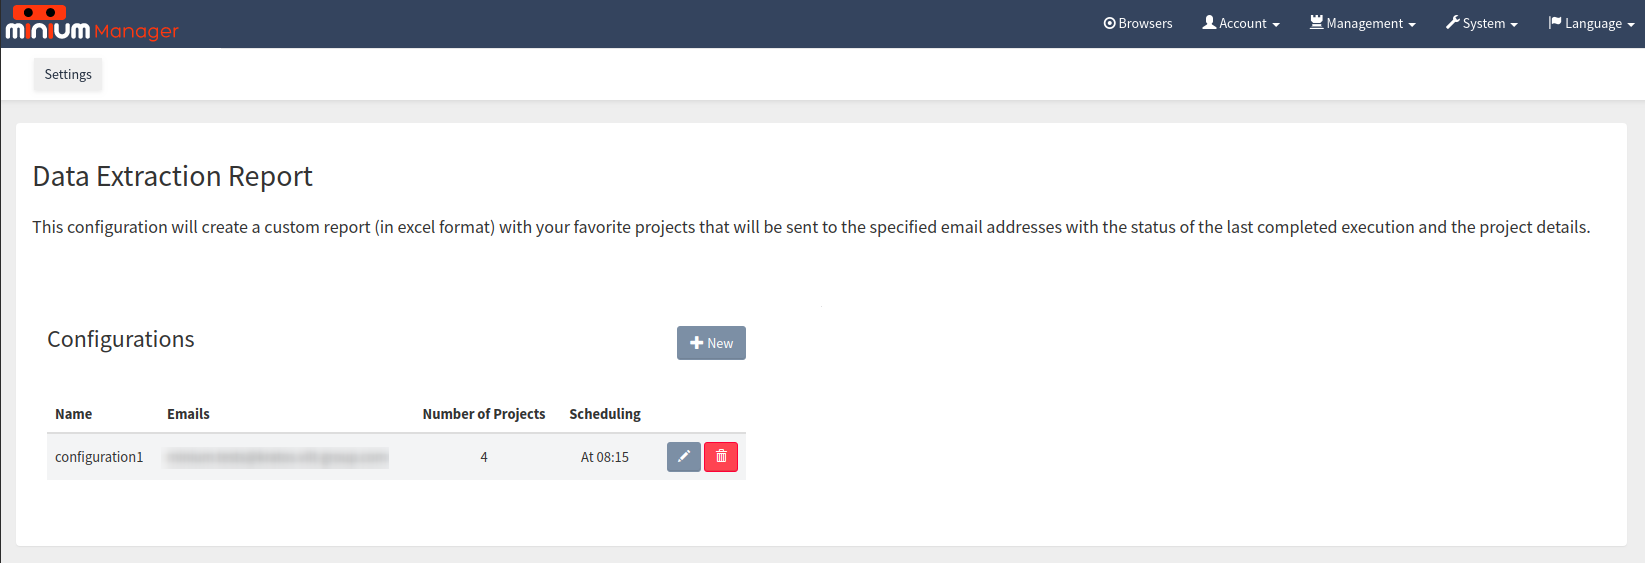
At the data extraction report page, you can see the current configurations created at the list Configurations.
You can edit (by clicking in the pencil button) or delete (by clicking on the trash button) the configurations listed at the list Configurations.
Also, you can create a new configuration by clicking on the button + New.
When you click the button + New, a form will appear (similar to the edit form) on the right side of the page:
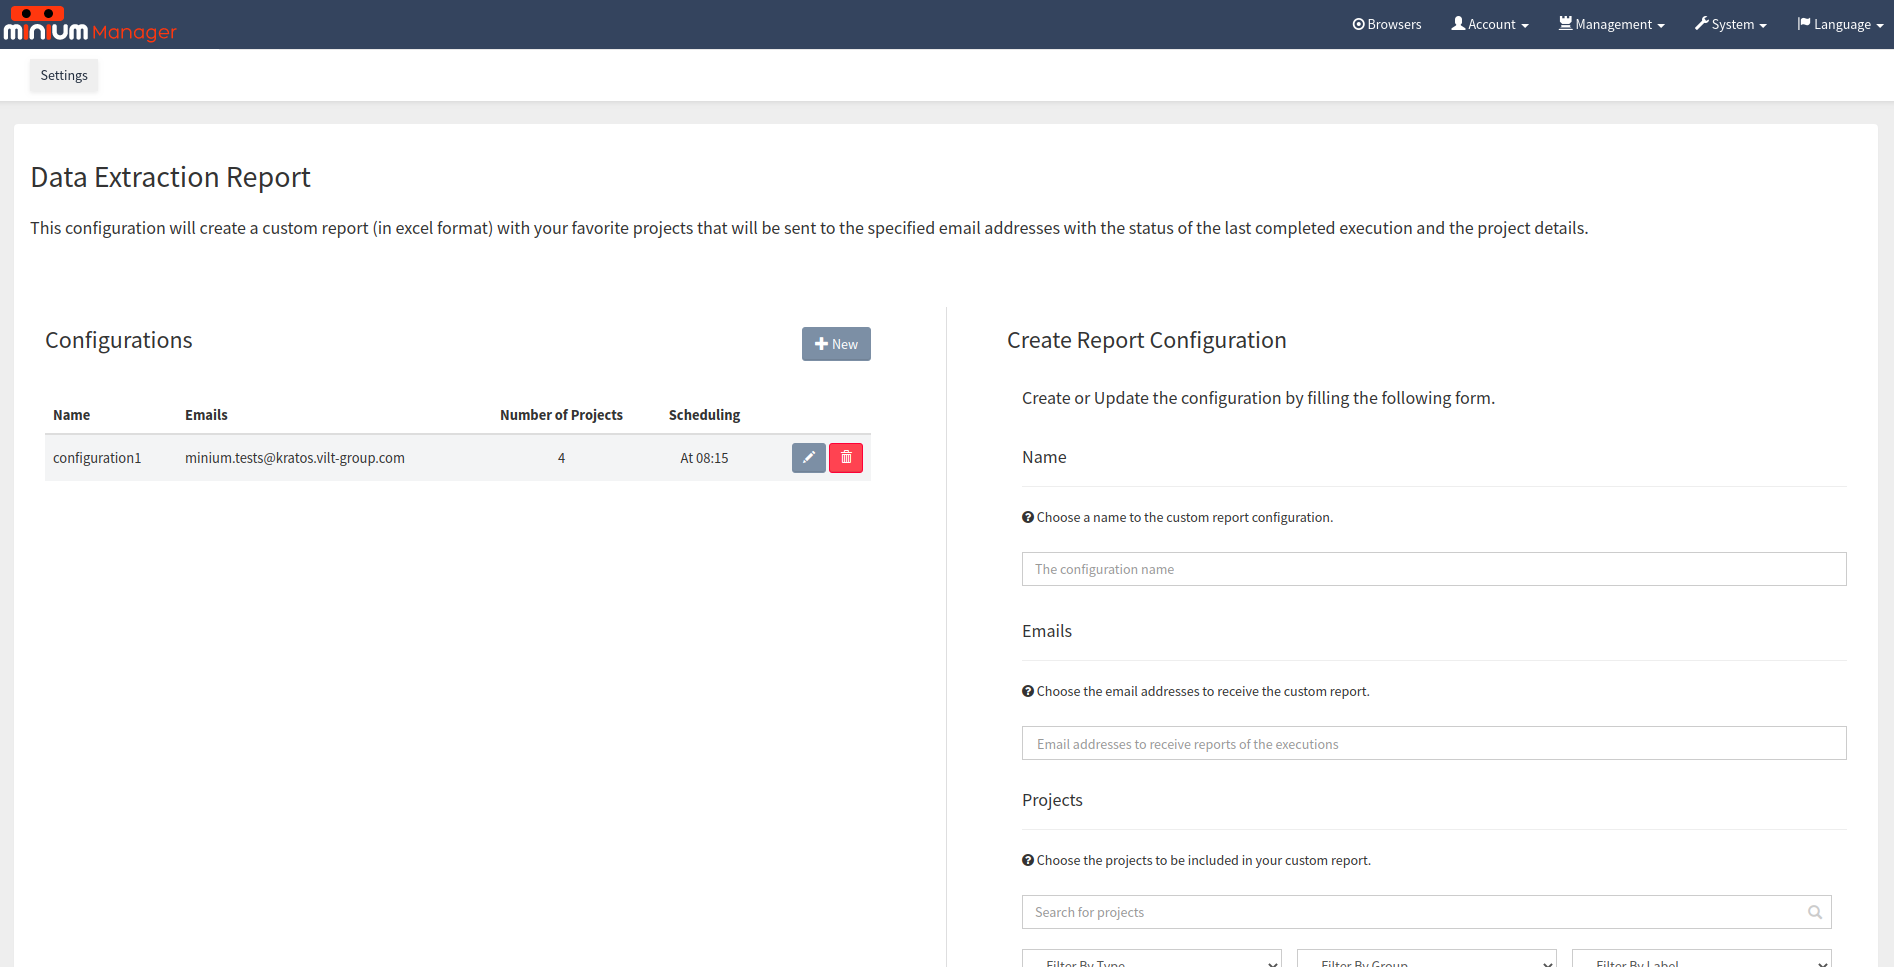
To create a new configuration, fill the form by add a new configuration name (unique value), the emails that will receive the configuration, choose the projects to be included in the report and finally, schedule the time the email will be sent, with the report.
|
Note:
To choose the projects, you have filters available to help. You can filter the project by name, type, group and label. |
To save the configuration, click on the button + Save.
The email received will list a summary of the projects selected (separated by type), the statistics of the monitoring projects (How many executions since last report was sent, how many executions passed and how many executions failed), and will have the report (in Excel format) attached.
|
Note:
The subject of the email received is "Data Extraction Report". |
12.4.1. Crawler Aggregator
The Data extraction report has an option to generate one report with only Cookie Crawler Projects.
To configure Data extraction report with the aggregation of the Cookie Crawler Projects, choose the type Crawler Aggregate:
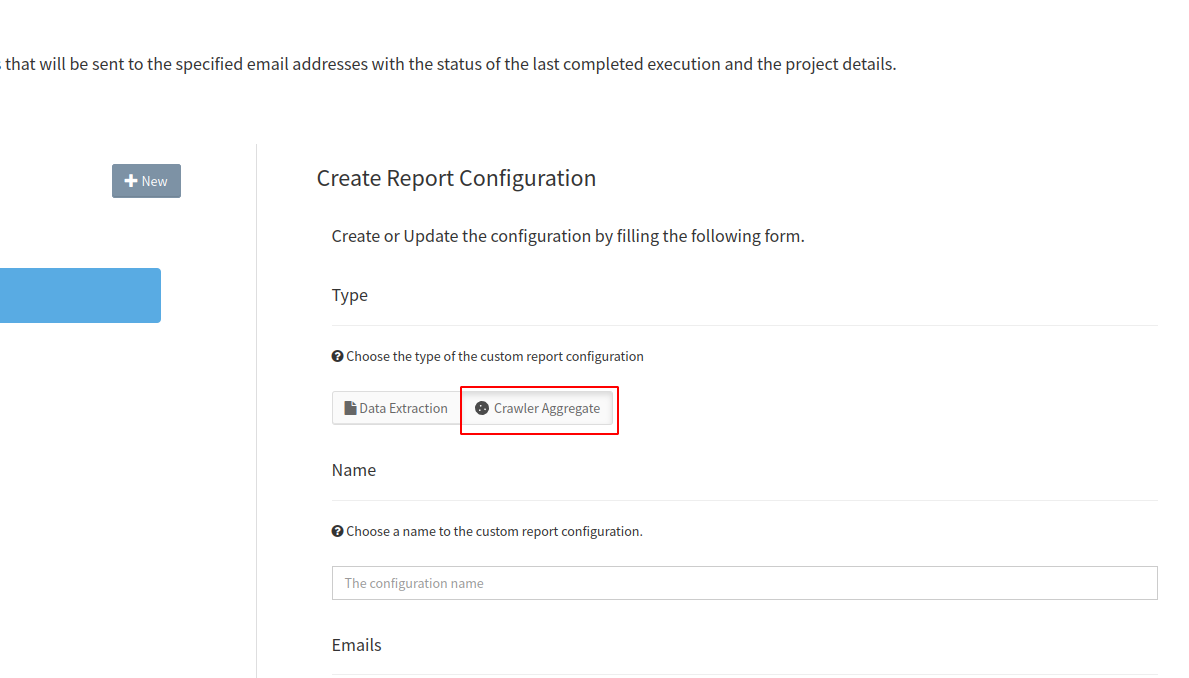
After configure the report as a Data extraction report.
The email received will list a summary of the projects Cookie Crawler selected, and the statistics of the projects (How many executions since last report was sent, how many executions passed and how many executions failed).
12.5. Regressions
Minium Manager identifies the scenarios and features that were passing and in the last execution failed:
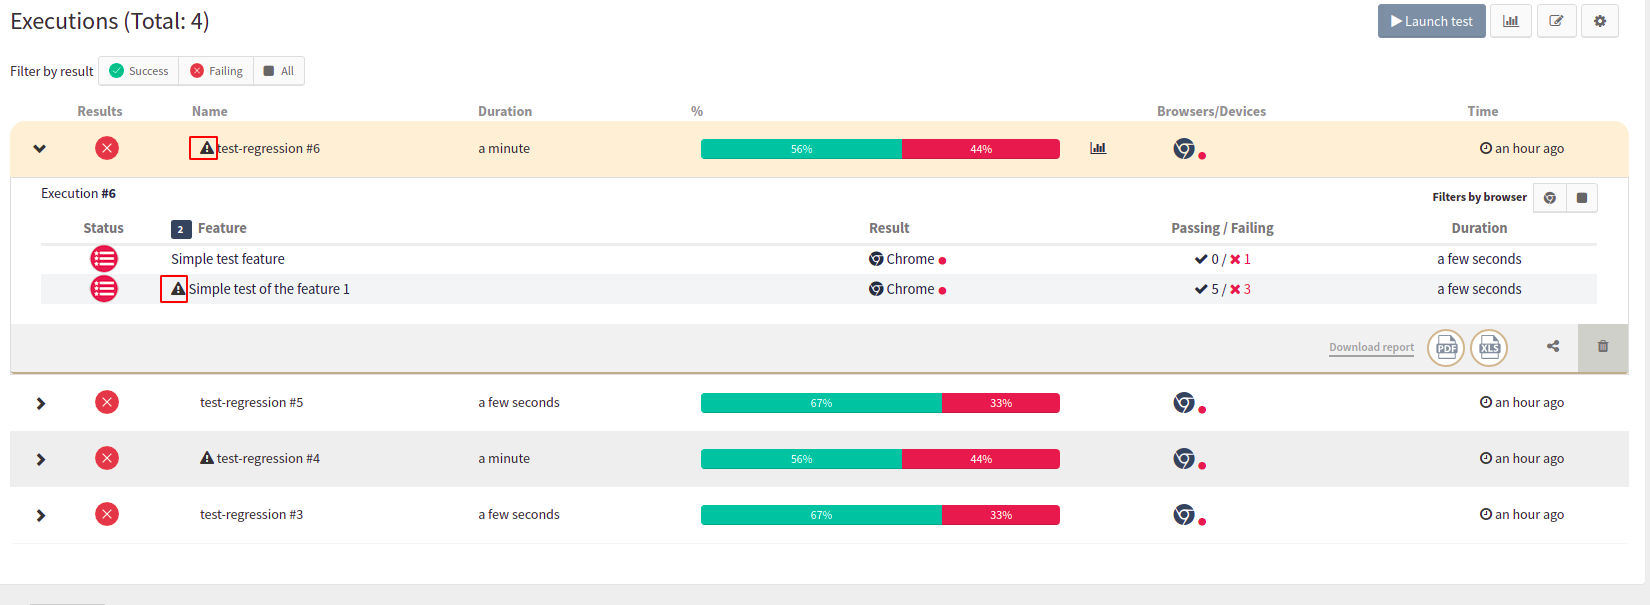
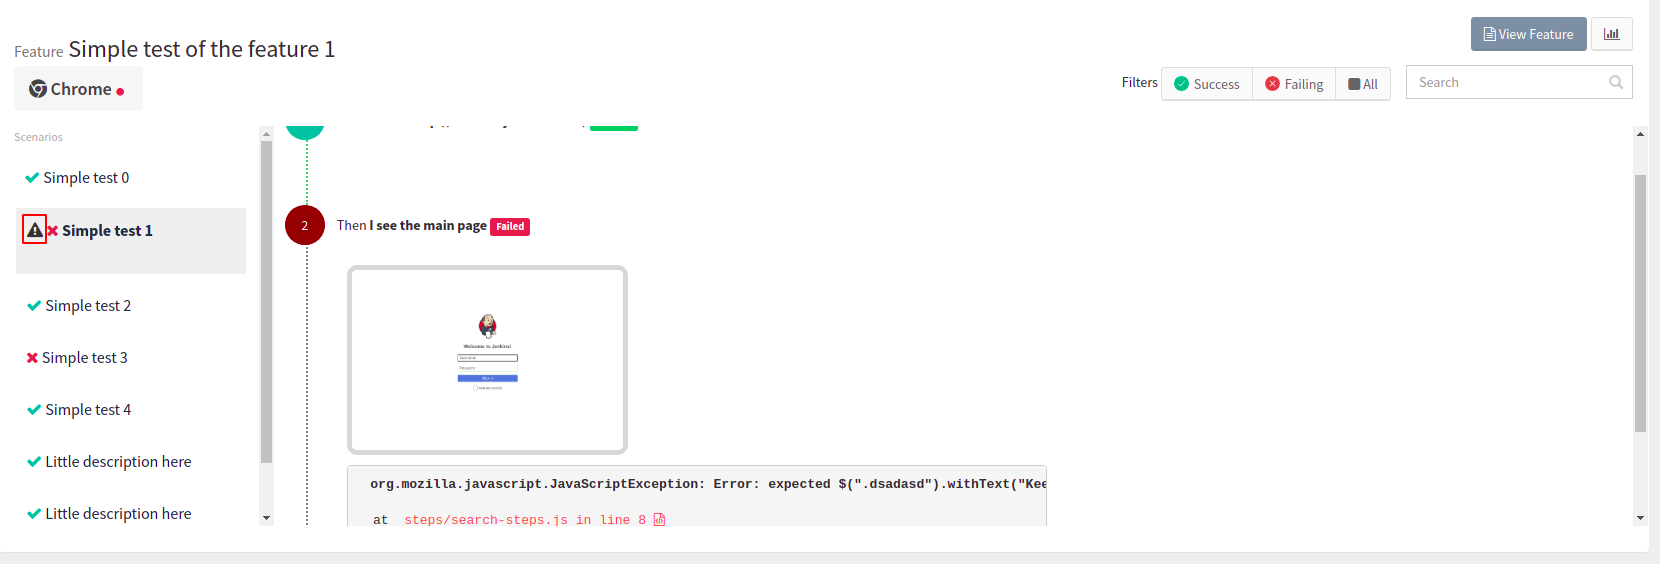
For monitoring projects, the executions page is:
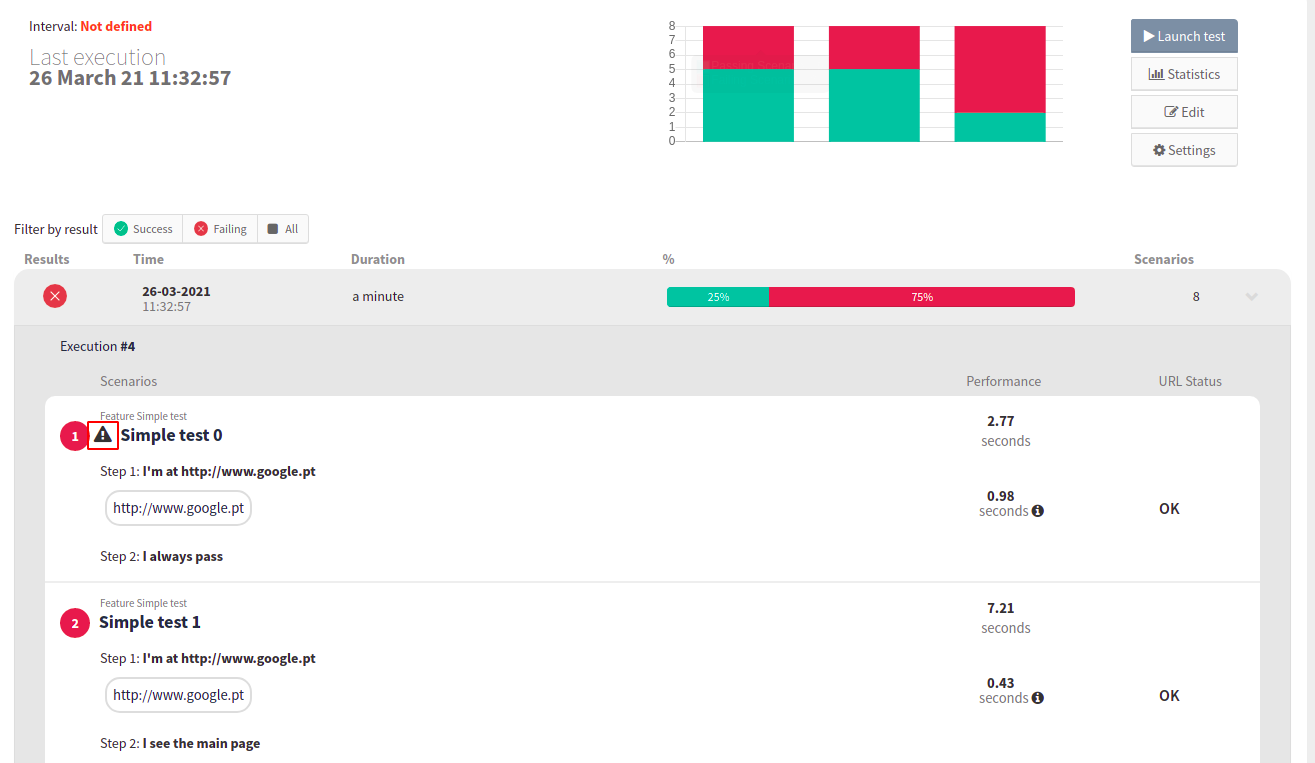
At the mouse over in the warning icon, the regressions’s widget is presented to show more information about the past executions, the last execution passed, and the last execution failed for the regression:
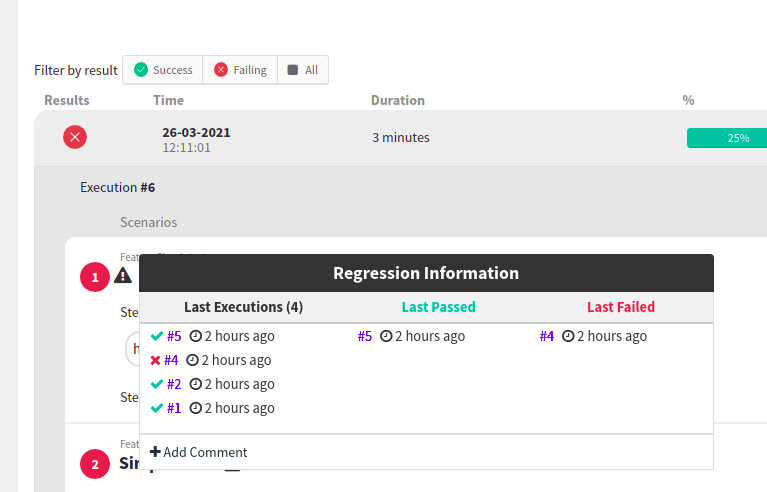
The regression widget also allow adding comments at the regression detected. To add a comment, click ad + Add Comment and fill textarea and click Save:
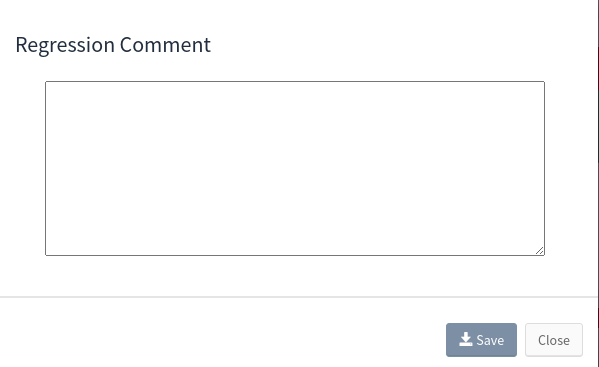
After, we can check the comments added in the previous executions by clicking on the comment’s icon:
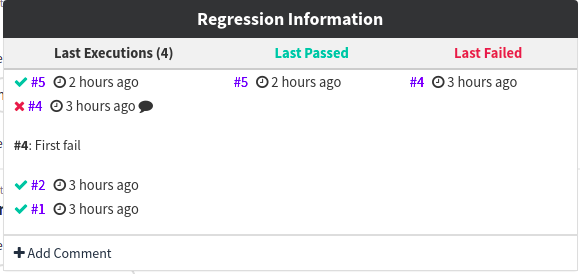
We can also edit the comment by clicking on Edit Comment:
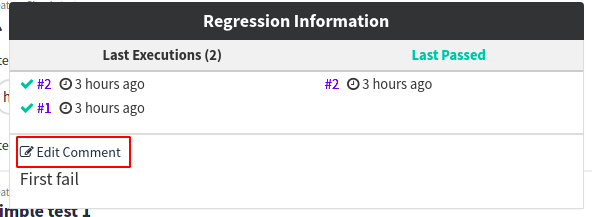
Edit the text and click Save.
To delete the comment click `Delete.
13. Roles
Roles allow granting different privileges to the users and the groups. The privileges associated with each role are described in the table below:
| User | Manager | Administrator | |
|---|---|---|---|
View projects |
|||
Launch test executions |
|||
Configure projects |
|||
Create projects |
|||
Manage project labels |
|||
Manage users |
|||
Manage roles |
13.1. Assign roles
To change the role of a user or group, navigate to Management > Roles at the navigation bar and:
-
Introduce the name of the user or group in the search bar.
-
Select a role.
-
Click on
Savebutton.
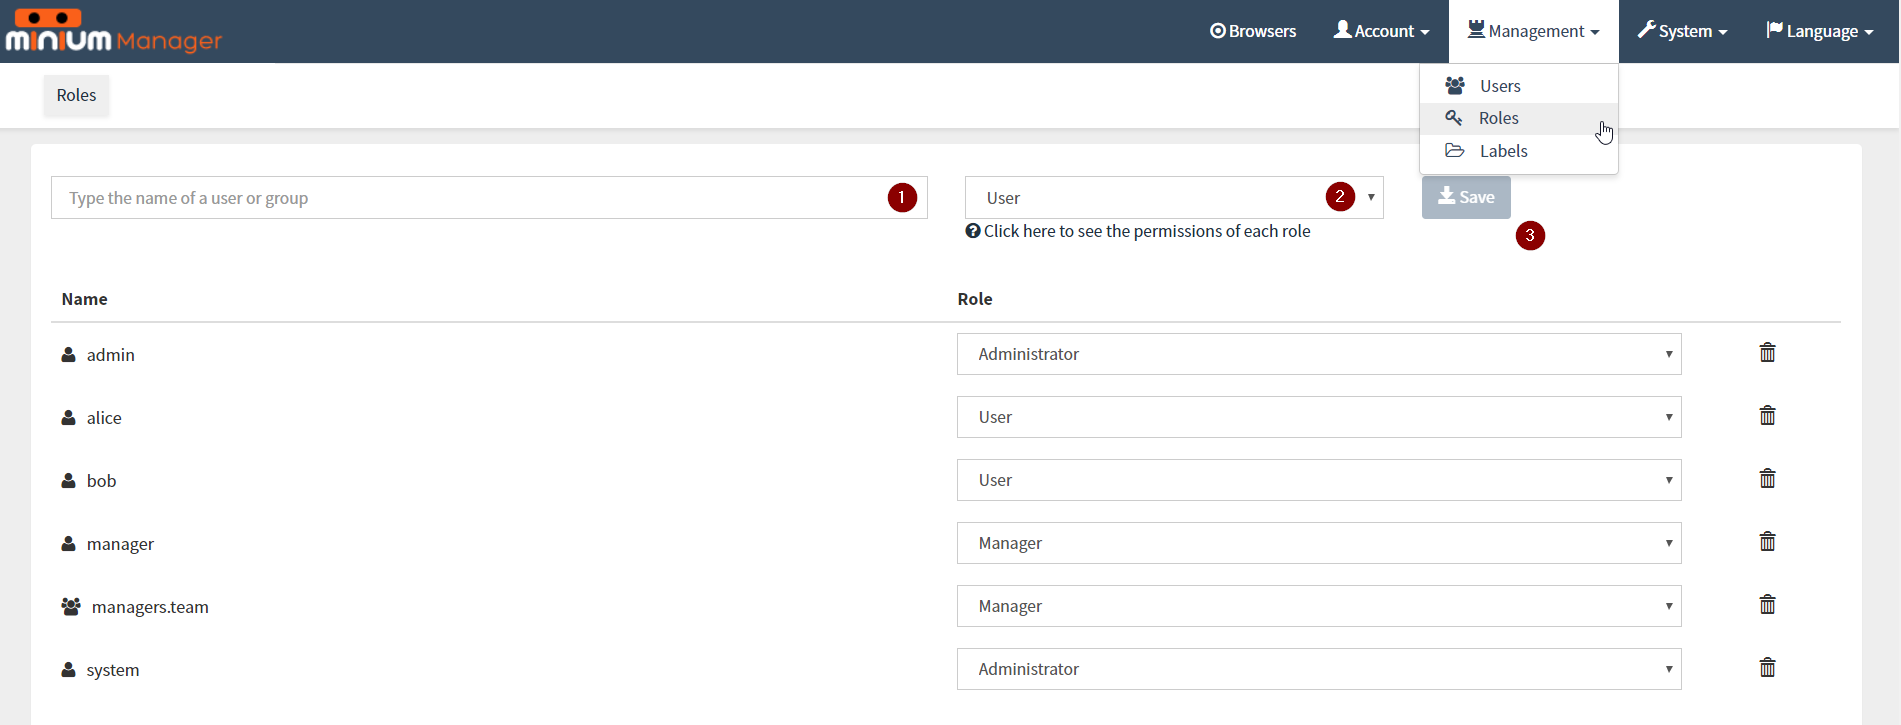
14. License information
At the top right of the project list page exists the license information label, that gives the number of executed scenarios in this month, and the total of scenarios per month that to the current license
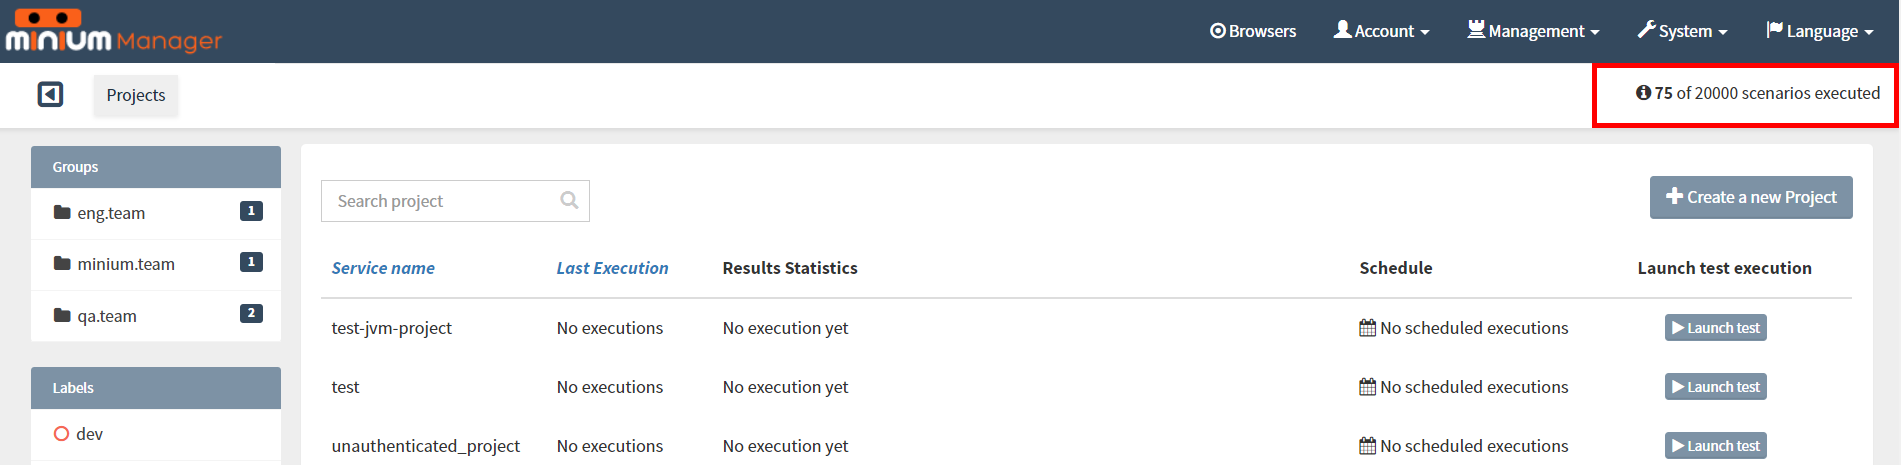
By clicking on the license information label, it will open a modal with more detailed information about one license.
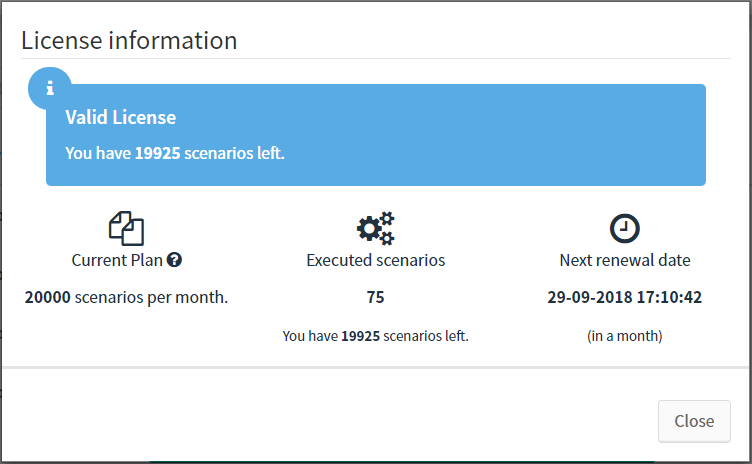
15. Minium Recorder User Guide
Minium Recorder has been developed to ease and accelerate the creation of Minium tests. With the Minium Recorder, is no longer needed to write all the code for the step definitions by hand. Simply tell to the Minium Recorder to start recording the interactions with the browser, perform the actions that correspond to the defined step and an automation script is immediately available in Minium Developer.
But what really makes Minium Recorder different in relation to other automation script recorders is that, for each element that interacts, Minium Recorder will not generate just one CSS selector. Instead, is possible choose among a list of alternative expressions for each element that take advantage of the great Minium filtering methods that are used like for example withLabel, below, rightOf, etc, to build more readable and resilient expressions.
15.1. Configure Minium Developer
Minium Recorder is already configured at Minium Developer Prime, but you can configure an existing Minium Recorder.
To configure Minium Developer with the Minium Recorder extension, first you need to download the Minium Recorder extension.
Navigate to the folder where Minium Developer is installed, create a folder named "extensions", copy the Minium Recorder extension file to the new folder and rename the file to "minium-recorder.crx".
After, edit the config/application-{windows,linux,macos}.yml file in order to add the following configuration (at the chrome webdriver):
minium:
  developer:
    webdrivers:
      - name: chrome
        ...
        chromeOptions:
          extensions:
            - ${app.home:.}/extensions/minium-recorder.crx
          preferences:
            devtools:
              preferences:
                panel-tabOrder: "{\"chrome-extension://ggefeclafoeoejognlebilidgmgdglogMiniumRecorder\":10,\"elements\":20,\"console\":30,\"sources\":40,\"network\":50,\"timeline\":60,\"heap_profiler\":70,\"resources\":80,\"security\":90,\"audits\":100}"
15.2. Launch Minium Recorder
Launch Minium Recorder through Minium Developer.
Open Minium Developer and add the following command to the editor:
browser.get("http://www.google.com/ncr")This will load the google search engine website, when the instance of Chrome is launched.
To launch Minium Recorder, use the (Ctrl + Enter) shortcut or select Run > Launch Browser (1) and (2) at the top-right menu:
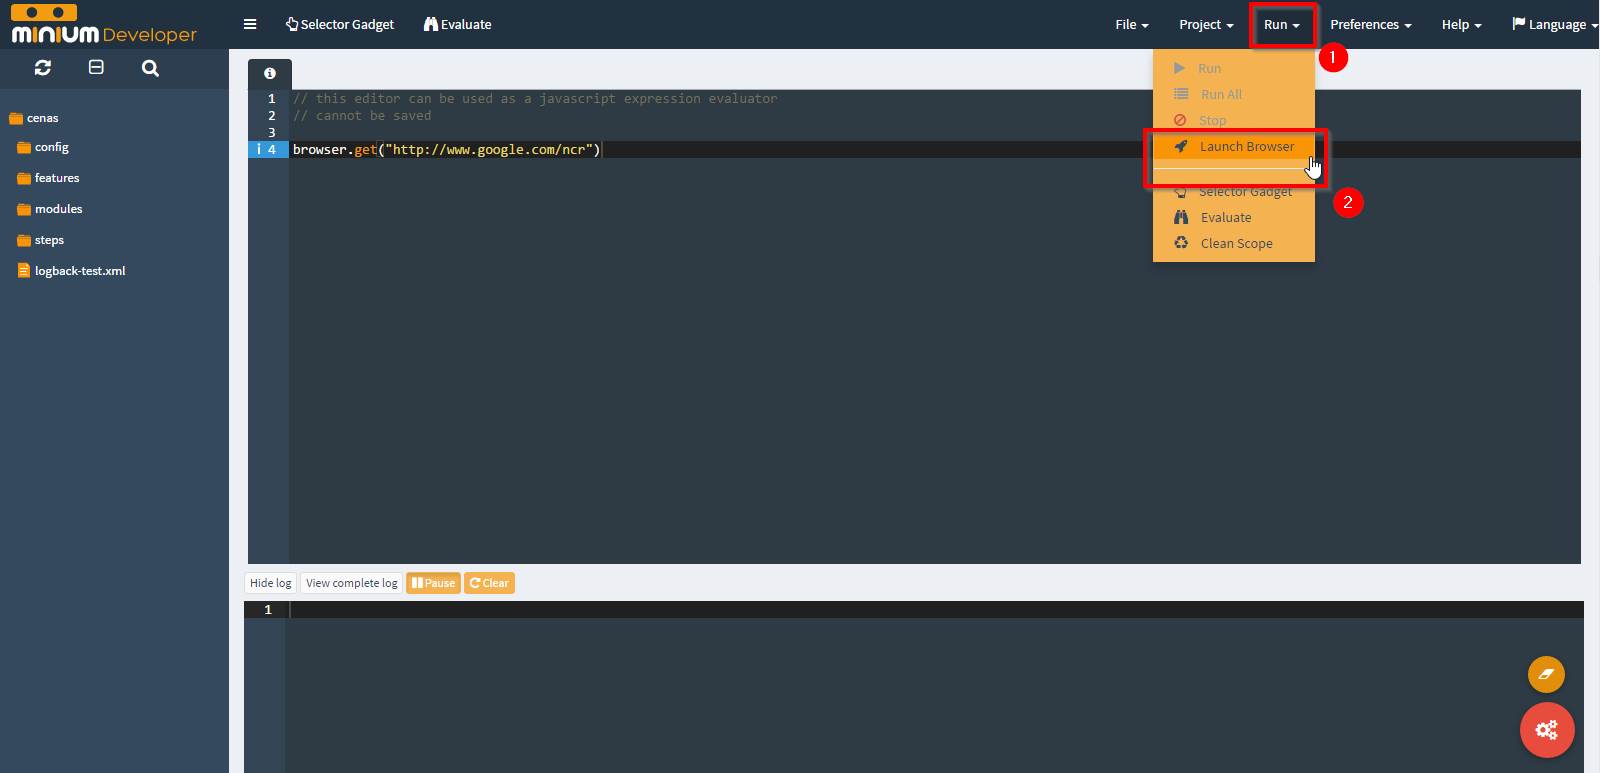
Select the Chrome browser (1), check if Minium Recorder is available (2) and click Created a new WebDriver (3):
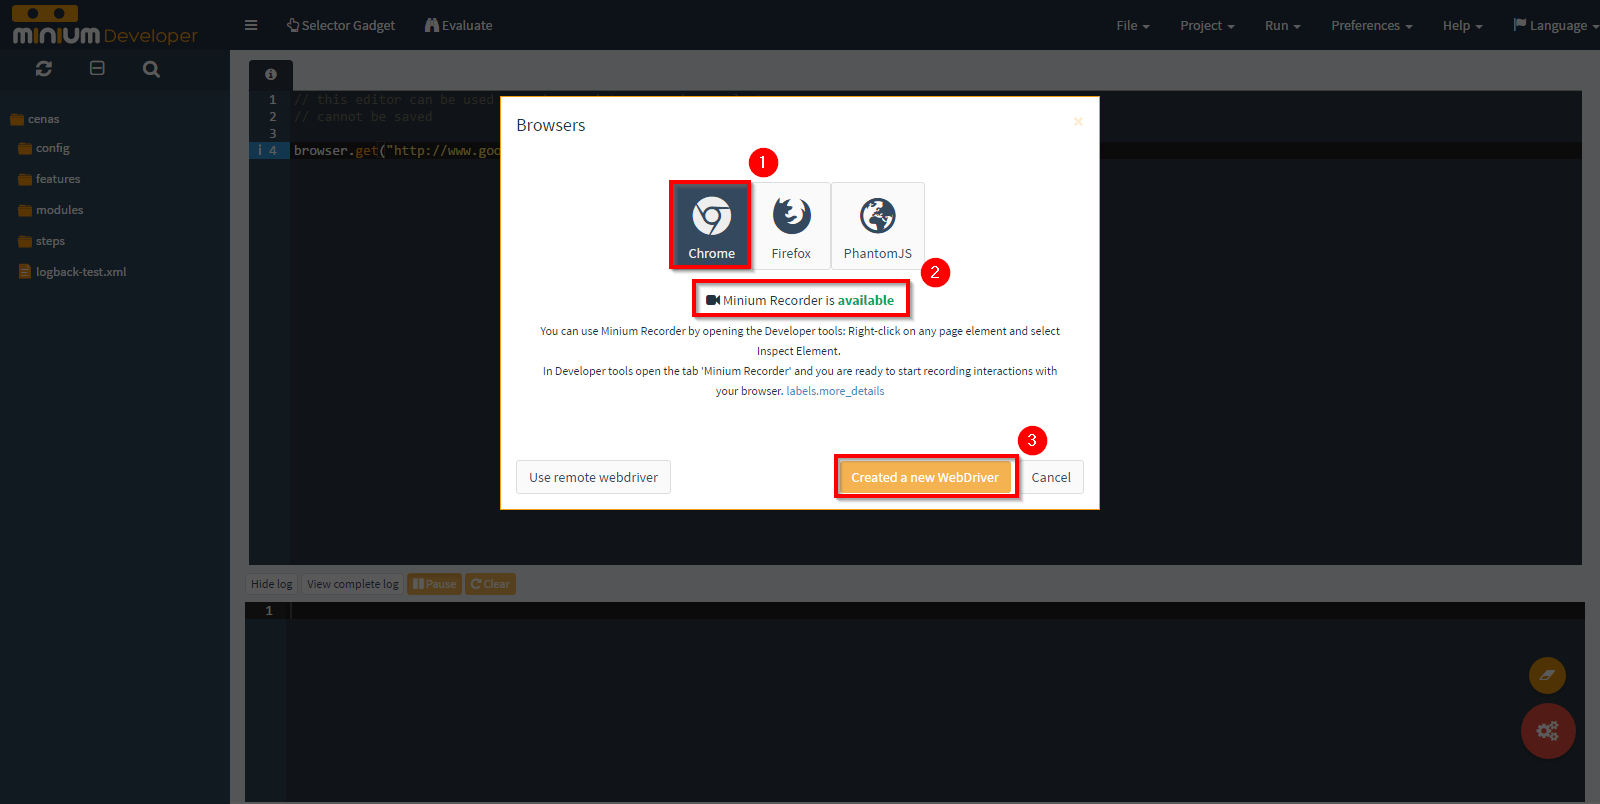
A new instance of Chrome will be launched with the Minium Recorder extension installed. In the instance of Chrome, open the Developer tools by using the (F12) shortcut (use another shortcut) or select More Tools > Developer tools.
After the Developer tools of the instance Chrome is opened, select the Minium Recorder tab (1):
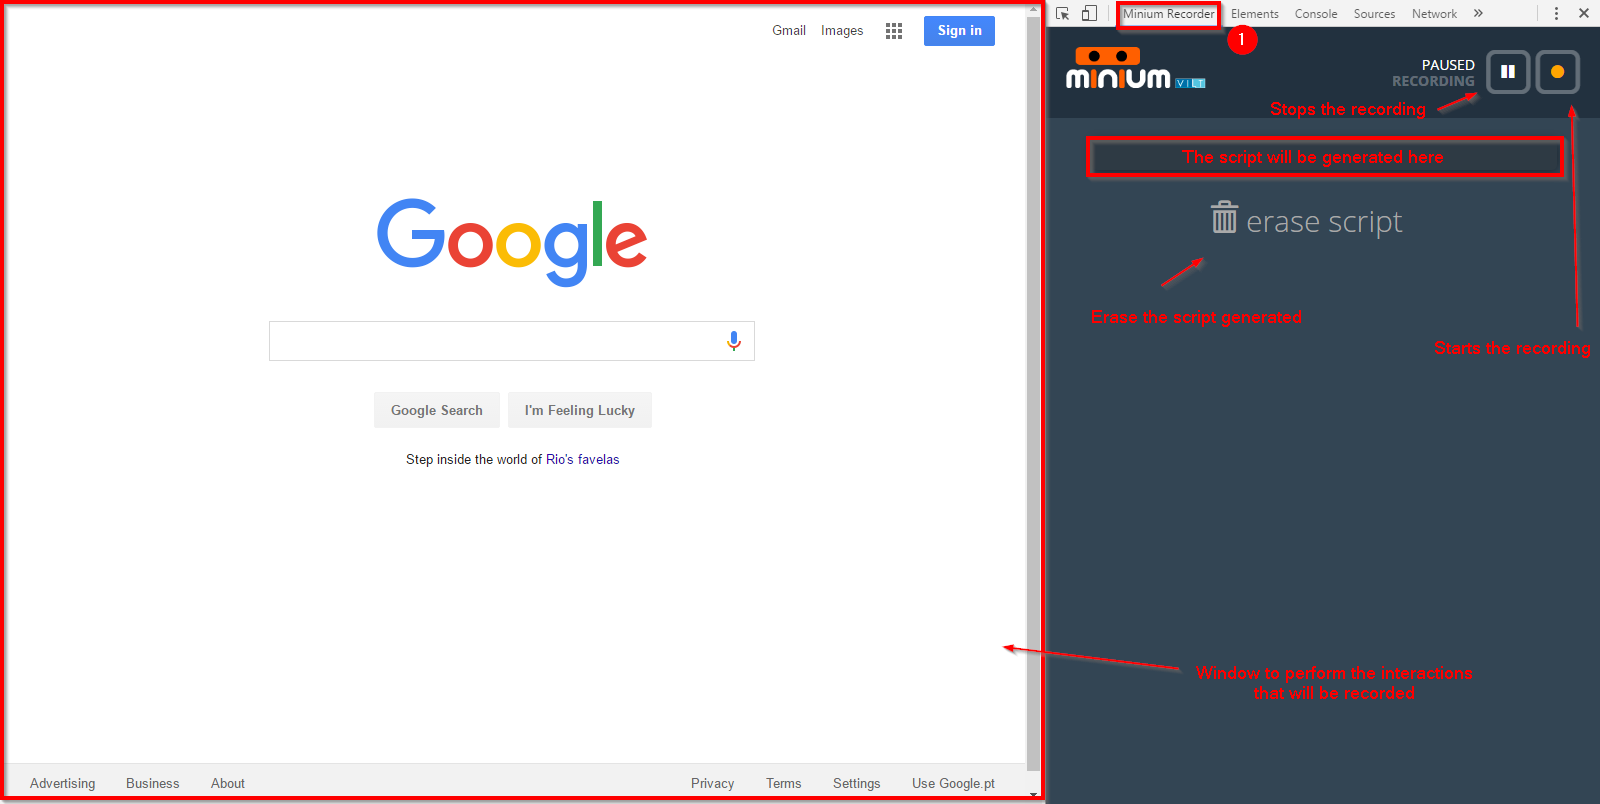
15.3. Start recording
To start recording, click on the following button:
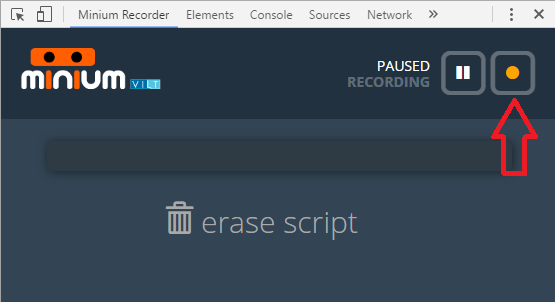
From now on, every interaction performed with the browser will be recorded.
15.4. Record interactions
For every action performed on the browser, like clicking on an element or filling a text input field, Minium Recorder will automatically generate the corresponding code. If typed an URL in the address bar, Minium Recorder will also generate the code to load that URL.
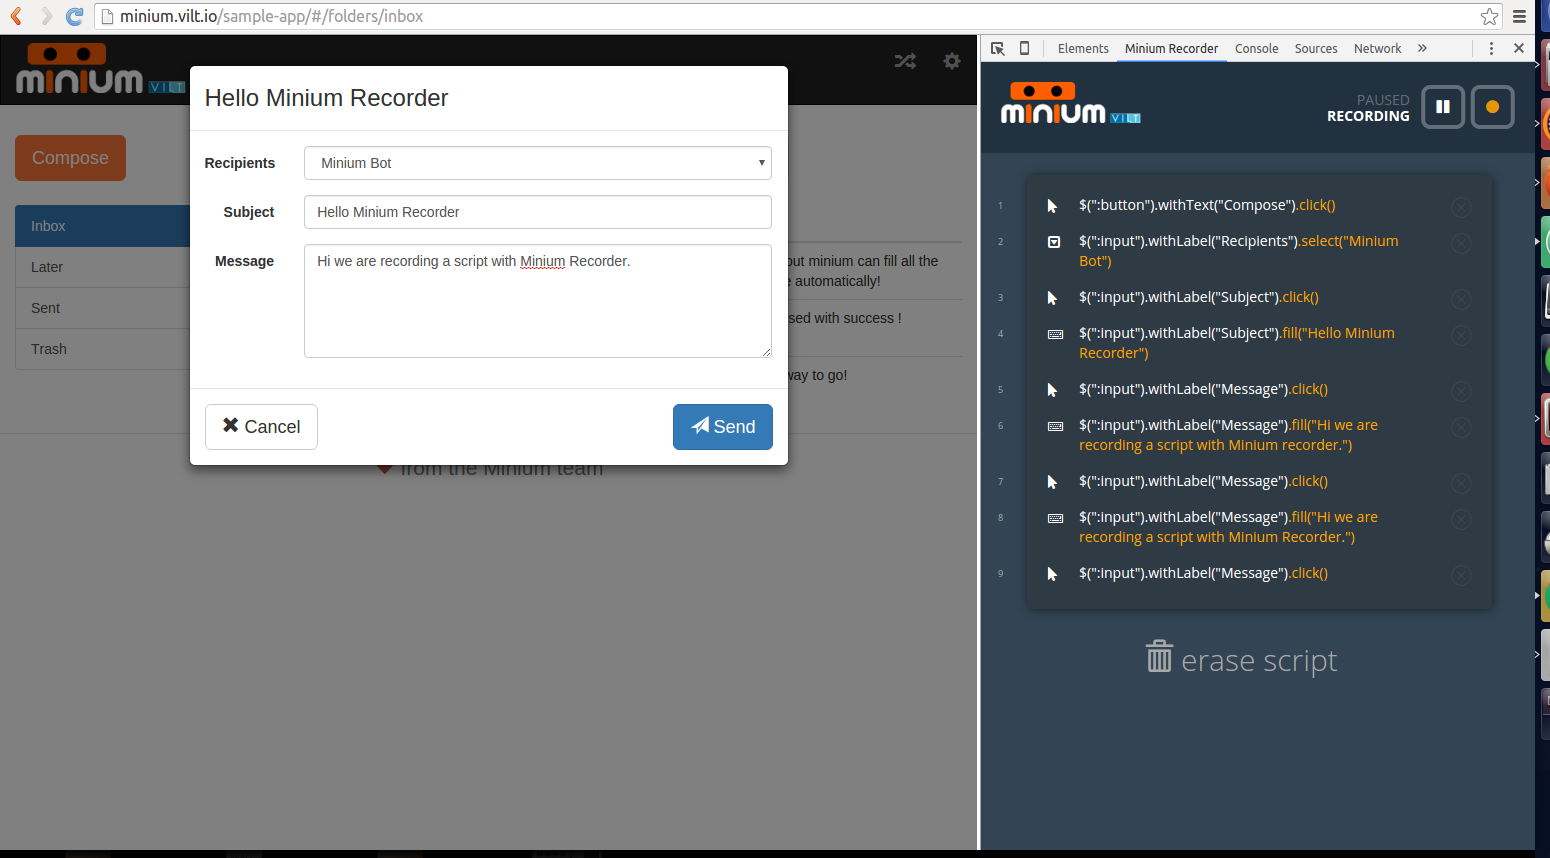
To try other expressions, click on the expression and a list of alternative expressions will be displayed:
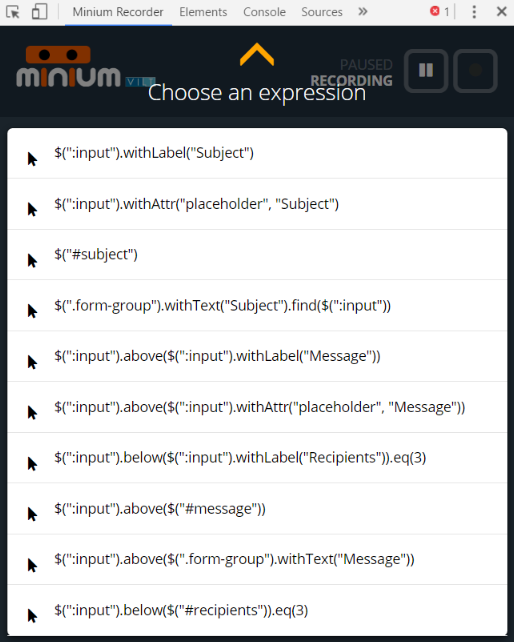
To select an expression, just click on it.
15.5. Stop recording
Click on the pause button to stop a recording.
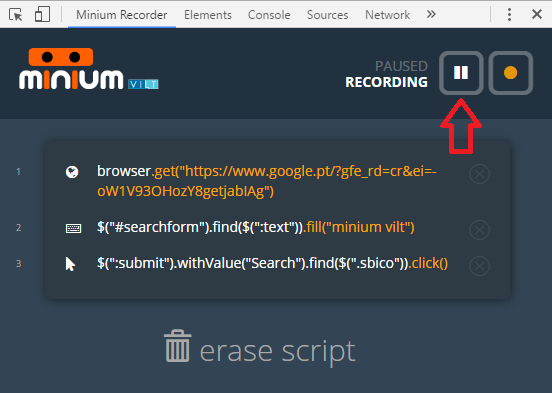
15.6. Import the recorded script in Minium Developer
To import a script in Minium Developer, right-click on the editor area, where is intended to put the script, and choose the option Import recorded script: